Overview
This document will cover the basic concepts and give examples of how to build a graph extension. It mainly focuses on:
how to build a simple graph model which manages the data for the graph
how to create a custom graph delegate which controls the look of the graph
how to create a graph example based on our generic base widget of GraphEditorCoreWidget.
Example
omni.kit.graph.editor.example is an extension we built up as an example for developers to start their journey on building up their own graph extension.
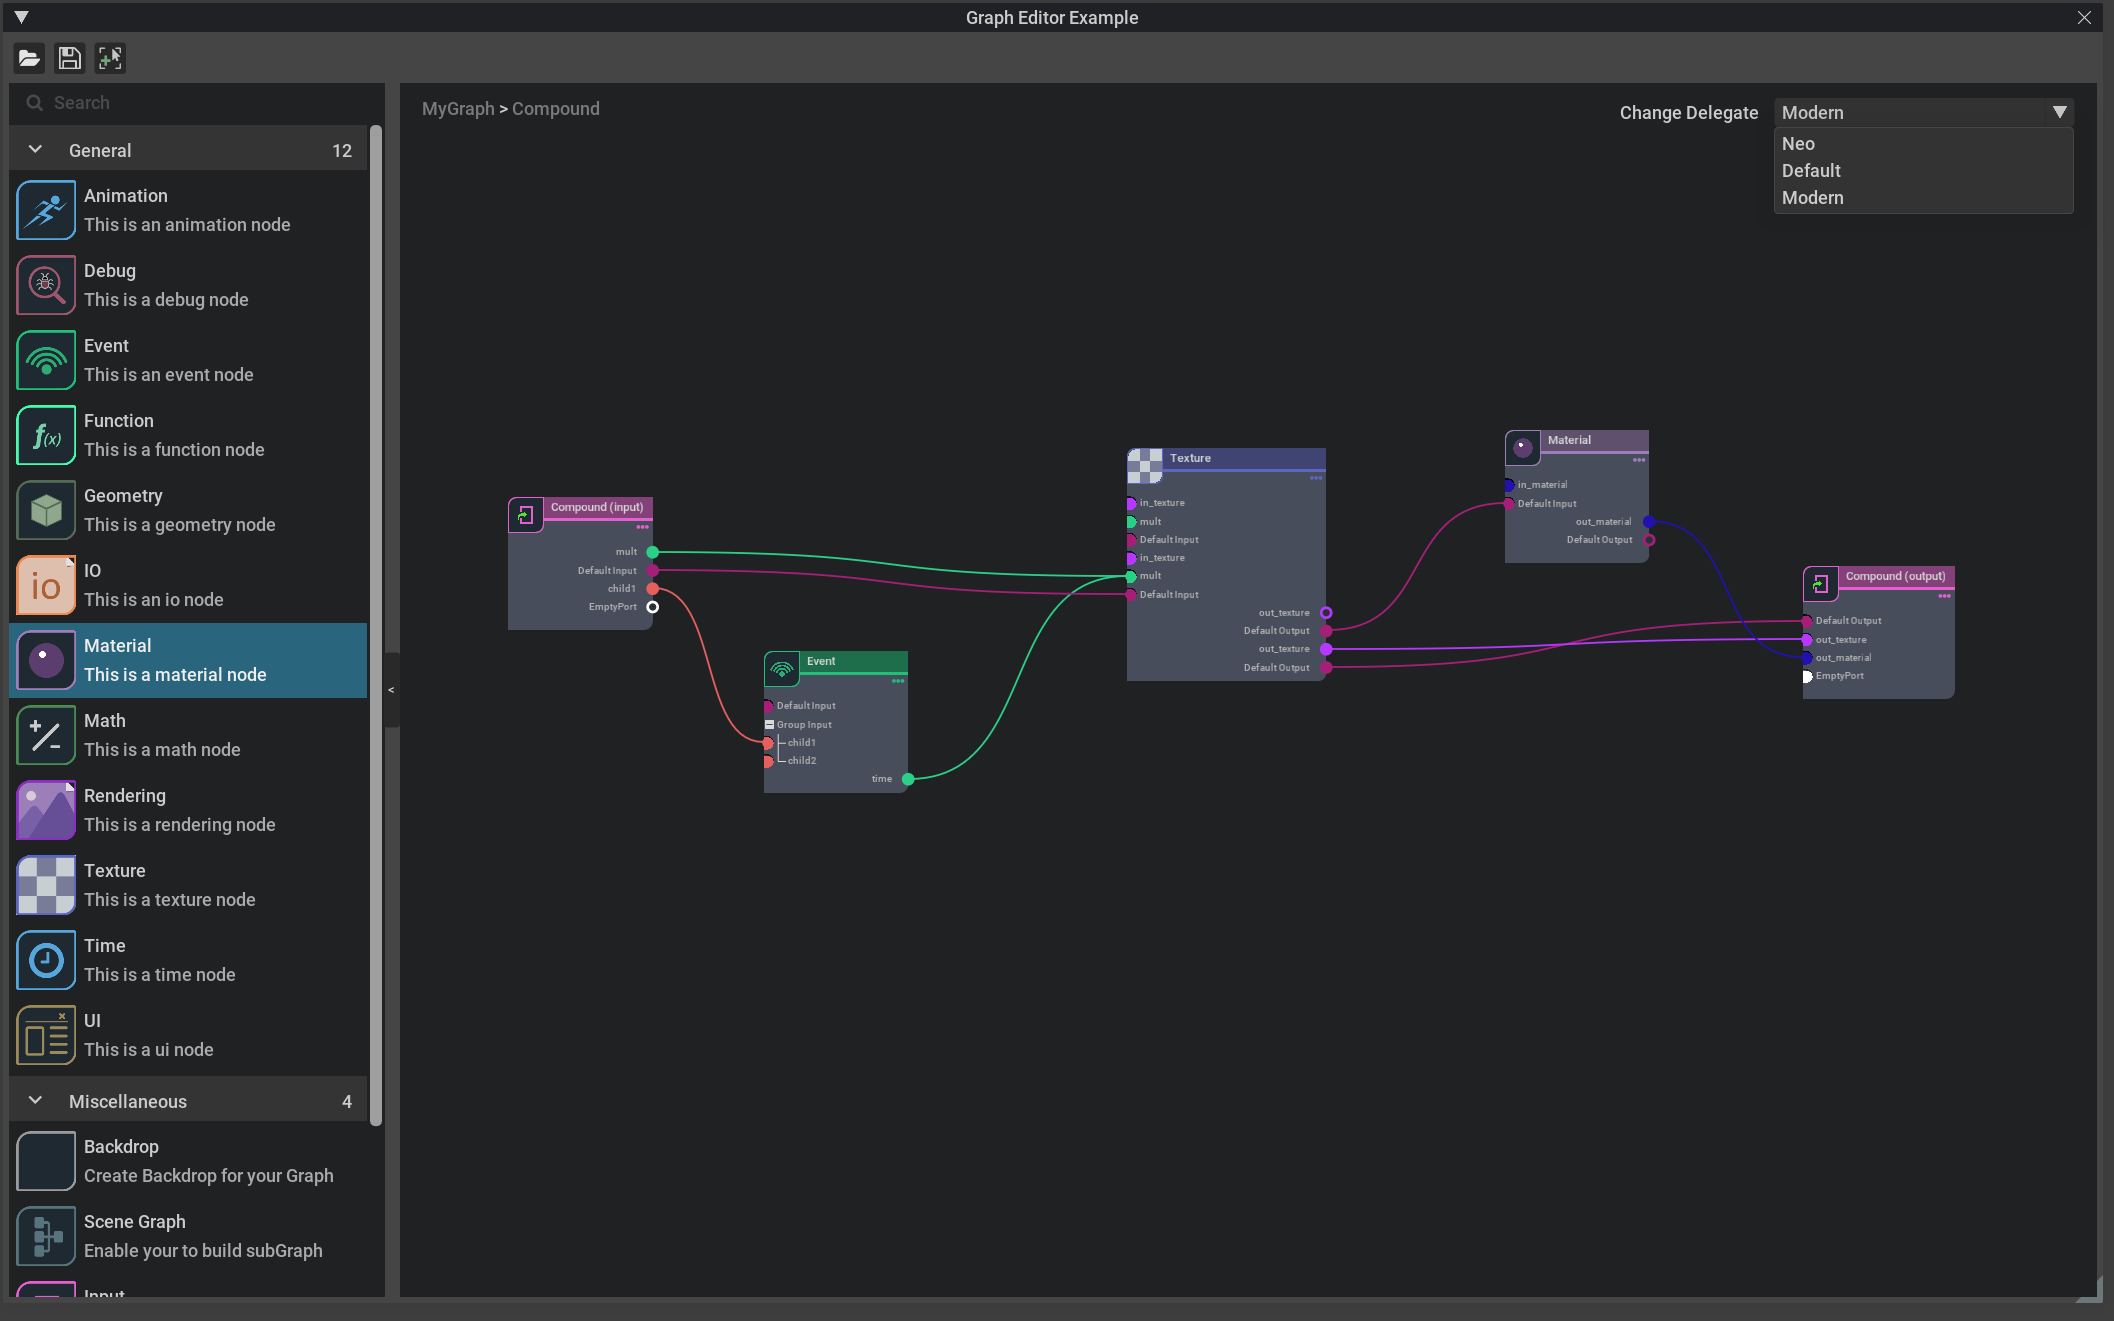
To have a preview of how the graph looks and how it works, you can find the extension omni.kit.graph.editor.example and enable it in your app (e.g. Code, enabled by default)

There is a start panel on the right hand graph editor where you can start to Open or Create your graph. You can drag and drop nodes from the left catalog widget, which contains a list of available nodes, to the graph editor area. There is also a simple toolbar on the top where you can open or save, or go back to the start frame. Once you start editing the graph, there will be a dropdown widget where you can switch between different delegate styles for your graph.
In summary, the simple example demonstrates:
save and import graph
node creation and deletion
ports connection and disconnection
switch between different graph delegates with the same graph model
Use backdrop and subgraph nodes to organize the graph visually and hierarchically
Make your own extension
You are welcome to fork the code as your extension start point and build your own from there.
This example is not USD based to simplify the demonstration of the graph model. It is using json for serialization. All the Nodes and Ports and their properties are string based. If you are looking for a Usd-based graph extension example, please refer to omni.kit.window.material_graph, which has more complications, however.