Developing on Nvidia Omniverse - How to Build an App
What Is an App?
Ultimately, an Omniverse Kit app is a .kit file. It is a single file extension. You can think of it as the tip of a dependencies graph, or a final extension that pulls in the other extensions defined in the file. The Kit executable (e.g. Kit.exe) is the engine that runs the app based on the configuration defined in the Kit file.
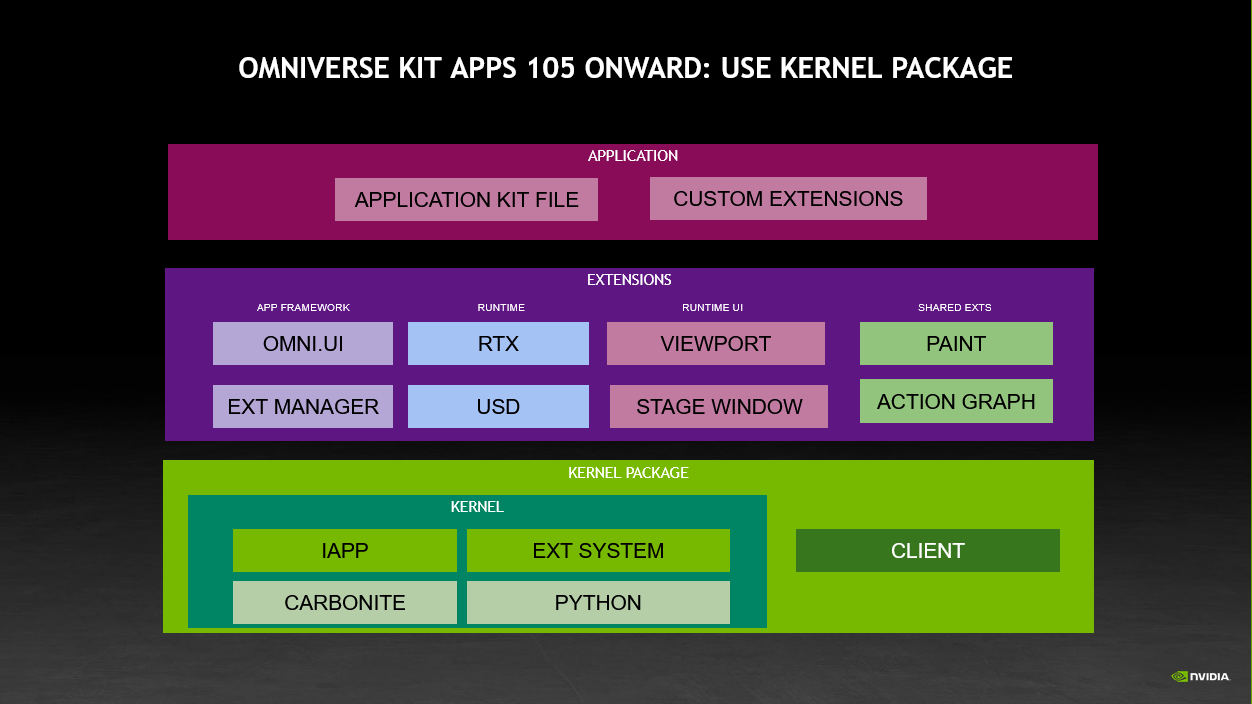
Applications built with the Kit SDK can have a user interface (UI) that is fully written using the UI engine, which enables it to be fully customized, or the application can be run headless as a microservice.
Overview
At the end of this tutorial, you will have all the necessary knowledge and practice to create your own App. The core concepts involved include:
What is a Kit file? How to create a Kit file?
Adding Extensions to the Application
Extension Dependencies
Defining the Layout of your application
Styling
Packing and Distribution
Prerequisites
You will be most successful in this tutorial if you meet the following prerequisites, but they are not a hard requirement for success.
Have created an extension for Omniverse
https://docs.omniverse.nvidia.com/kit/docs/kit-manual/latest/guide/extensions_basic.html
Know how to use GitHub
Have some Python Development skills
Comfortable with using commands in terminal
Step 1: Setup
Step 1.1: Install VSCode
Download Visual Studio Code and Perform the Standard Installation
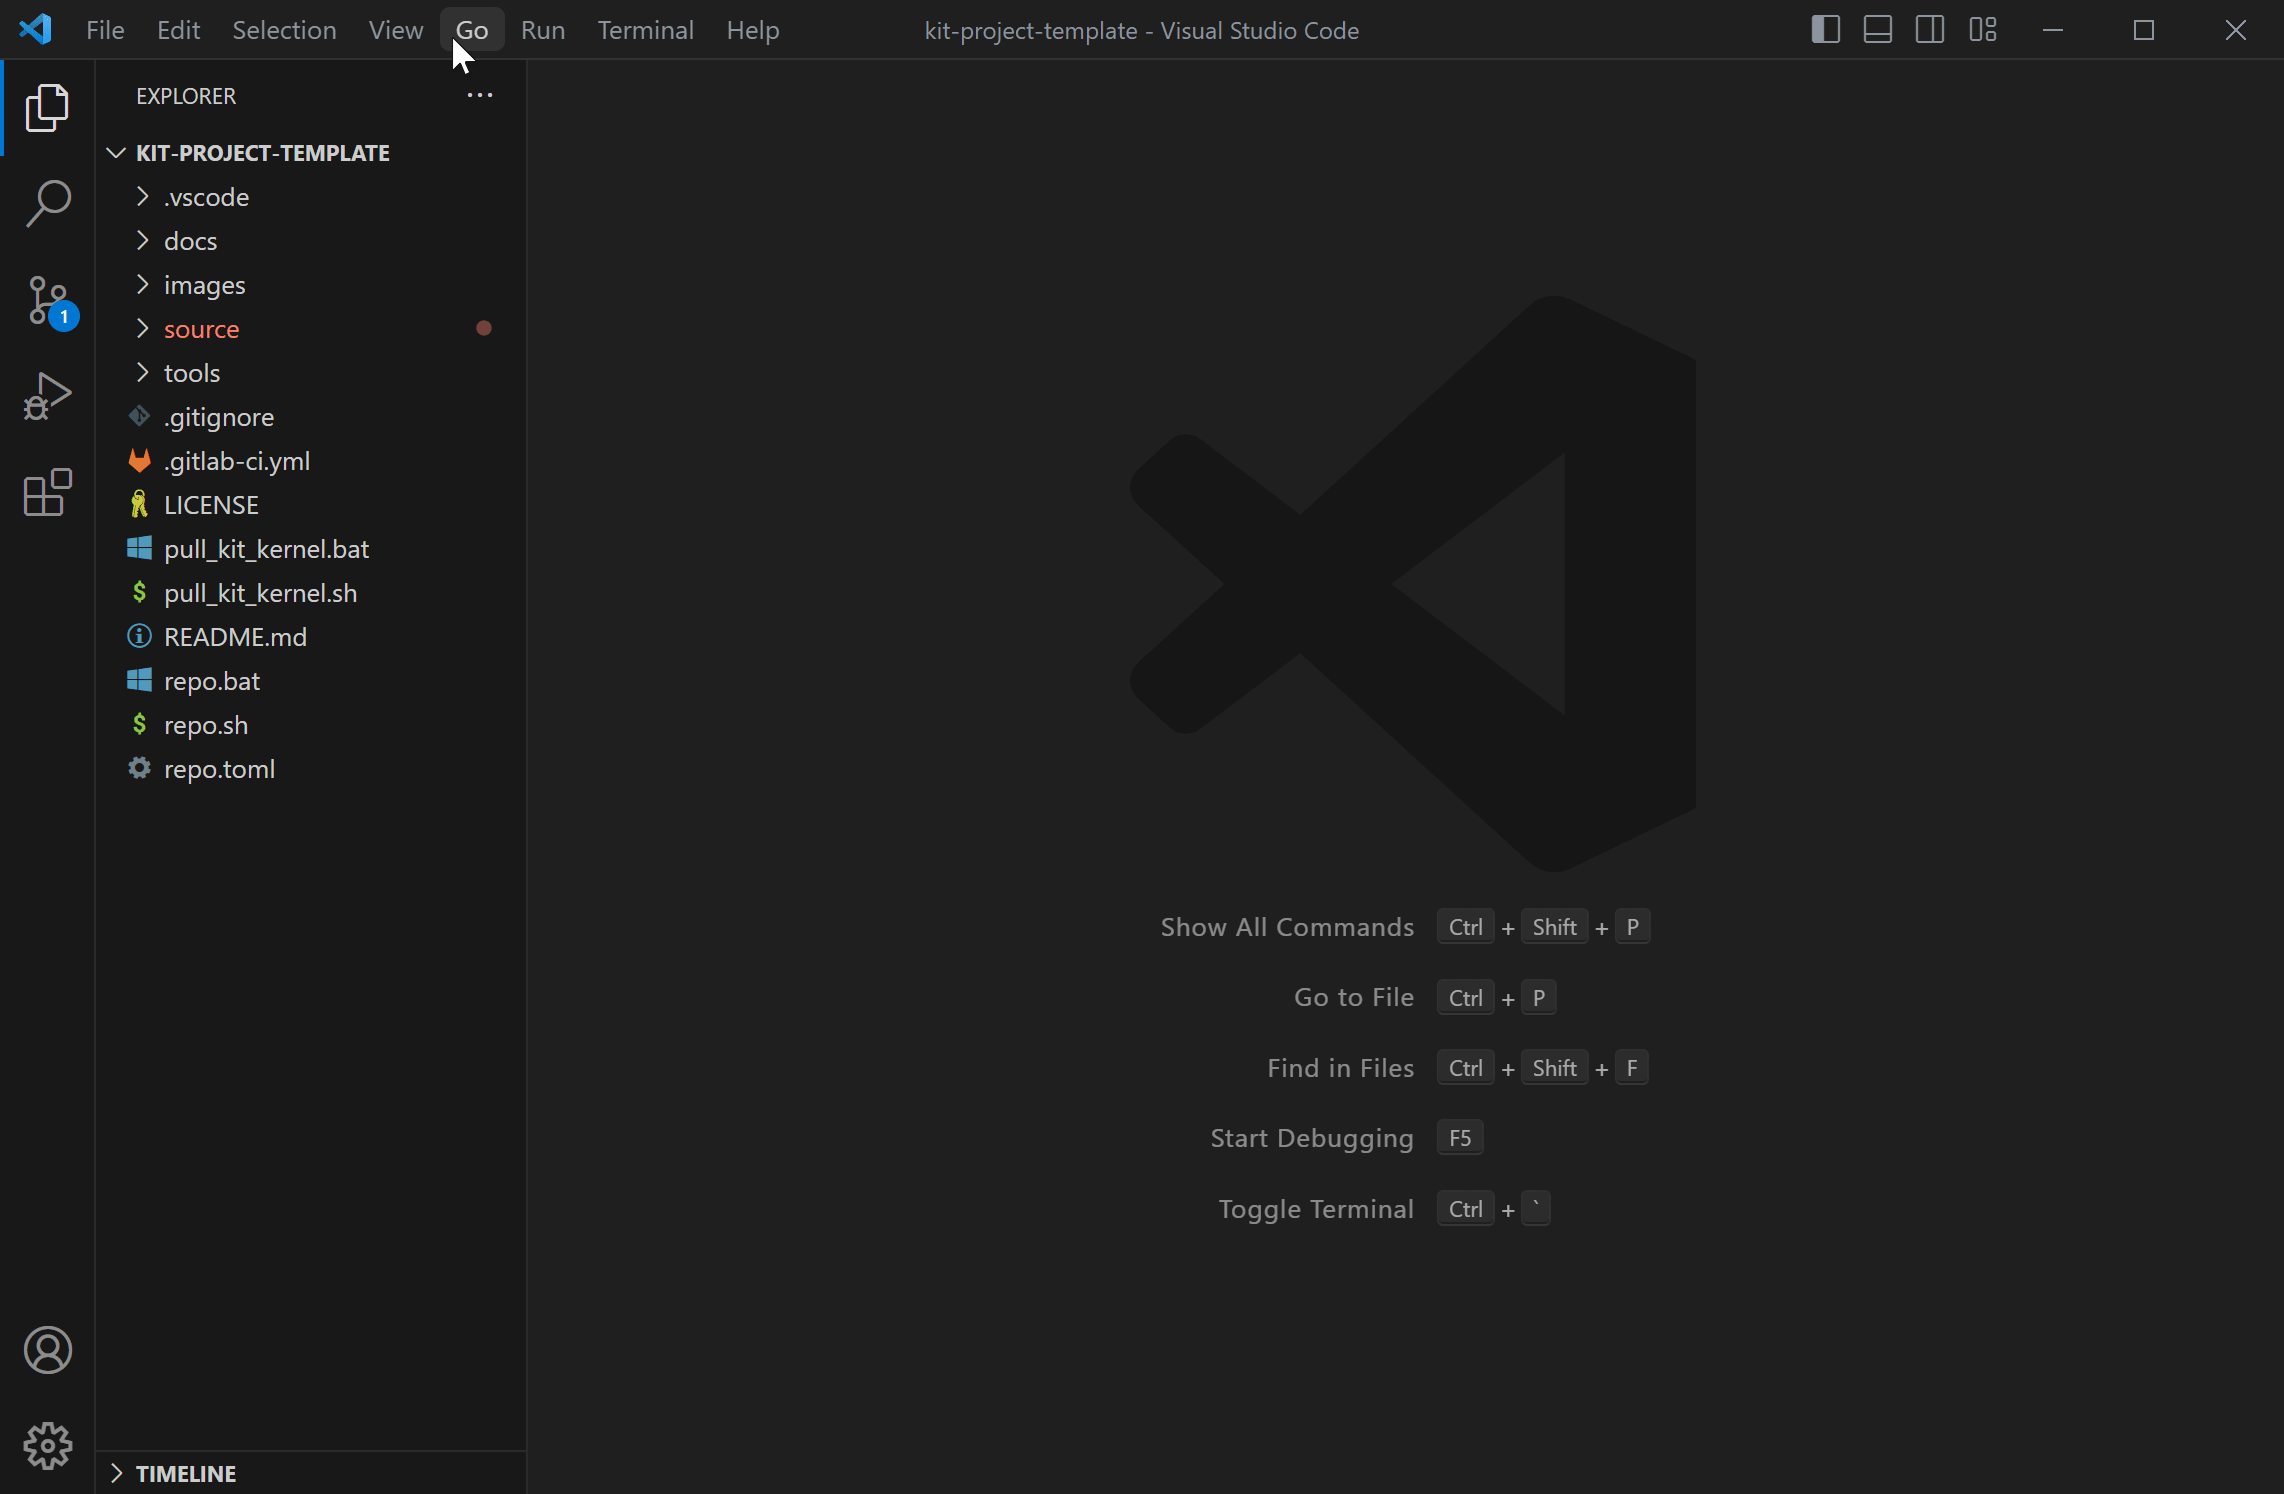
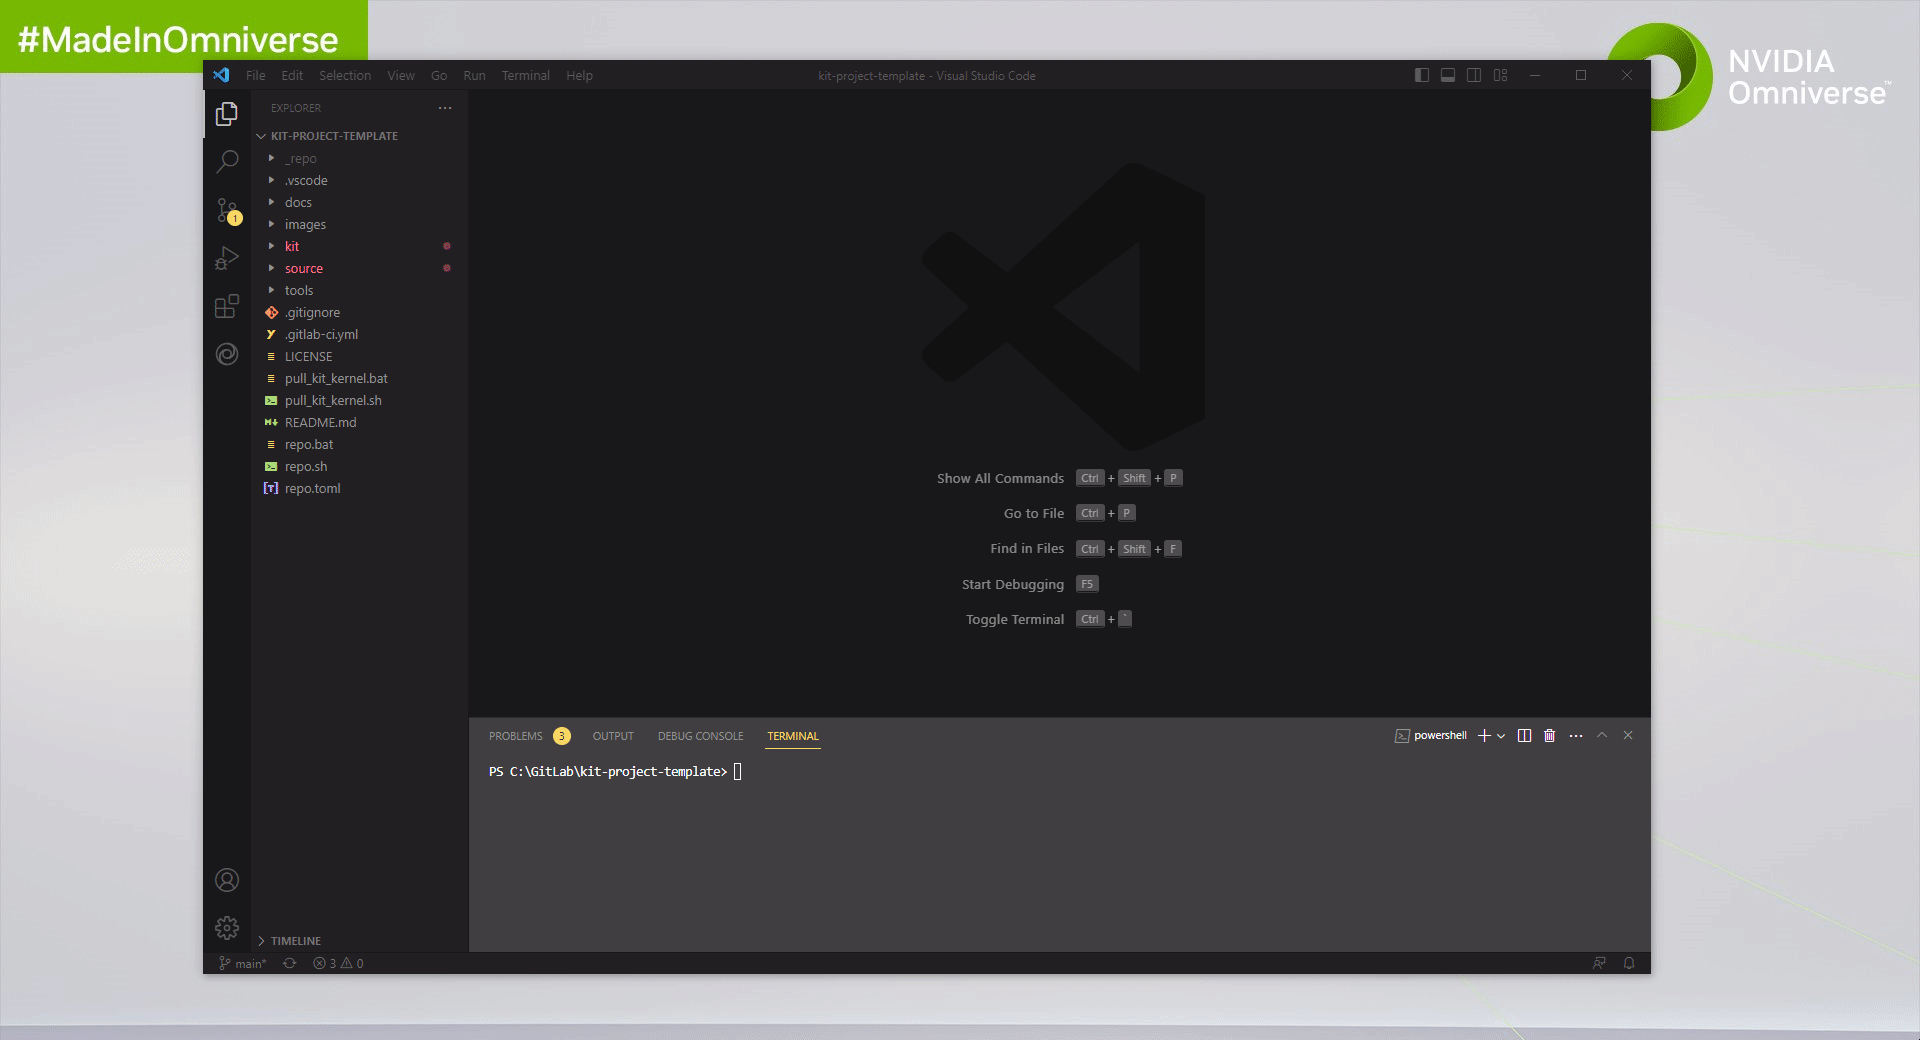
Step 2: Clone the Repo
Open VSCode
Open the command palette using
Ctrl + Shift + PIn the palette prompt enter
gitclthen selectGit: Clone commandPaste
https://github.com/NVIDIA-Omniverse/kit-project-templateinto the repository URL then selectClone from URLSelect (or create) the local directory into which you want to clone the project
Once it has finished cloning it will ask if you want to open the cloned repository, select Open
Step 2: Create an Omniverse App
Step 2.2: Pulling Kit Code
With the project in VSCode open proceed with the following steps:
Open a new terminal in VSCode
Type
.\pull_kit_kernel.bat(windows) or.\pull_kit_kernel.sh(linux)Hit enter to run
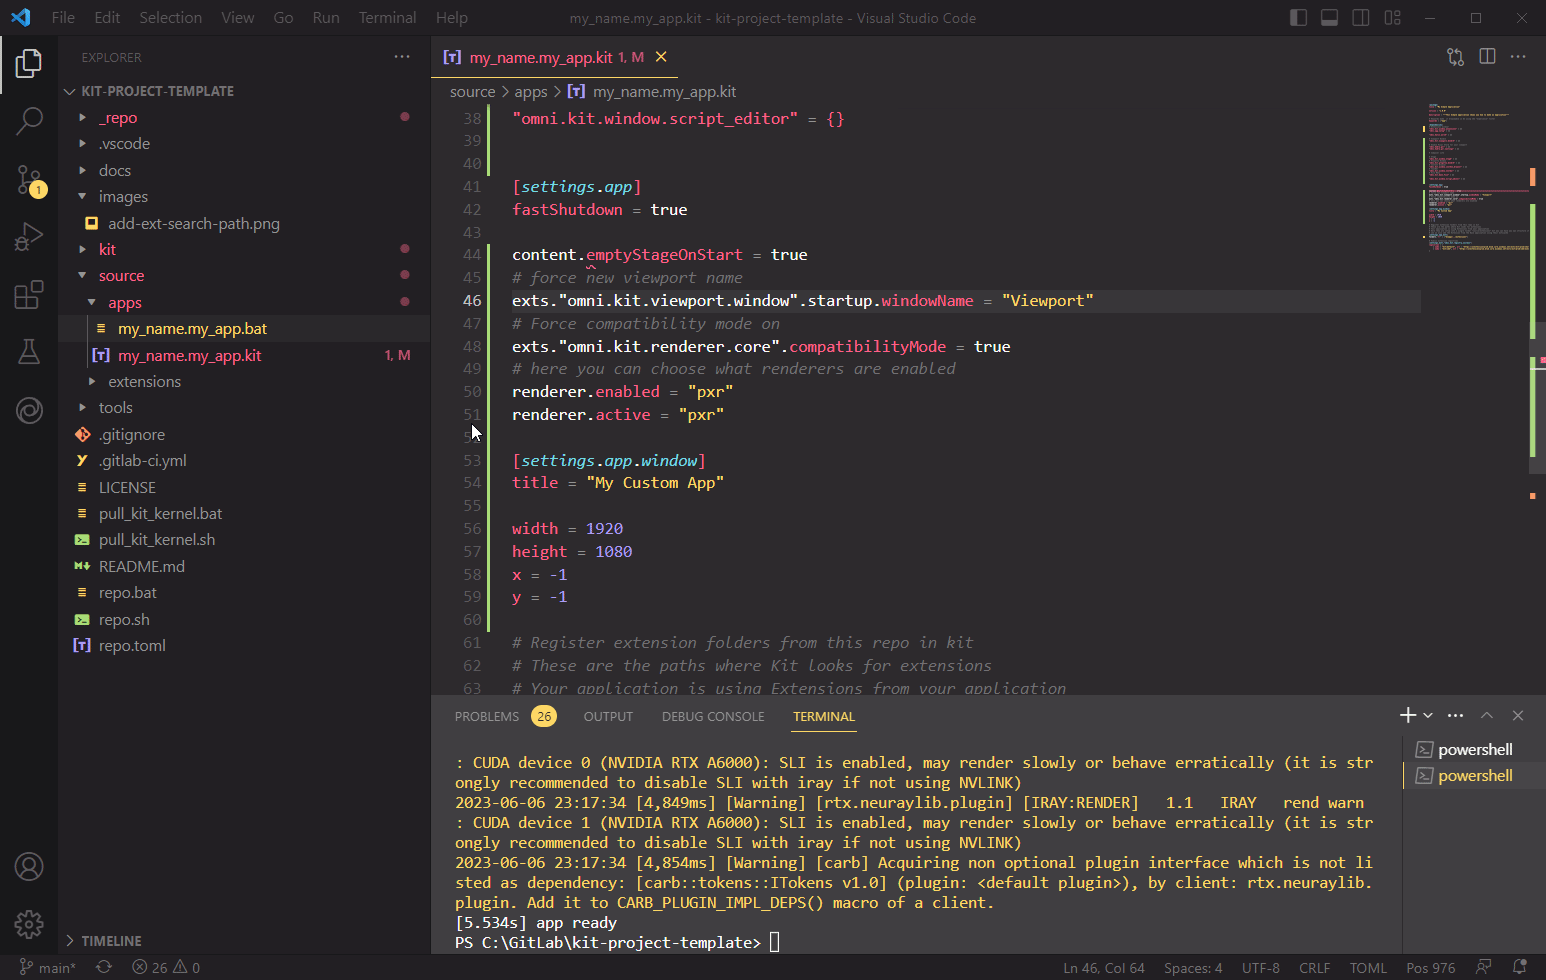
The Github repository does not come with Kit, so to retrieve the SDK we run the pull_kit_kernel.bat (windows) or pull_kit_kernel.sh (linux) script.
This can take a while so, while waiting, head to the next step for an overview of the files you will find.
The script will open a new Application window when finished. That is how you’ll know the pull is completed and you can continue.
Overview of Files

pull_kit_kernel.bat(Windows) /pull_kit_kernel.sh(Linux)A script that pulls the Omniverse Kit Kernel. By running this, a kit folder link will be created.
repo.bat(Windows) /repo.sh(Linux)Script file which runs the Repo Tools
repo.tomlConfiguration file used by Repo Tools
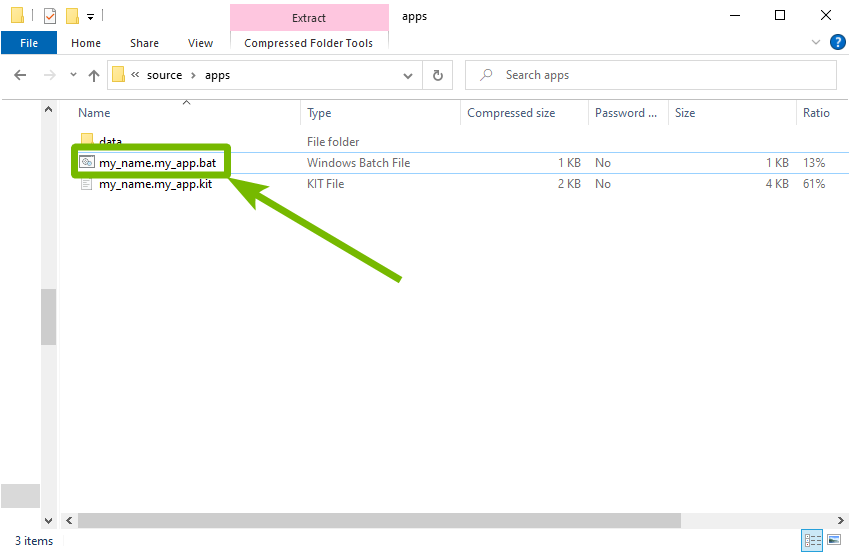
source/apps/my_name.my_app.kitA template Kit file. This will be our working file throughout the tutorial
source/apps/my_name.my_app.batThis script runs kit.exe and passes it
my_name.my_app.kit
source/extensions/Location of local extensions. Currently there is a template extension called hello world
/kitContains reference to Kit directory after running pull_kit_kernel.bat/sh
/kit/appsContains documented sample Kit files that can be used as a reference
What is a Kit file?
The Kit file is the recommended way to configure applications. The format is essentially a .toml and shares the same ease of readability and purpose of defining a configuration, it simply has a different file extension (.kit). It can be published, downloaded, versioned, and have dependencies.
A Kit file is a manifest of the things you want to use in the ecosystem. It is like building blocks which allow you to build the world using the blocks we share as well as your own.
As with any extension, it can be named, versioned and even published to the registry. It defines dependencies in the same format to pull in additional extensions.
Step 2.3: Running the App
Now you will run the current template file in the repository.
Open a new terminal if one isn’t already open
Type
.\source\apps\my_name.my_app.bat(windows) or.\source\apps\my_name.my_app.bat(linux)Hit Enter
This is how you will run your project for all future occurrences.
What is my_name.my_app.kit and my_name.my_app.bat (windows) or my_name.my_app.sh (linux)?:
This is the name of the configuration file and the script file that runs the configuration file you’re building upon. Right now, we will not be changing the name of this file
Step 2.4: Adding an Extension
Now that you know how to run the project, let’s add an extension.
Close any running instance of your project, then head back to VSCode
Navigate to
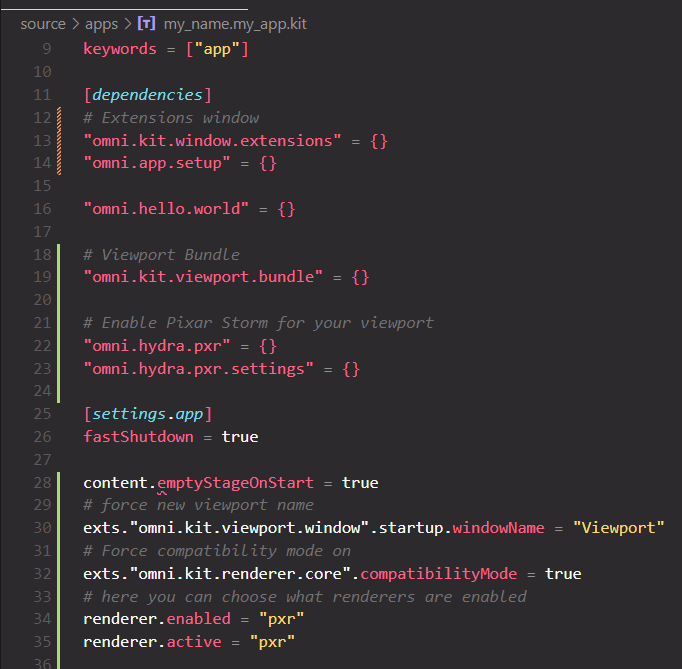
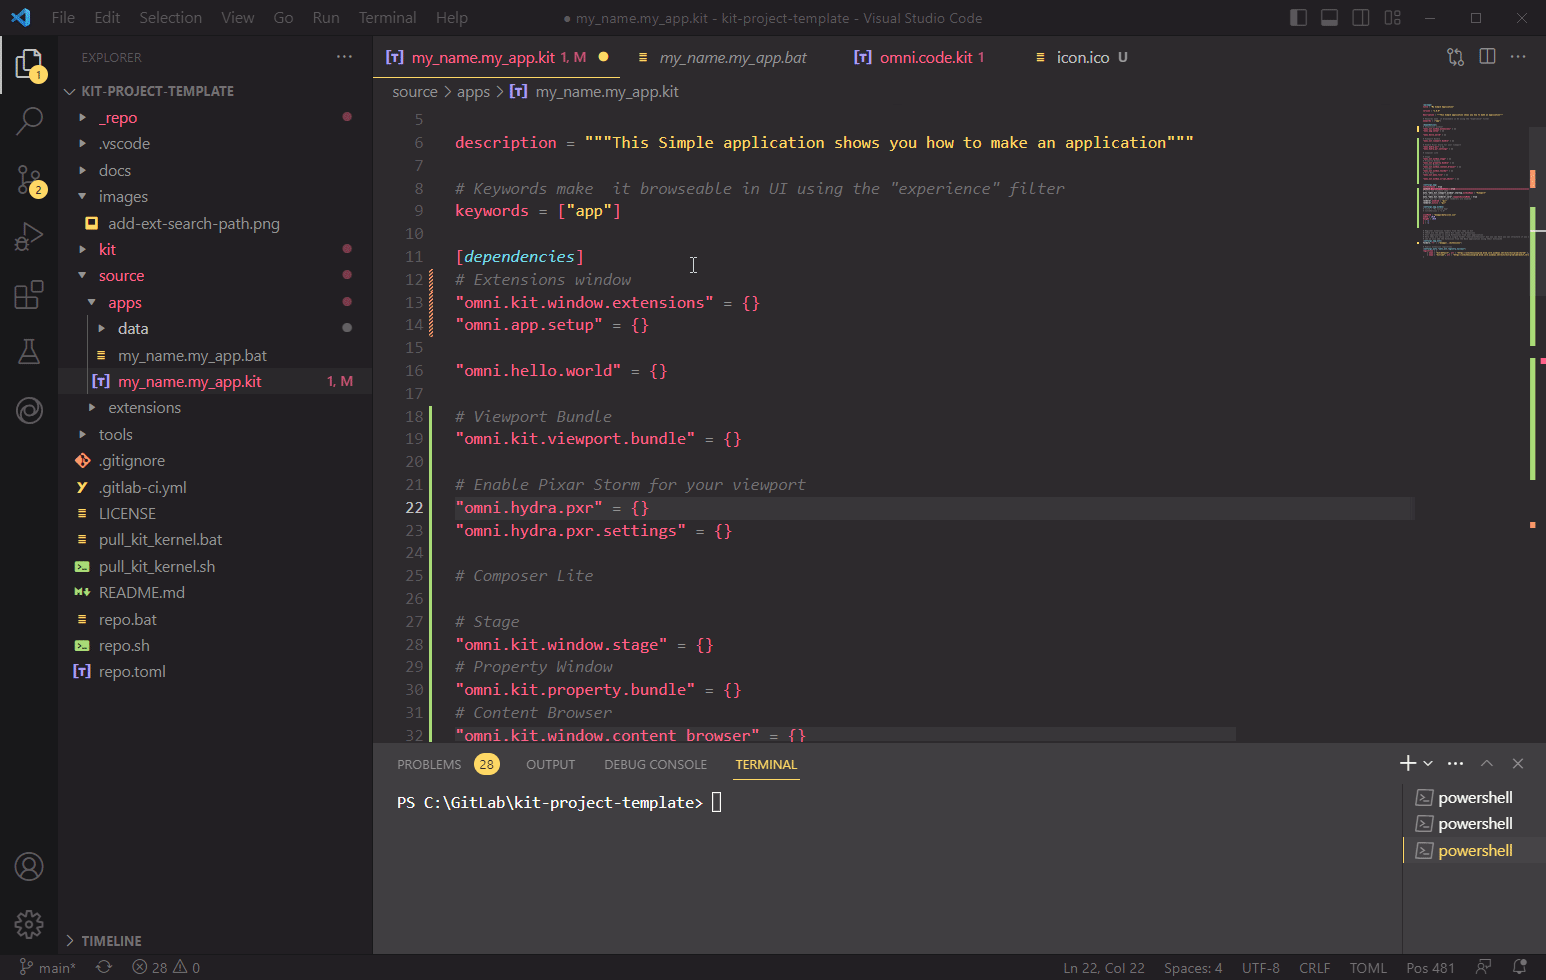
source/apps/and Openmy_name.my_app.kitThis is your working Kit file that contains your configurations for your App
Locate the line
[dependencies]and add a new line after itExtensions will go under
[dependencies]this tells the project which Extensions are required. Order in which it gets placed does not matter.
Add the following lines of code under
[dependencies]
# Extensions window
"omni.kit.window.extensions" = {}
"omni.app.setup" = {}
Remove the following lines:
# Create Kit UI Based applications
"omni.app.editor.base" = {}
Save the file
Step 2.5: Finding Extensions
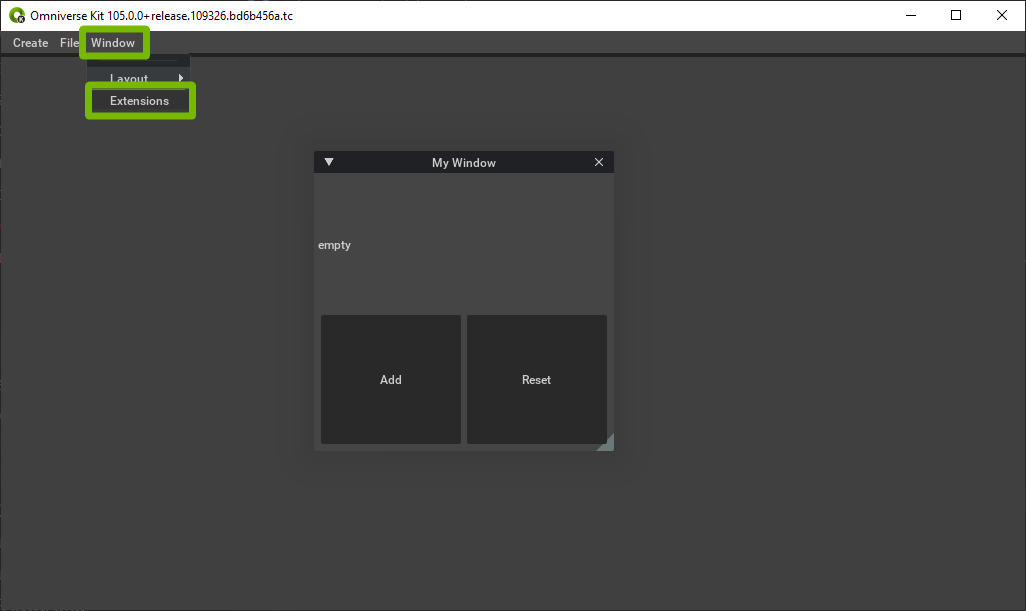
In the previous step you added the Extension Window. The Extension Window is a UI interface that shows all available extensions that you can use for your project.
Run the project
.\source\apps\my_name.my_app.bat
Click on
Window > Extensionsin the AppYou can drag and dock the window
In the Extensions window, type
"extensions"in the search bar
With the Extension Window available, you can now search for other extensions
Note: the following i.e.
omni.kit.welcome.extensions,omni.kit.windows.extensions, etc… These are the package names for each extension.
Overview: Dependencies
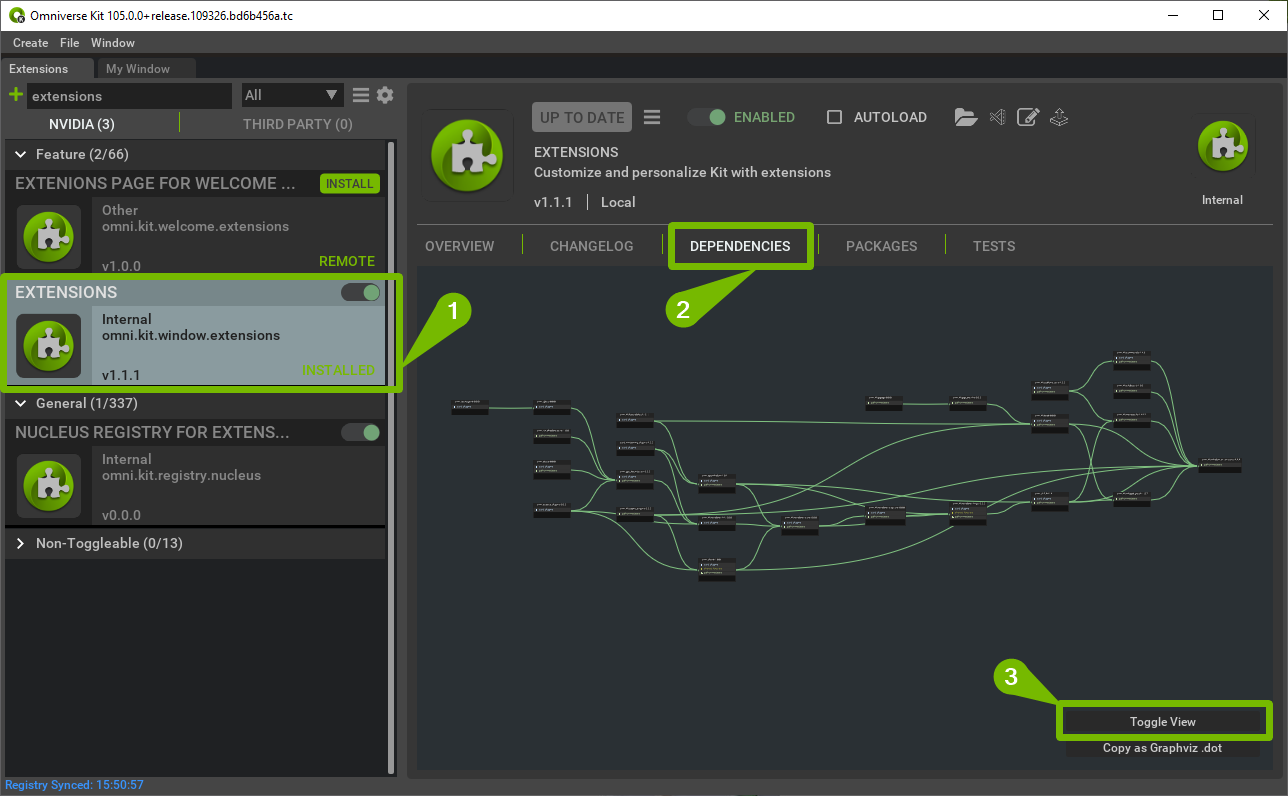
Dependencies are the building blocks that describe which extensions your app will use.
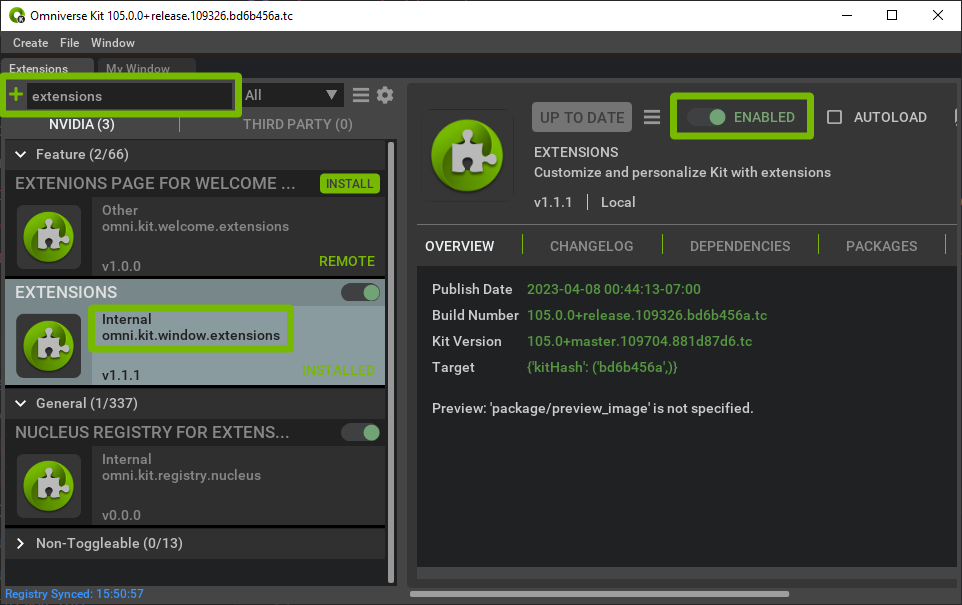
Let’s look at what dependencies are in omni.kit.window.extensions:
Select / Click on Extensions
Click on Dependencies
For a list view you can select the Toggle View button in the bottom right of the window.
For node view, you can zoom with the mouse wheel and use the middle mouse wheel to pan around.
Close the project and head back to VSCode
Simply by adding in omni.kit.window.extensions we have also imported all the extensions listed in the dependency graph.
It is good to note what the dependencies of each extension are. That way you can simplify your Kit file and not have to add every extension.
Step 2.6: Adding the Viewport
The Viewport is the primary 3D world viewer in Omniverse Kit-based Applications. You will be adding “bundles” or collections of extensions (i.e. menubar, manipulators, window).
Back in VSCode add the following lines in the
[dependencies]section ofmy_name.my_app.kit:
# Viewport Bundle
"omni.kit.viewport.bundle" = {}
# Enable Pixar Storm for your viewport
"omni.hydra.pxr" = {}
"omni.hydra.pxr.settings" = {}
Next, you need to enable Pixar Storm through settings. To do this, add the following lines after
[settings.app]:
content.emptyStageOnStart = true
exts."omni.kit.viewport.window".startup.windowName = "Viewport"
exts."omni.kit.renderer.core".compatibilityMode = true
# here you can choose what renderers are enabled
renderer.enabled = "pxr"
renderer.active = "pxr"
Make sure you save your Kit file
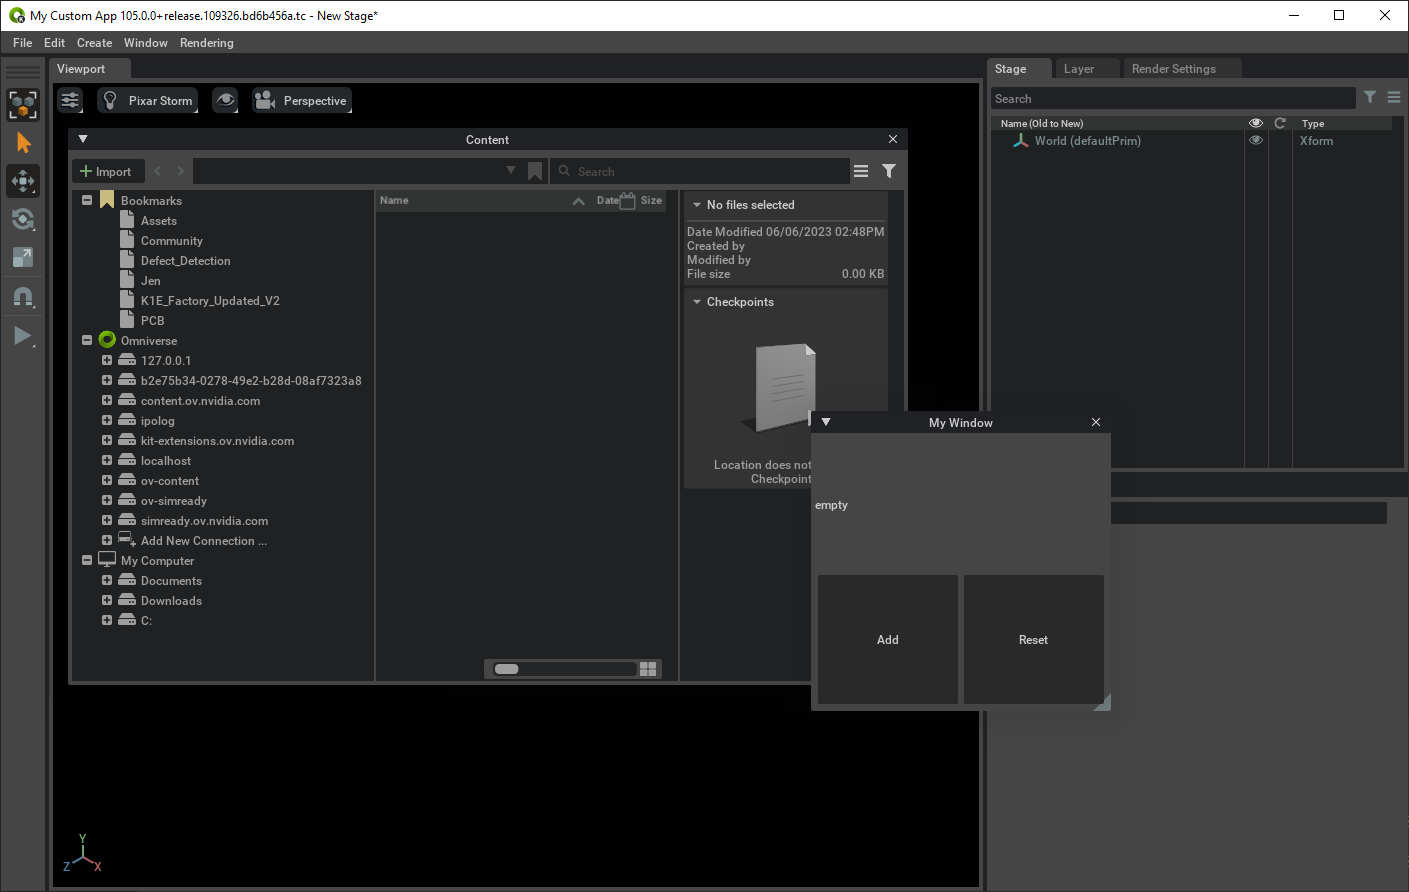
Let’s view the results of adding an extension:
Close any instance of the project and Run the project again. You should now see a Viewport window
Move the ‘My Window’ off to the side
Go to Create > Mesh > Cone
Notice how the manipulator is enabled. You can also navigate the camera in the viewport as well
Press the Right Mouse button to Orbit around
Use the Scroll Wheel or Press Right Mouse Button + “OPT”/”Alt” to zoom in
Press the Middle Mouse Button to Pan
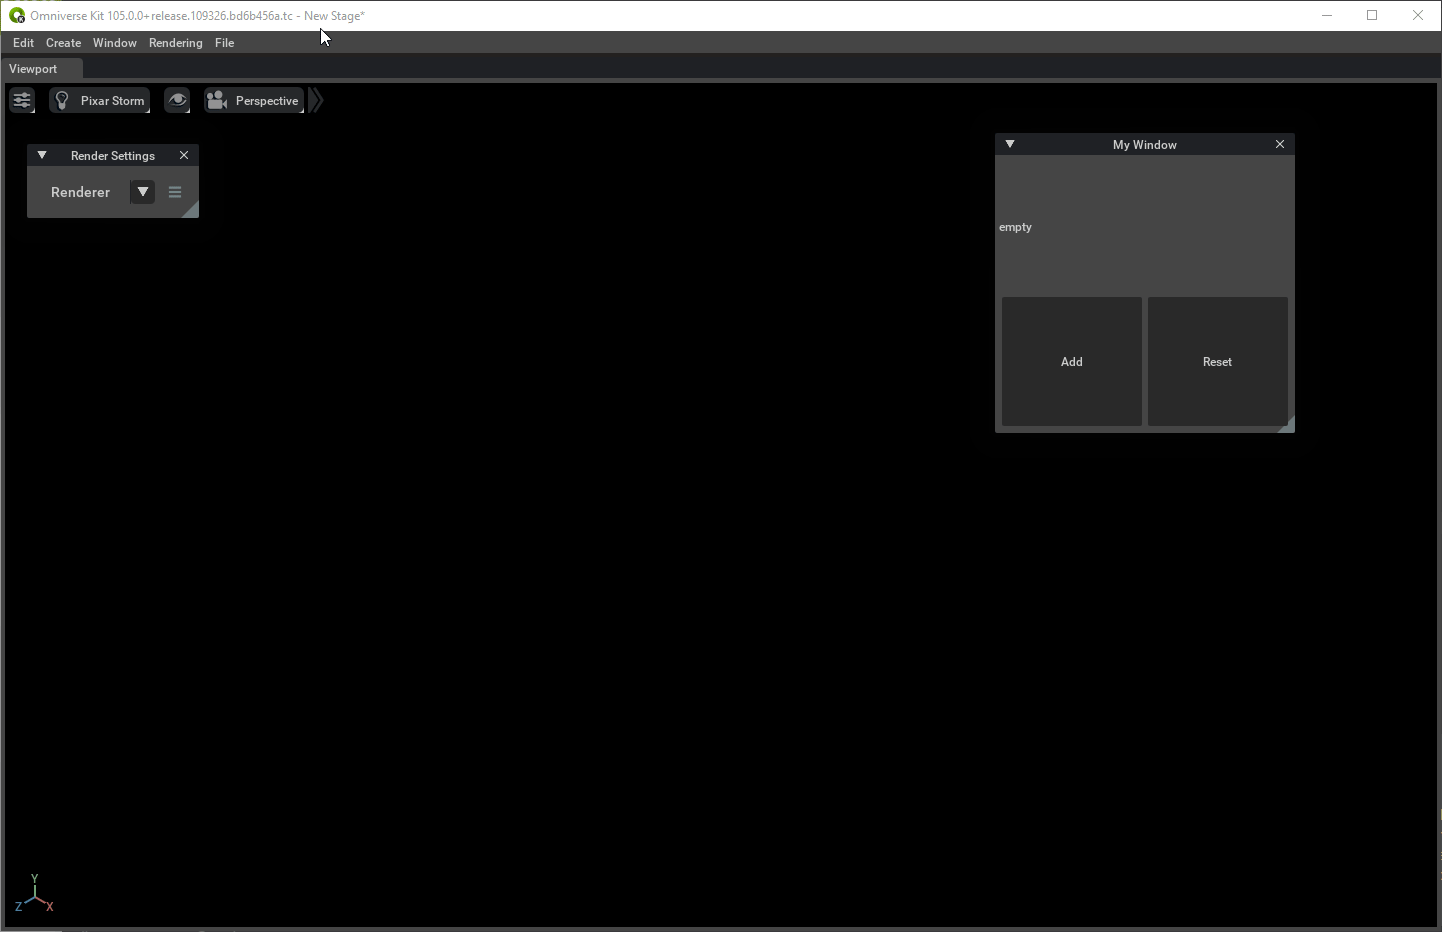
Take some time to view the dependencies of the extensions we have added. With just a few extensions, you already have the capability to view, create and manipulate prims in the scene. - Prim is short for “primitive”, a fundamental unit in Omniverse. Anything imported or created in a USD scene is a prim. This includes, cameras, sounds, lights, meshes, and more.
Viewport Settings:
In the last step you added some settings relating to the viewport. Here we provide an explanation for what these settings are:
content.emptyStageOnStart = trueThis will create an empty stage during the startup process
exts."omni.kit.viewport.window".startup.windowName = "Viewport"Setup Kit to create an ‘omni.kit.viewport.window` Window named Viewport
exts."omni.kit.renderer.core".compatibilityMode = trueThis forces Compatibility Mode on. Compatibility mode allows the user to run the project if they do not have RTX.
renderer.enabled = "pxr"Renderers that the user can pick between
renderer.active = "pxr"Default renderer that is active upon launching
Additional Settings
There are some additional settings that can change your project. These settings can be viewed through an extension.
Run the project
Go to
Window > ExtensionsSearch for
debug settingsInstall and Enable
"omni.kit.debug.settings"This will open a window where you can search for settings that can be referenced in the Kit file based on the current extensions enabled.
Each setting can be hovered over so you can see the path.
For example, if we look at audio/enabled the path is /app/audio/enabled. To add this setting in the Kit file we add it to [settings.app].
If the setting is under a different section, it would need a new header. For example, any settings under log need to go under [settings.log]. Each collapsible frame in the Debug Settings Window would be considered a new section.
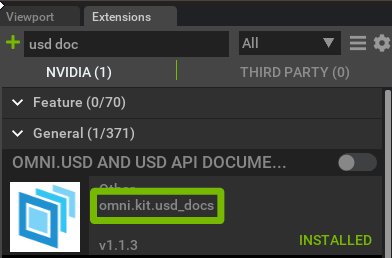
Step 2.7: Finding an Extension Name
Now that you have added one extension, let’s add another one. Before you add another extension, you need to know how to find an extension name.
Inside the App Open the Extension Window.
Window > ExtensionsNotice for each Extension box it includes the Title, and inside the box it has the category and a short name i.e. omni.graph.bundle.action, omni.kit.window.environment
In the search bar type
usd_doc.Take note the package name is
omni.kit.usd_docs.Close the App and head back to VSCode and add the following line in our
[dependencies]section. Order does not matter as long as it’s under[dependencies]."omni.kit.usd_docs" = {}
Save the Kit file and rerun the project.
Go to Help in the menu bar, you should see USD Docs in the list.
Let’s break down what you did in the previous step.
When you added "omni.kit.usd_docs" = {} how did you know to add this?
Before you added omni.kit.usd_docs you went into the Extension Manager and searched for usd docs. If you look at the results, you’ll notice that the package name is listed for each extension.
This is a great way to check for what extensions are available so that you can add it to your Kit file.
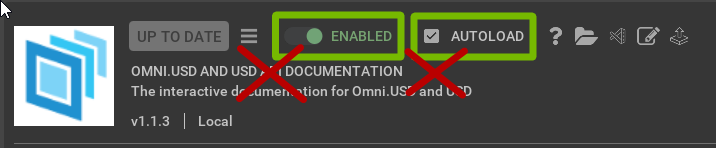
You will need to click on the extension UI block to learn more about what it does.
Note: If you check Autoload or enable the extension that DOES NOT mean it has been added to the App. The ONLY way to add extensions to the App is by adding to the Kit file.
Step 2.8 Challenge: Create your App
This is a self-discovery to challenge you. If you want to just skip, please proceed to the next step.
This Challenge is to build up your own App. If you are stuck on ideas think about some of the elements that make up USD Composer App and try searching for them in the Extension Manager. Turn some extensions on and off to test them out. When you’ve found them add them to your Kit file. Remember this does not need to have EVERY extension, just the basic functionalities you want the user of your app to be able to perform. For example, Content, Stage, Properties and Toolbar are some components to search for. You can also search for USD and see what extensions pop up relating to USD. The next step will go over the extensions we suggest for this exercise.
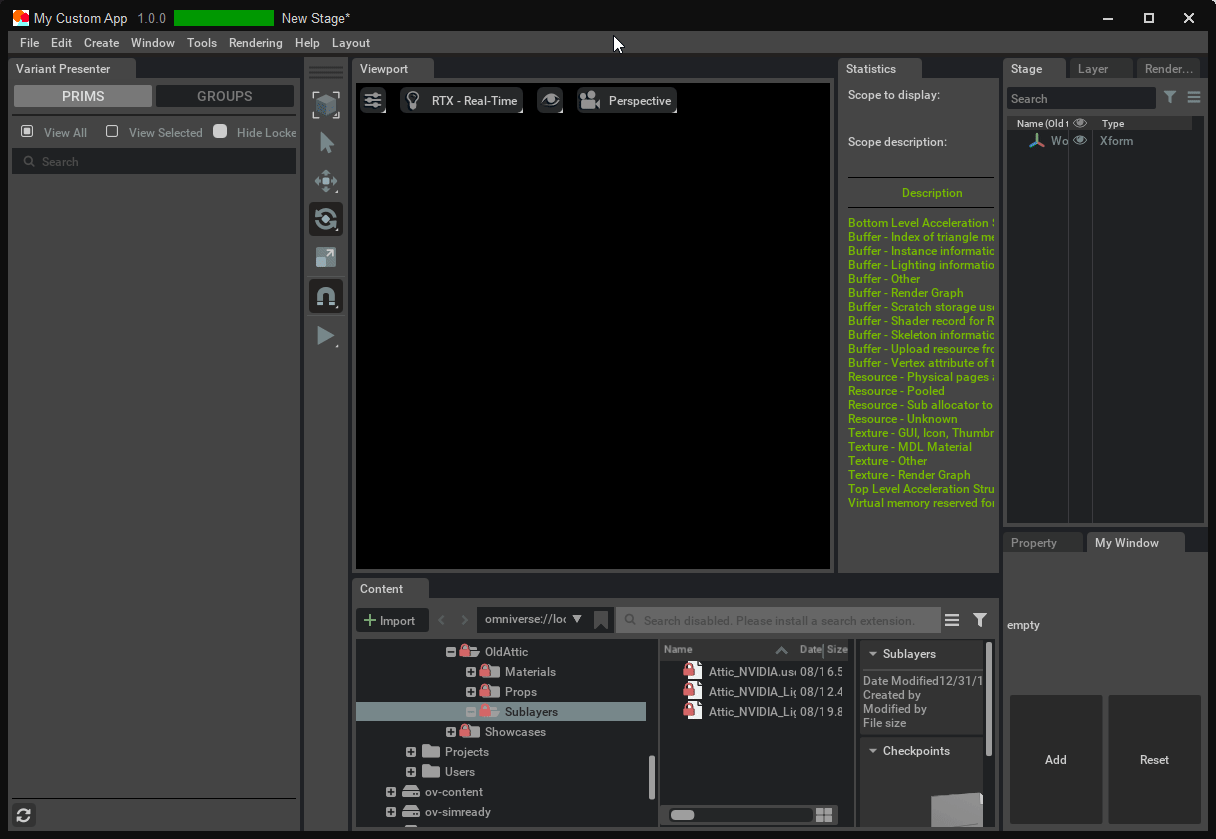
Step 2.9: Our Answer: Hello World
Underneath
"omni.hydra.pxr.settings" = {}add the following lines:
# File Menu
"omni.kit.menu.file" = {}
# Stage
"omni.kit.window.stage" = {}
# Content Browser
"omni.kit.window.content_browser" = {}
# Edit Menu
"omni.kit.menu.edit" = {}
# ToolBar
"omni.kit.window.toolbar" = {}
# Property Window
"omni.kit.property.bundle" = {}
# Variant presenter
"omni.kit.variant.presenter" = {}
# USD Docs
"omni.kit.usd_docs" = {}
# USD Paths
"omni.kit.window.usd_paths" = {}
# USD Collection window
"omni.kit.window.collection" = {}
Save the Kit file and close any instances of Omniverse.
Run the project, you should now see the extensions added.
Note: If you have more than the listed extensions in the previous steps, your project will look different from the image.
Why those Extensions?
Here’s a brief description of the extensions we added to our project:
File Menu & Edit Menu
File menu offers access to file operations both locally and on your Nucleus. Edit Menu contains editing tools like Undo, Redo, Select, along with other more advanced capabilities.
Stage
Here you will be able to manage all the assets in your USD Scene, listed in a hierarchical (parent/child) order. This is essentially for large scenes.
Content Browser
Items listed in the Content Browser provide meaningful information about the asset without having to open it.
Tool Bar
Provides easy access to common commands needed when editing a USD Scene.
Property Window
Provides you a way of configuring properties for the prim selected.
Variant Presenter
Gives you convenient access to all the USD Variants in a scene. Can also be used to organize variants into custom groups using USD Collections.
USD Docs
Interactive Documentation with coding examples for omni.kit.usd
USD Paths
Easy tool for you to search and replace paths of prims in the scene.
USD Collection Window
Collections are a way to group/organize prims and properties in USD.
Step 3: Styling
Style Settings
There are various ways you can style your project. Some of the methods that will be covered are:
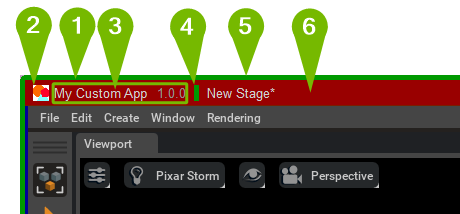
Changing the Icon that appears in the top left corner of the app window
Customizing the Title Bar color
Changing Fonts
Shading Extension Colors
Note: There isn’t a global color schema for Kit extensions. Each extension’s color will need to be configured individually. However, you can set up your own extensions with a global custom color schema.
Step 3.1: Change the Icon
Note: Currently this is unavailable for Linux.
Applications are represented by a developer-selected icon in the menu bar and on the window bar. You have an option to define what that icon is in the Kit file.


In VSCode, Create a new folder in apps called
dataMake sure your .ico image is stored in this folder
You need to have a .ico image with a size of 64x64 and resolution of 72.
In VSCode, Add
[settings.app.window]section if you do not have oneAdd the following line under
[settings.app.window]:iconPath = "${app}/data/icon.ico"
Note:
${app}refers to/source/appsfolderSave and run the project. You should see your icon in the top left corner of the window, it will also appear on your menu bar.
Step 3.2: Customize the Title Bar
Note: Currently this is unavailable for Linux.
The Title Bar is the Application Window’s main menu bar where you can minimize, maximize and close the window.

First, we need to add the extension that allows us to change the title bar settings. In the dependencies section add the following line:
"omni.kit.window.modifier.titlebar" = {}
Next, add the following section:
[settings.exts."omni.kit.window.modifier.titlebar"]
titleFormatString = "  My Custom App  {verKey:/app/version,font_color=0x909090,font_size=16} {separator} {file, board=true}"
icon.file = "${app}/data/icon.ico"
icon.size = 64
name = "Arial"
defaultFont.size = 16
defaultFont.color = 0xD0D0D0
separator.color = 0x00B976
separator.width = 1
windowBorder.color = 0x0F0F0F
windowBorder.width = 2
colors.caption = 0x0F0F0F
colors.client = 0x0F0F0F
Save the file and Rerun the project.
Customize the Title Bar Deep Dive
Note: All colors are represented as 0xBBGGRR (B – Blue, G – Green, R – Red)
Title
titleFormatString – Contains the title that will be displayed in the Title Bar
Icon
icon.file – This is the Icon file that will appear. The extension will override what we provided previously in iconPath but only for the Title Bar.
icon.size – Defines the Size of the Icon
Font
defaultFont.name – Default font for the Title Bar
defaultFont.size - Default Font Size
defaultFont.color – Font Color
Separator
separator.color – Color for the Separator
separator.width – The Width of the separator
Border
windowBorder.color - Border Color of the window
windowBorder.width - Width of the window border
Window
colors.caption – The Color of the Title Bar
colors.client – The Color of the window outline
Step 4: Updating the Layout
Currently, your windows might not be in the appropriate default locations. You can dock the windows where you like them and then save a layout based on the configuration you’ve created.
Step 4.1: Configuring a Custom Layout
Run the project if it is not running already
Dock your windows in the locations that appeal to you.
To position the window
Left-Click + Dragnear the blue preview images.
Repeat for any other enabled Extension Windows
This is not a strict layout and can also be changed to any configuration your intended user sees fit.
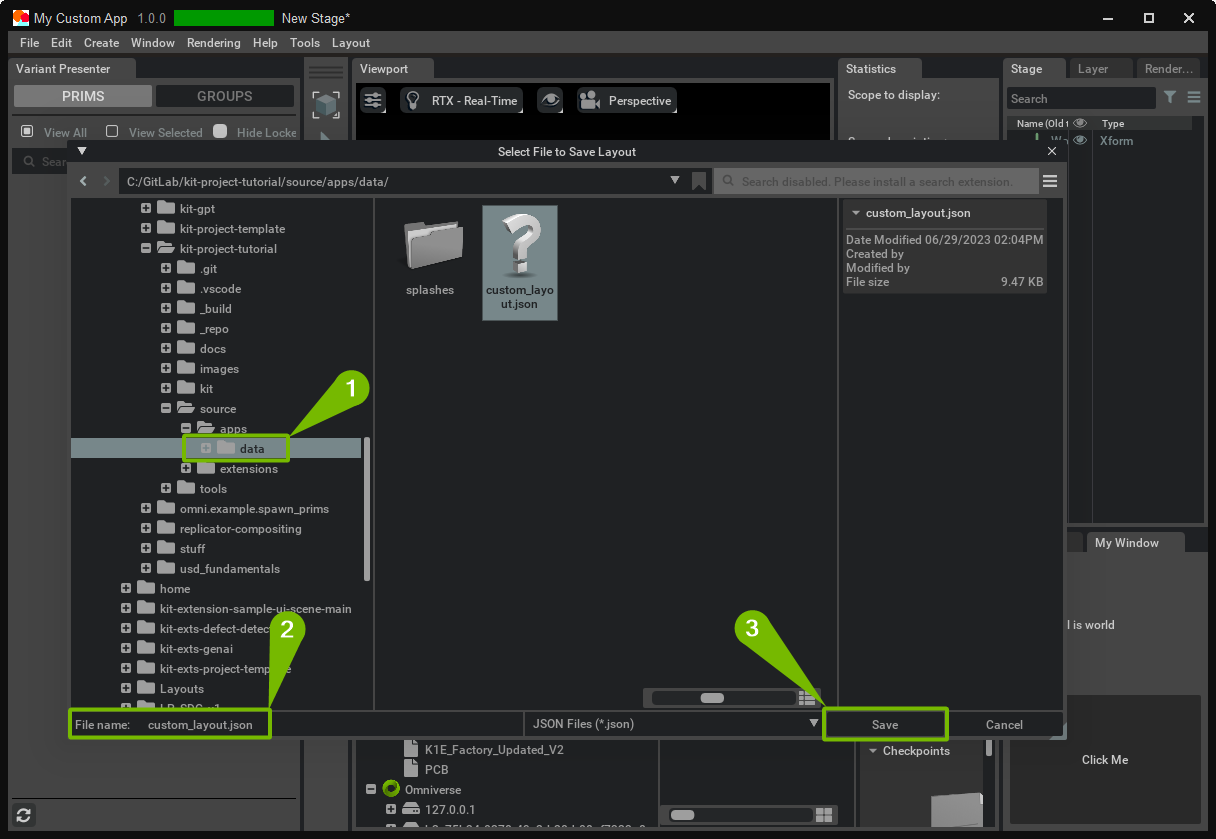
Step 4.2: Saving the Layout
After setting up the layout go to the Menu Bar click on
Window > Layout > Save Layout....
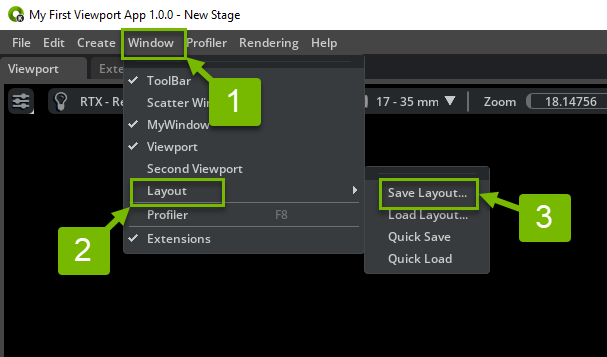
A new prompt window will open. Navigate to your project folder. From your project folder go to
source > apps > data.Under filename name it
custom_layoutthen click Save.
Step 4.3: Updating Your Application’s Layout Reference
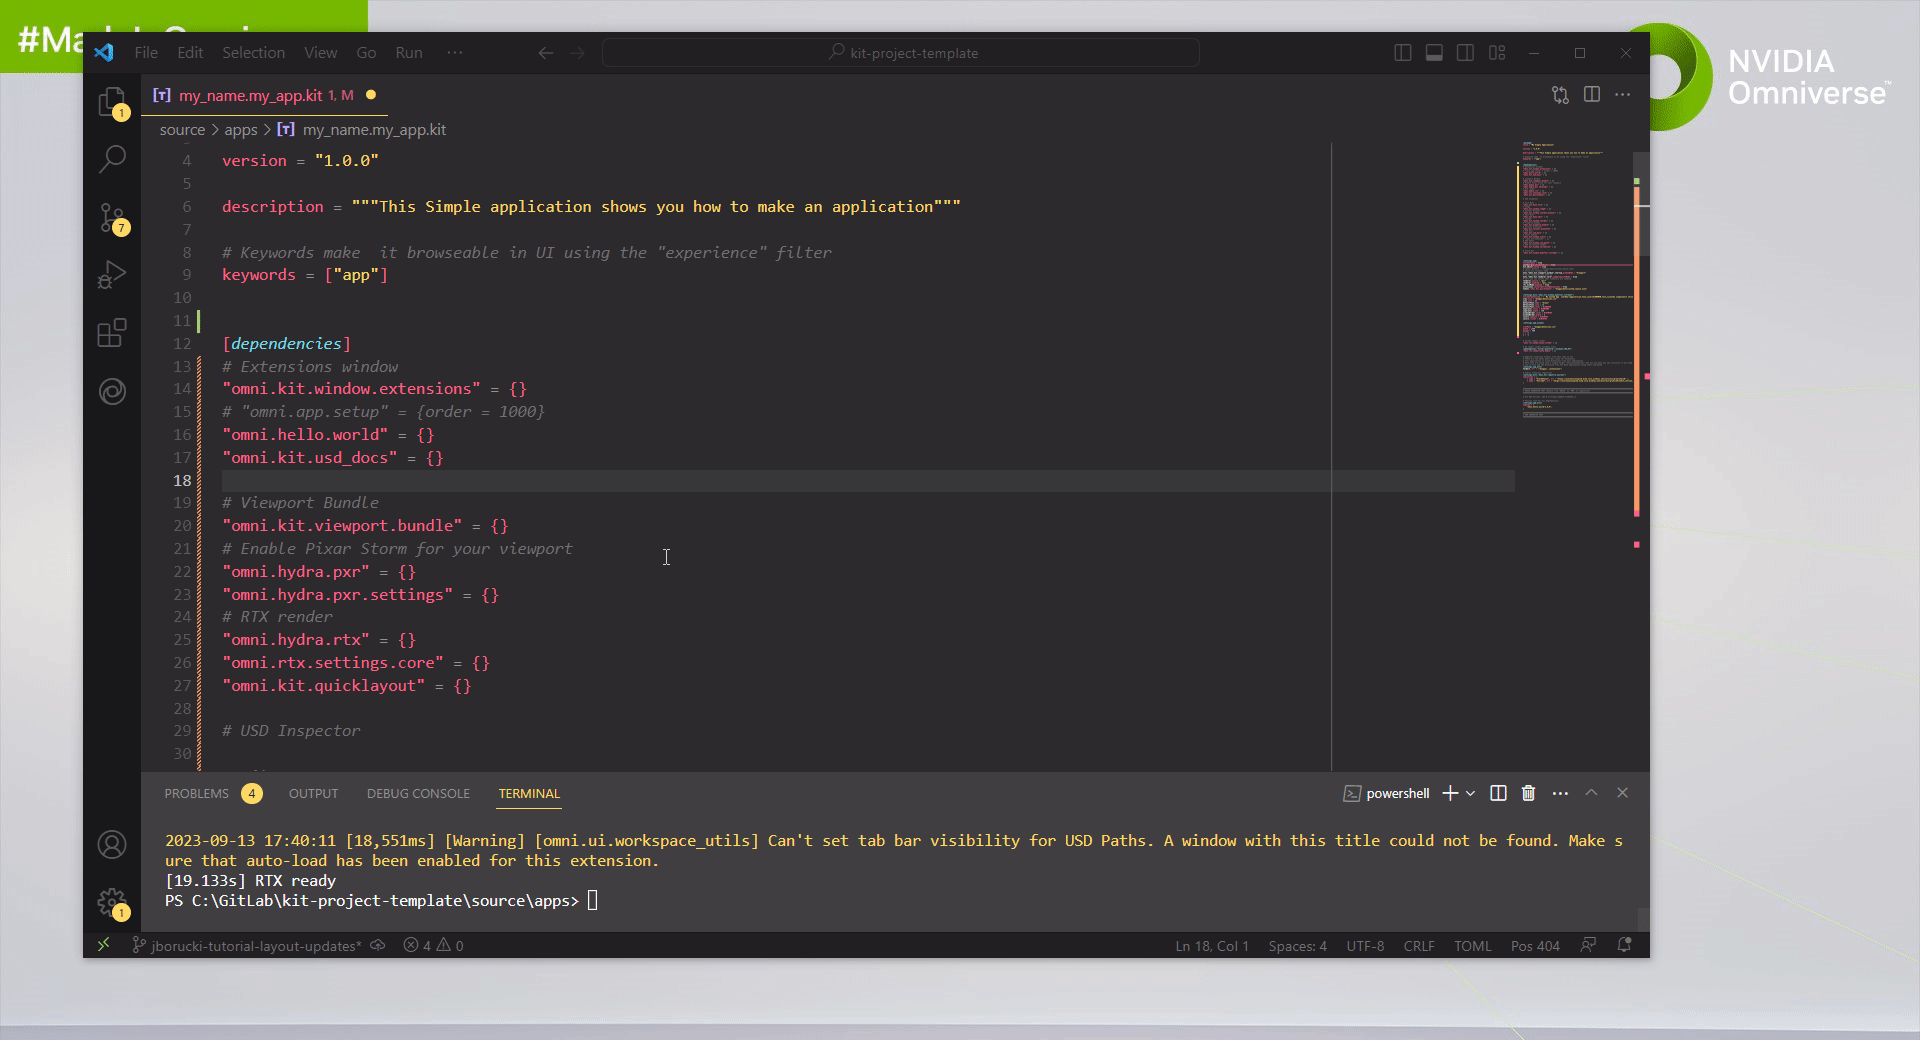
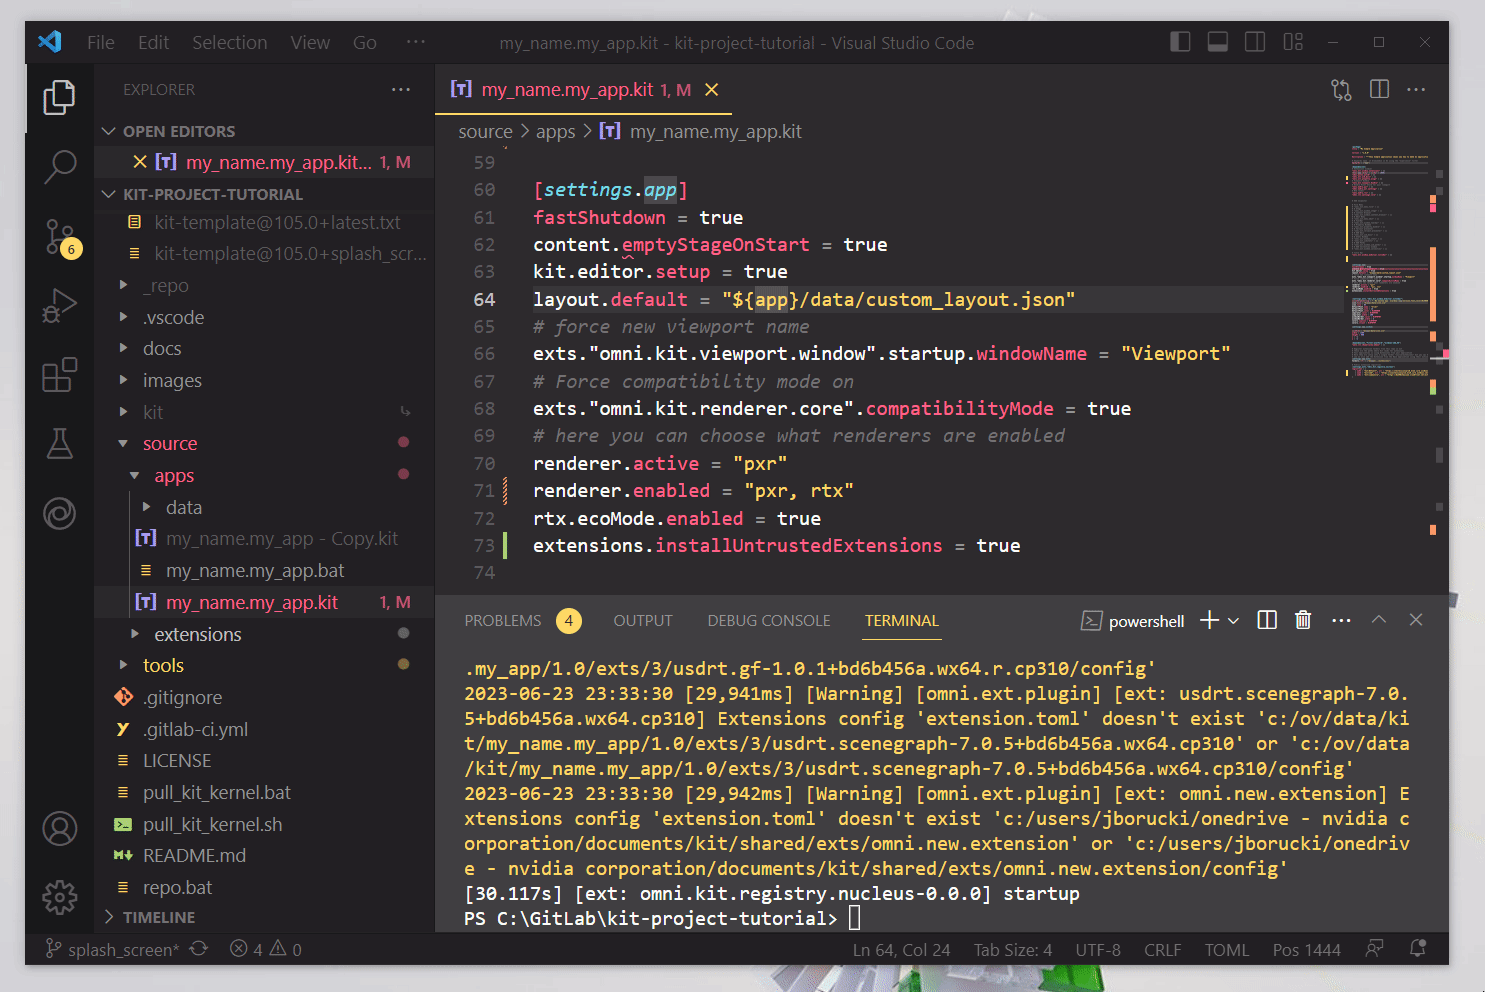
When we save a layout, it creates a .json file detailing how each window should be positioned in the App. However, you will need to tell the Kit file which layout it should load.
Close the application. Go back to VSCode and in your Kit file.
Add the following lines to the
[dependencies]section: These extensions will be covered later on."omni.kit.welcome.window" = {} "omni.app.setup" = {} "omni.app.workflow.startup" = {}
Add the following lines after the
[dependencies]section:[settings.exts."omni.kit.welcome.window"] default_workflow = "startup" [[settings.exts."omni.app.setup".workflow]] name = "startup" workflow = "omni.app.workflow.startup" [settings.exts."omni.app.workflow.startup"] default_layout = "${app}/data/custom_layout.json"
Save the Kit file.
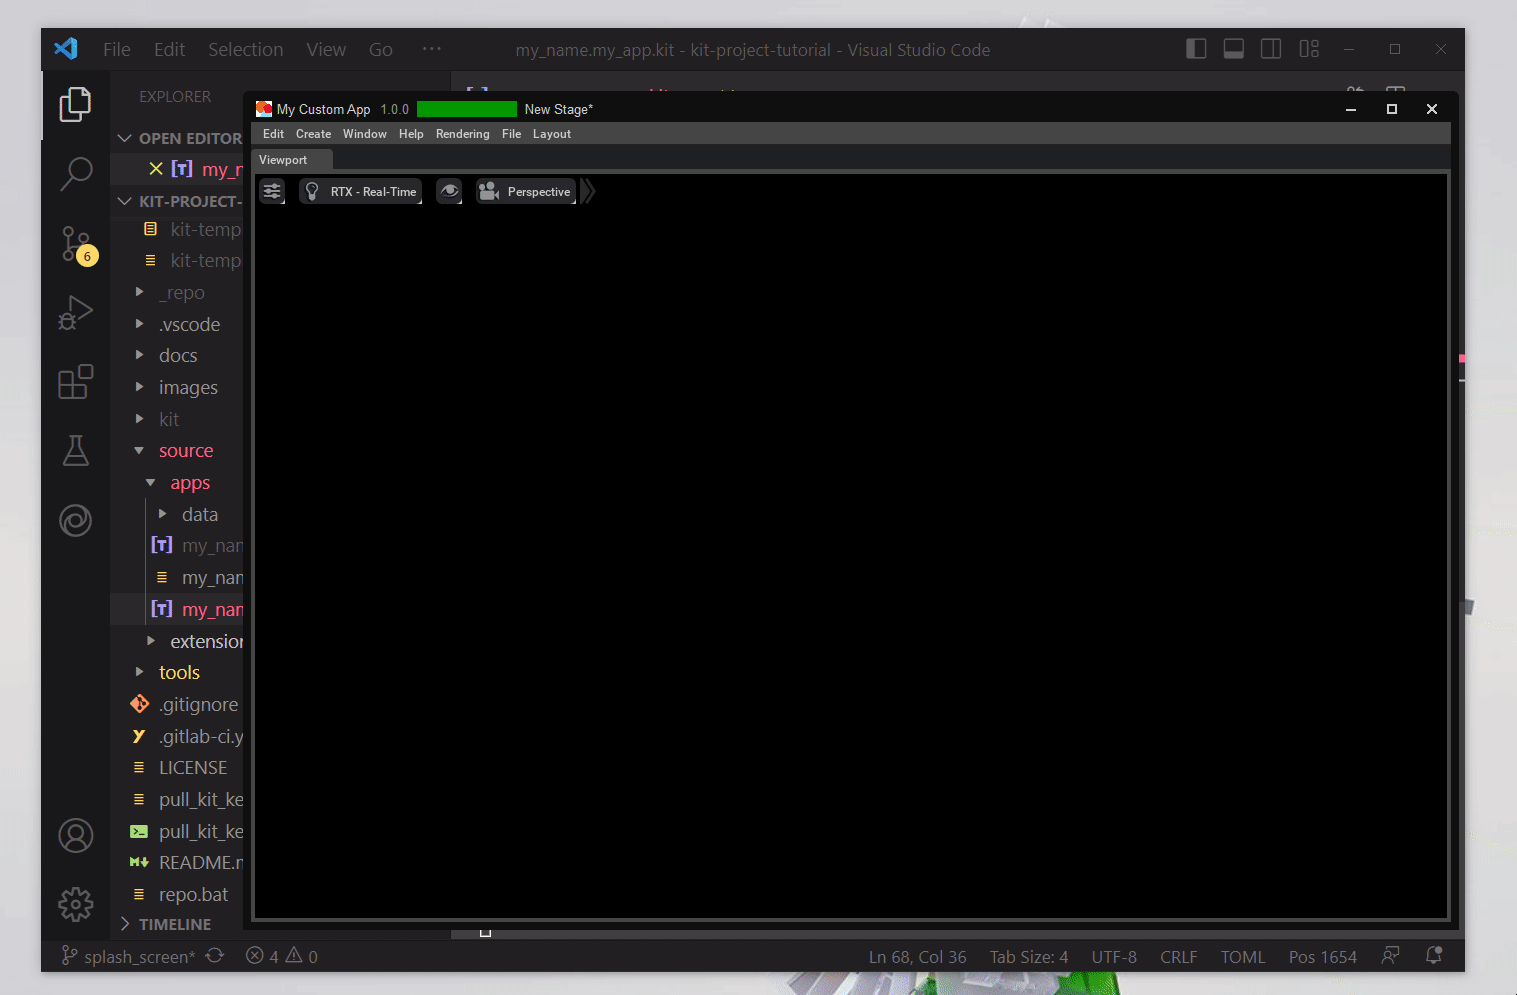
Run the project. Now every time you open your App it will retain the same layout.
The layout file is loaded in the following steps:
Load default layout defined in
app.layout.default.Welcome window displays.
When Welcome Window closed, load startup workflow if defined.
Step 5: Adding Third Party Extensions
So far, you have added Extensions that come with Omniverse. You can also add Third Party Extensions, these are extensions other community developers create and publish on Github publicly.
Step 5.1: Add Third Party Extensions
To see Third Party Extensions and access them, you must add their registry. Registries are providers for publishing extensions and pulling extensions from.
In our Kit file in VSCode, scroll down to the
[settings.exts."omni.kit.registry.nucleus"]section.Add the following inside the registries dictionary, between
{ name="kit/sdk....}and]:{ name = "kit/community", url = "https://dw290v42wisod.cloudfront.net/exts/kit/community" }
Add a
commaat the end of{ name="kit/sdk...}Save the file and run the project.
Open the Extension Manager
Window > Extensions
Click on Third-Party tab. With the registry now in our Kit file you can now pull all available extensions that are live on Github.
Notice the first extension, Align Tool (
omni.kit.property.align). You will be adding this as an example.Close the App and go back to VSCode.
Locate the
[dependencies]section and add the following line:"omni.kit.property.align" = {}
By default, all Untrusted Extensions will NOT install. To override this, you must change the setting. Use this wisely. Locate
[settings.app]section and add the following line:extensions.installUntrustedExtensions = true
Save the file and run the project.
Head back to the Extension Manager and under the Third-Party tab you should see that the Align Tool is installed and enabled.
Recap: Add Third Party Extensions
To add Third Party Extensions, make sure you do the following:
Add the Registry to the registry dictionary in the Kit file
{ name = "kit/community", url = "https://dw290v42wisod.cloudfront.net/exts/kit/community" }
To allow for Third Party extensions to be installed enable the flag in
[settings.app]extensions.installUntrustedExtensions = true
From there you can add any Third Party extension the same way that you can with Kit extensions.
Note: Choose wisely when installing Unverified extensions.
Step 5.2: Add Extensions Locally
Extensions do not need to go into the public repository. You can also include extensions locally to the project.
Take any locally created extension and copy ONLY the extension. The project directory should not be included.
i.e.
my.local.extension,omni.hello.world,omni.spawn.prims, etc.
In the project folder, add/paste your extension to
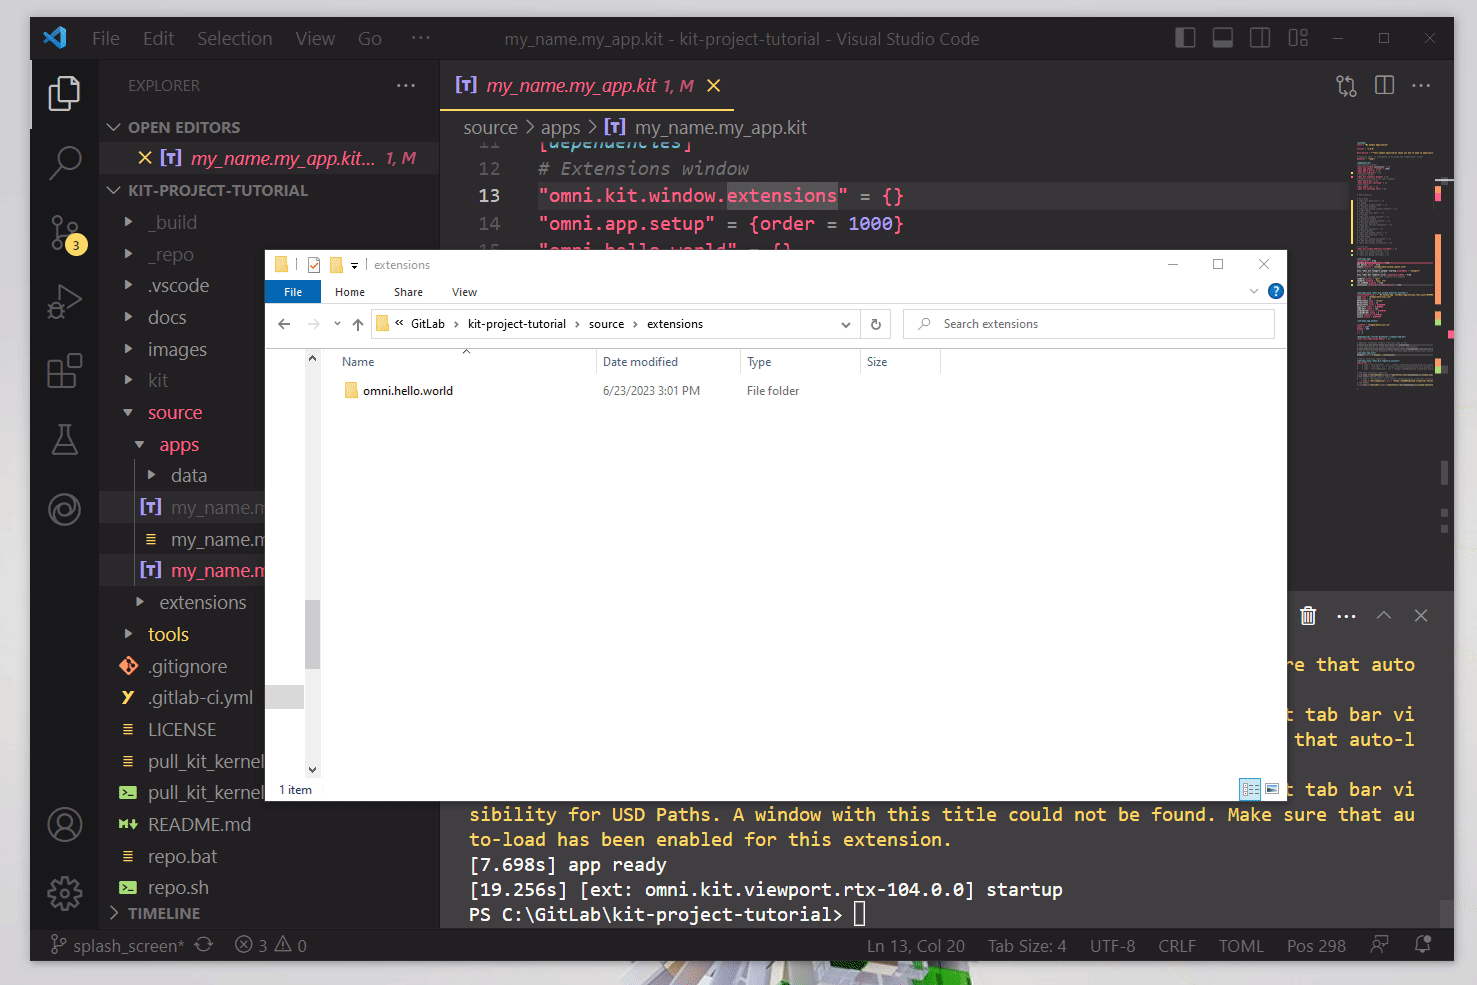
source/extensions. Currently, there is one extension in the folder,omni.hello.worldIn your Kit file, add your extension name. For example,
omni.example.spawn_primshas been added to my extension folder so in my Kit file I will add the following line under[dependencies]:"omni.example.spawn_prims" = {}
Save the file and run the project. You should now see your extension has been added to your App.
Adding extensions can be done either through the public repository or locally. Notice that locally added extensions will cause the project to be larger.
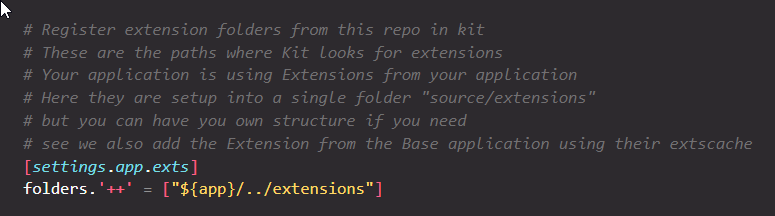
When adding a local extension place it into source/extensions. Otherwise define another extension folder.
In the Kit file there is a
[settings.app.exts]section. These are the paths where Kit looks for extensions.
[settings.app.exts]
folders.'++' = ["${app}/../extensions"]
When copying over your extensions ONLY copy the extension not the project folder.
For example, an extension folder would be
omni.kit.exts,my.own.extension, etc
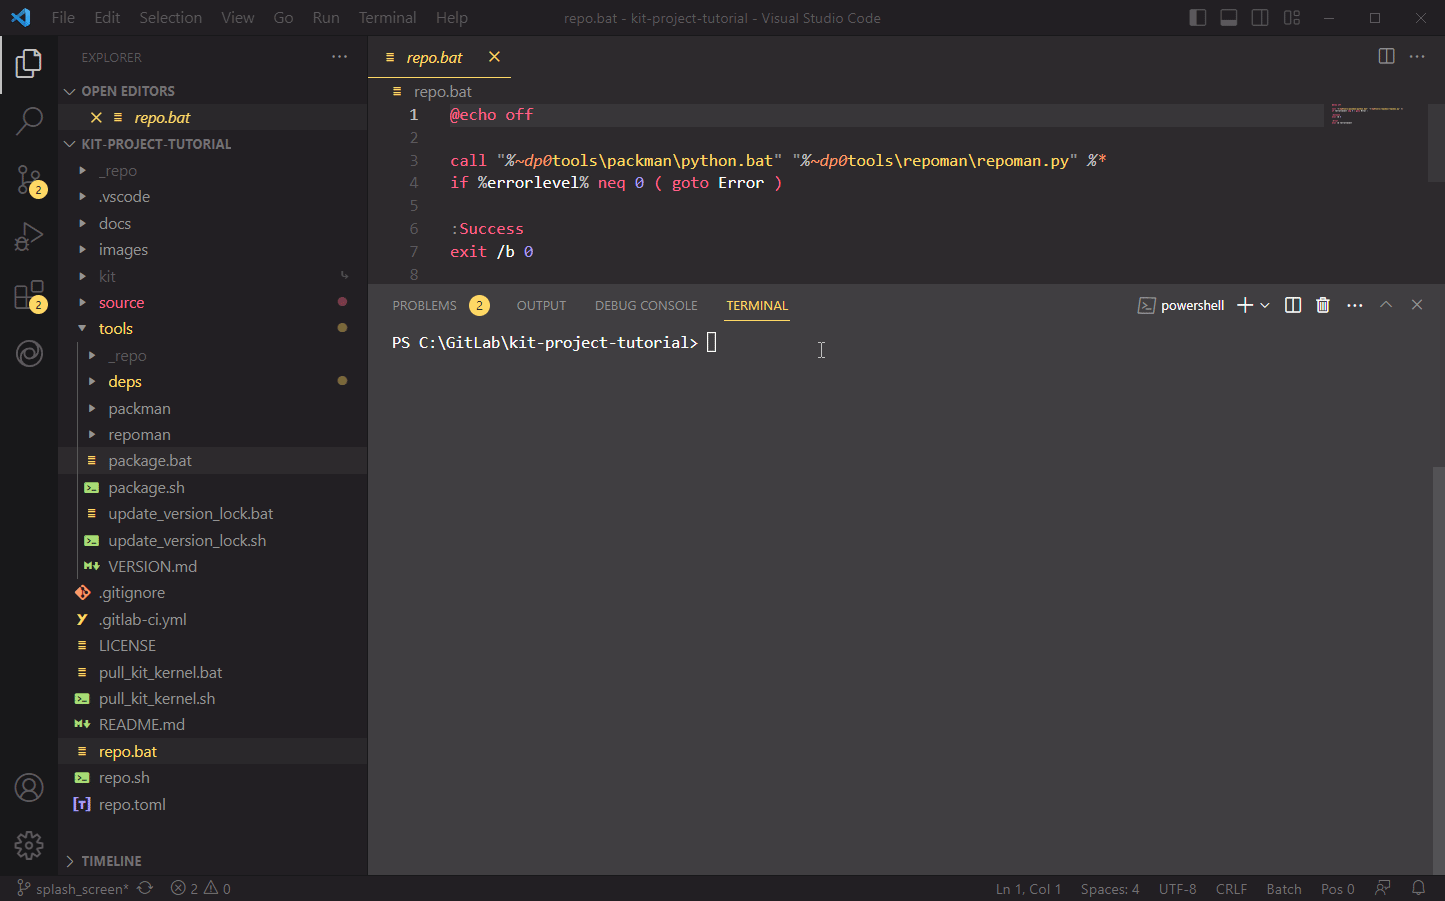
Step 6: Packaging and Distribution
Choosing a Name
In the repository we use my_name and my_app token for our app and extensions naming, the purpose is to outline where you should use your company / name id and name for your app.
i.e.
company_x.custom_editor.kit
A few rules about naming
Don’t use a generic names like bob or cloud
Don’t use omni as this is reserved for NVIDIA Applications or Extensions
Be consistent. Select one and stick to it.
App Name: my_app
When building applications, you might want to namespace the extension within the app name they belong to like omni.code for an application where we have omni.code.setup as an extension.
Shared Extensions
Aside from the extension you build specifically for your App there might be some that you want to make more generic and reuse across applications.
This is how Omniverse Shared Extensions are built. We have them in namespaces like omni.kit.widget or omni.kit.window
Step 6.1: Change the App Name
Currently, the Kit file and Bat (windows) or Sh (linux) file are unclear what App is being run. When distributing the App make sure to change the name before packaging.
In VSCode, right click on the Kit file.
Select Rename
Rename the Kit file
i.e.
company_x.custom_editor.kit
Right click on the Bat (windows) or Sh (linux) file and Rename the file to the same name you chose for the Kit file.
Open the Bat (windows) or Sh (linux) file and update the last line to reference your updated Kit file.
Save the Bat (windows) or Sh (linux) file and run the project using the newly named Bat (windows) or Sh (linux) file.
Step 6.2: How to Package the App
After wrapping up the final touches for your App, it can be packaged and shared with others.
To package an app, go to VSCode and Open a Terminal
Type the following in the Terminal:
.\tools\package.bat (windows)or.\tools\package.sh (linux)OR
repo package
Hit Enter
The package will be created in the _build/packages folder
Step 6.3: Locating the Package
After packaging has completed the App is ready to share.
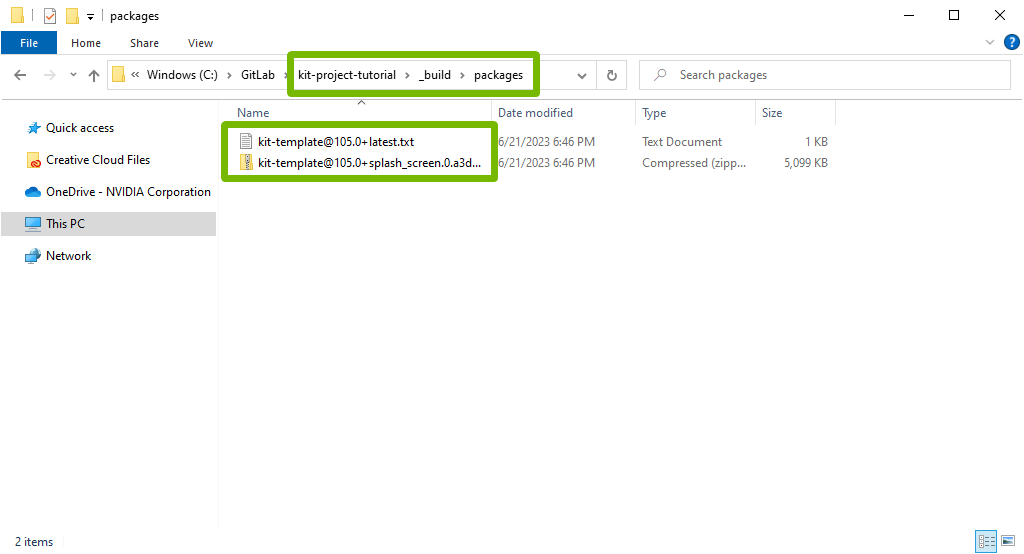
To locate the packaged zip from the base directory, navigate to
_build > packages. You should then see a zip and text file.
The zip folder can be renamed, it will not affect the Application.
Step 6.4: Packaging and Distribution
After giving the zip folder to the end user make sure they follow these instructions:
After Downloading the Zipped folder, Extract it
Run
pull_kit_kernel.bat(windows) orpull_kit_kernel.sh(linux) inside the packageNavigate and run
source/apps/[app_file].bat(windows) orsource/apps/[app_file].bat(windows)