Omniverse Kit Project Template
This project is a template for developing apps and extensions for Omniverse Kit.
Important Links
Getting Started
Fork/Clone the Kit Project Template repo link to a local folder, for example in
C:\projects\kit-project-template(Optional) Open this cloned repo using Visual Studio Code:
code C:\projects\kit-project-template. It will likely suggest installing a few extensions to improve python experience. None are required, but they may be helpful.In a CLI terminal (if in VS Code, CTRL + ` or choose Terminal->New Terminal from the menu) run
pull_kit_kernel.bat(windows) /pull_kit_kernel.sh(linux) to pull the Omniverse Kit Kernel.kitfolder link will be created under the main folder in which your project is located.Run the example app that includes example extensions:
source/apps/my_name.my_app.bat(windows) /./source/apps/my_name.my_app.sh(linux) to ensure everything is working. The first start will take a while as it will pull all the extensions from the extension registry and build various caches. Subsequent starts will be much faster. Once finished, you should see a “Kit Base Editor” window and a welcome screen. Feel free to browse through the base application and exit when finished. You are now ready to begin development!
An Omniverse App
If you look inside a source/apps/my_name.my_app.bat or any other Omniverse App, they all run off of an SDK we call Omniverse Kit . The base application for Omniverse Kit (kit.exe) is the runtime that powers Apps build out of extensions.
Think of it as python.exe. It is a small runtime, that enables all the basics, like settings, python, logging and searches for extensions. All other functionality is provided by extensions.
To start an app we pass a kit file, which is a configuration file with a kit extension. It describes which extensions to pull and load, and which settings to apply. One kit file fully describes an app, but you may find value in having several for different methods to run and test your application.
Notice that it includes omni.hello.world extension; that is an example extension found in this repo. All the other extensions are pulled from the extension registry on first startup.
More info on building kit files: doc
Packaging an App
Once you have developed, tested, and documented your app or extension, you will want to publish it. Before publishing the app, we must first assemble all its components into a single deliverable. This step is called “packaging”.
To package an app run tools/package.bat (or repo package). The package will be created in the _build/packages folder.
To use the package, unzip the package that was created by the above step into its own separate folder. Then, run pull_kit_kernel.bat inside the new folder once before running the app.
Version Lock
An app kit file fully defines all the extensions, but their versions are not locked, which is to say that by default the latest versions of a given extension will be used. Also, many extensions have dependencies themselves which cause kit to download and enable other extensions.
This said, for the final app it is important that it always gets the same extensions and the same versions on each run. This is meant to provide reliable and reproducible builds. This is called a version lock and we have a separate section at the end of kit file to lock versions of all extensions and all their dependencies.
It is also important to update the version lock section when adding new extensions or updating existing ones. To update version lock the precache_exts tool is used.
To update version lock run: tools/update_version_lock.bat.
Once you’ve done this, use your source control methods to commit any changes to a kit file as part of the source necessary to reproduce the build.
The packaging tool will verify that version locks exist and will fail if they do not.
More info on dependency management: doc
An Omniverse Extension
This template includes one simple extension: omni.hello.world. It is loaded in the example app, but can also be loaded and tested in any other Omniverse App. You should feel free to copy or rename this extension to one that you wish to create. Please refer to Omniverse Documentation for more information on developing extensions.
Using Omniverse Launcher
Install Omniverse Launcher: download
Install and launch one of Omniverse apps in the Launcher. For instance: Code.
Add a new extension to your Omniverse App
If you want to add extensions from this repo to your other existing Omniverse App.
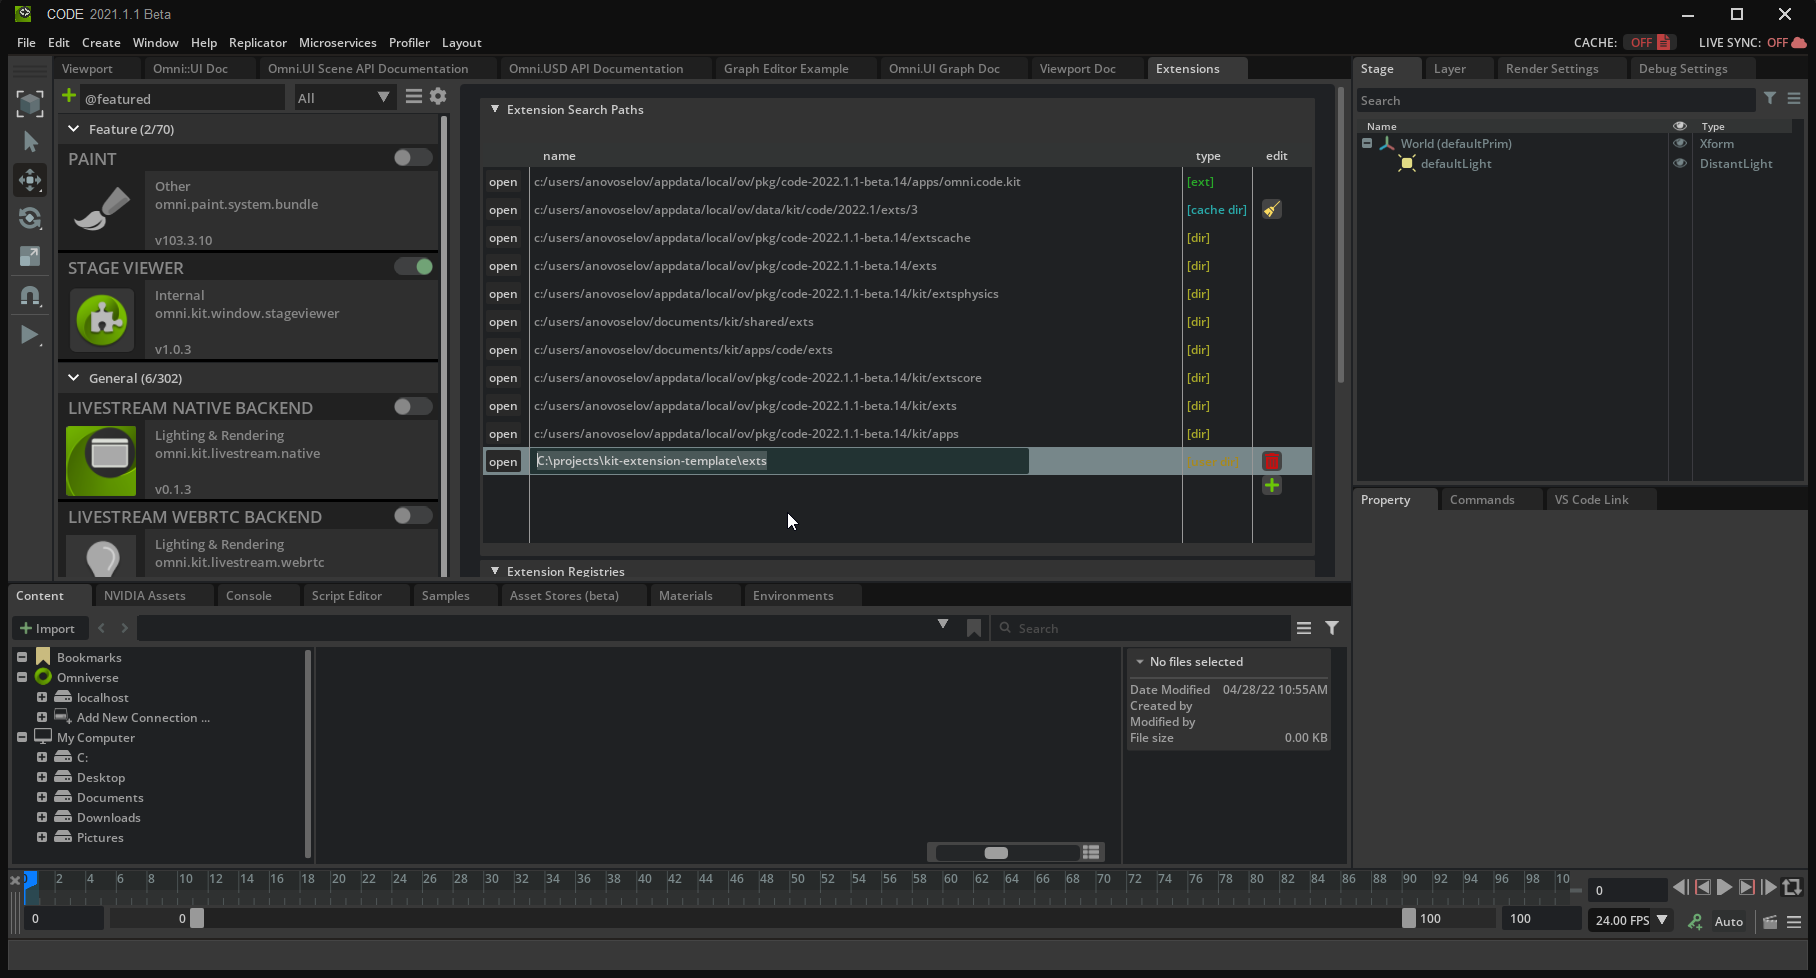
In the Omniverse App open extension manager: Window → Extensions.
In the Extension Manager Window open a settings page, with a small gear button in the top left bar.
In the settings page there is a list of Extension Search Paths. Add cloned repo
source/extensionssubfolder there as another search path:C:/projects/kit-project-template/source/extensions
Now you can find
omni.hello.worldextension in the top left search bar. Select and enable it.“My Window” window will pop up. Extension Manager watches for any file changes. You can try changing some code in this extension and see them applied immediately with a hotreload.
Adding a new extension
Now that
source/extensionsfolder was added to the search you can add new extensions to this folder and they will be automatically found by the App.Look at the Console window for warnings and errors. It also has a small button to open current log file.
All the same commands work on linux. Replace
.batwith.shand\with/.Extension name is a folder name in
source/extensions, in this example:omni.hello.world. This is most often the same name as the “Extension ID”.The most important thing that an extension has is its config file:
extension.toml. You should familiarize yourself with its contents.In the Extensions window, press Burger button near the search bar and select Show Extension Graph. It will show how the current App comes to be by displaying all its dependencies.
Extensions system documentation can be found here
Alternative way to add a new extension
To get a better understanding of the extension topology, we recommend following:
Run bare
kit.exewithsource/extensionsfolder added as an extensions search path and new extension enabled:
> kit\kit.exe --ext-folder source/extensions --enable omni.hello.world
--ext-folder [path]- adds new folder to the search path--enable [extension]- enables an extension on startup.
Use -h for help:
> kit\kit.exe -h
After the App starts you should see:
new “My Window” window popup.
extension search paths in Extensions window as in the previous section.
extension enabled in the list of extensions.
It starts much faster and will only have extensions enabled that are required for this new extension (look at [dependencies] section of extension.toml). You can enable more extensions: try adding --enable omni.kit.window.extensions to have extensions window enabled (yes, extension window is an extension too!):
> kit\kit.exe --ext-folder source/extensions --enable omni.hello.world --enable omni.kit.window.extensions
You should see a menu in the top left. From this UI you can browse and enable more extensions. It is important to note that these enabled extensions are NOT added to your kit file, but instead live in a local “user” file as an addendum. If you want the extension to be a part of your app, you must add its name to the list of dependencies in the [dependencies] section.
A third way to add an extension
Here is how to add an extension by copying the “hello world” extension as a template:
copy
source/extensions/omni.hello.worldtosource/extensions/[new extension id]rename python module (namespace) in
source/extensions/[new extension id]/omni/hello/worldtosource/extensions/[new extension id]/[new python module]update
source/extensions/[new extension name]/config/extension.toml, most importantly specify new python module to load:Optionally, add the
[extension id]to the[dependencies]section of the app’s kit file.
[[python.module]] name = “[new python module]”
Running Tests
To run tests we run a new configuration where only the tested extension (and its dependencies) is enabled. Like in example above + testing system (omni.kit.test extension). There are 2 ways to run extension tests:
Run:
tools\test_ext.bat omni.hello.world
That will run a test process with all tests and exit. For development mode pass --dev: that will open test selection window. As everywhere, hotreload also works in this mode, give it a try by changing some code!
Alternatively, in Extension Manager (Window → Extensions) find your extension, click on TESTS tab, click Run Test
For more information about testing refer to: testing doc.
No restart is needed, you should be able to find and enable [new extension name] in extension manager.
Contributing
The source code for this repository is provided as-is and we are not accepting outside contributions.
License
By using any part of the files in the KIT-PROJECT-TEMPLATE repo you agree to the terms of the NVIDIA Omniverse License Agreement, the most recent version of which is available here.