Getting Started with Extensions
This guide will help you get started creating new extensions for Kit based apps and sharing them with other people.
While this guide can be followed from any Kit based app with a UI, it was written for and tested in Create.
Note
For more comprehensive documentation on what an extension is and how it works, refer to :doc:Extensions <extensions>.
Note
We recommend installing and using Visual Studio Code as the main developer environment for the best experience.
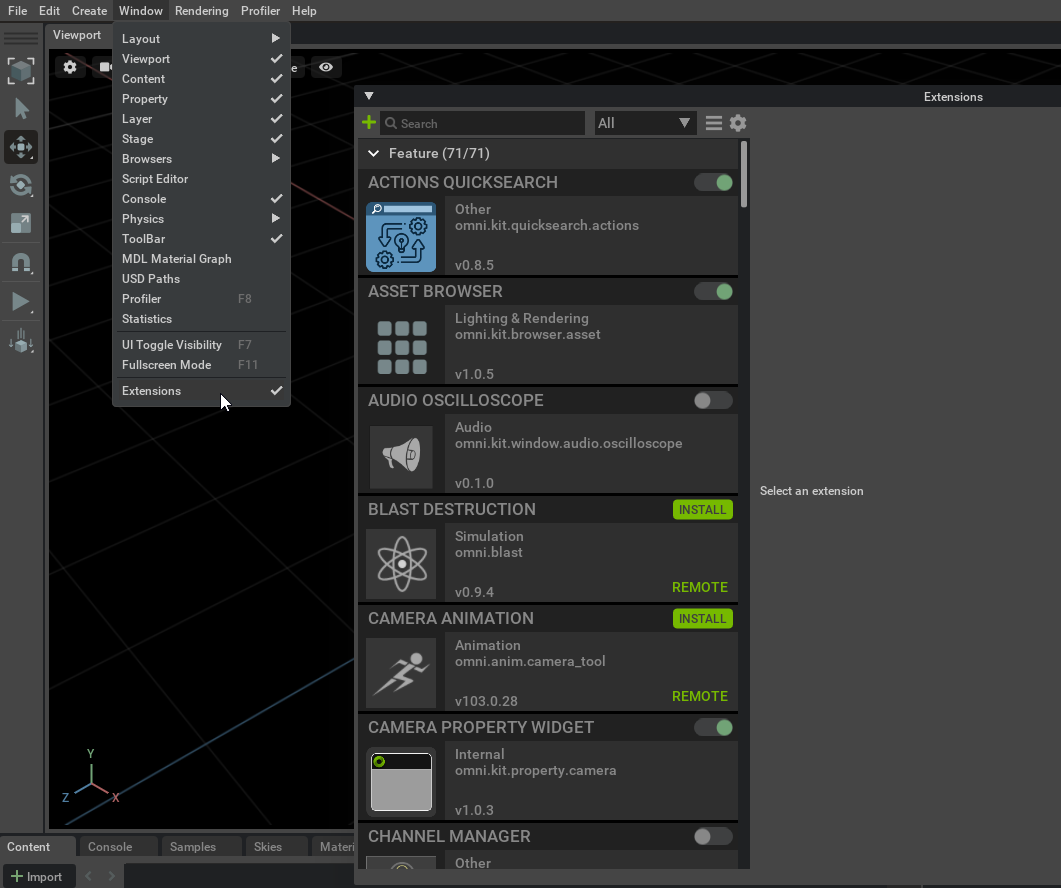
1. Open Extension Manager UI: Window -> Extensions

This window shows all found extensions, regardless of whether they are enabled or disabled, local or remote.
3. Push to git
When you are ready to share it with the world, push it to some public git repository host, for instance: GitHub
A link to your extension might look like: git://github.com/[user]/[your_repo].git?branch=main&dir=exts.
Notice that exts is repo subfolder with extensions. More information can be found in: Git URL as Extension Search Paths.
The repository link can be added right into the extension search paths in UI:

To get new changes pulled in from the repository, click on the little sync button.
Note
Git must already be installed (git command available in the shell) for this feature to work.
More Advanced Things To Try
Explore kit.exe
From Visual Studio Code terminal in a newly created project you have easy access to Kit executable.
Try a few commands in the terminal:
app\kit\kit.exe -hto get startedapp\kit\kit.exe --ext-folder exts --enable company.hello.worldto only start newly added extension. It has one dependency which will automatically start few more extensions.app\kit\omni.app.mini.batto run another Kit based app. More developer oriented, minimalistic and fast to start.
Explore other extensions
Kit comes with a lot of bundled extensions. Look inside app/kit/exts, app/kit/extscore and app/exts. Most of them are written in python. All of the source to these extensions is available and can serve as an excellent reference to learn from.

