Motion Path (beta)#
Overview#
The Motion Path allows the user to plot the motion of an object along a curve. Enabling a high level control of the objects motion to simplify the creation of dynamic motions. Motion paths can be used to plot the path of Cars, Aircraft, Cameras and other such dynamic motions. While Making it easy to create a chase camera for an object in your scene.
How to Create a Motion Path#
If not already loaded - you can load the motion path extension in the extension manager. Find omni.anim.motion_path The first step is to create a motion curve to attach your object too.
Create a Basis Curve#
Before creating the motion path you will need to draw a Bezier curve to plot your object along. Once the curve is created,you can execute the motion path on a prim and assign to the motion path.
You can find the Basis curves in the Create menu - Create/BasisCurves/from bezier.
Creating the motion path#
Select the object you want to attach to the motion path.
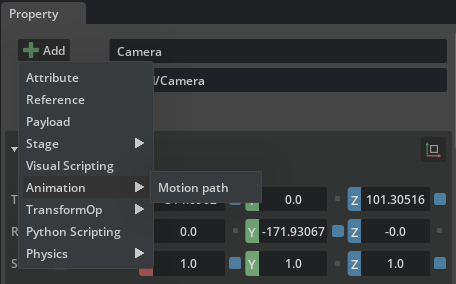
In the properties Panel, go to Add/Animation and select Motion Path.
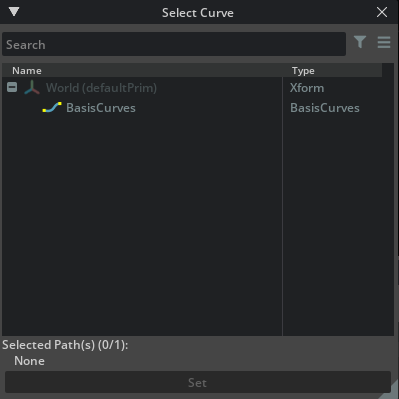
A dialogue Box will open, Prompting the user to select a curve from the current stage.
Select the basic curve and click Set,The motion path will be created and the object will snap to the path.
Setup Motion paths#
To animate the prim along the path use the U-value found on the prim properties,Right click to set a keyframe. Animating a value from 0 to 1 will position the prim along the path.

U-value#
The U value determines the objects position along the curve - animate this parameter to animate the object.
0 will set the object to the start of the curve.
1 will set the object to the end of the curve.
Forward Axis#
Depending on the orientation of the Prim constrained to the motion path,it may or may not be pointing in the correct direction along the path. In this case,Select the correct Forward Axis for the prim to align to your preference.
Up Axis#
Sets the up Vector on the Prim Constrained to the motion path.
Note
Forward Axis and Up Axis cannot be set to the same axis.
Aim Offset#
Roll - Pitch and Yaw - as the object animates along the curve - you can offset it’s orientation with these controls.
World Up type#

Scene |
Aligns world up for the motion path to be the same as the stages world up.
|
Click Set World Up Object and Select the Target Prim from the presented Stage menu.

Object |
Enables a prim to be a target for the world up - You can animate the target prim to control it’s position relative to the path and offset the objects upward orientation.
|

Vector |
Allows the user to specify a direction for the world up Vector.
|
Note
Depending on the type of object you are animating - you may want more control of the object on top of the motion path. Where this is the case - It is recommended to put the Prim under an Xform - and attach the Xform to the motion path. This will allow you to freely keyframe a Prim as it rides along the curve.