Set Up Your Development Environment
In this tutorial, you set up your computer environment so you can write and publish NVIDIA Omniverse™ extensions.
Check out this video if you only need the GIT portions of this tutorial:

Then, follow this video to complete your installation and optionally set up Nucleus:
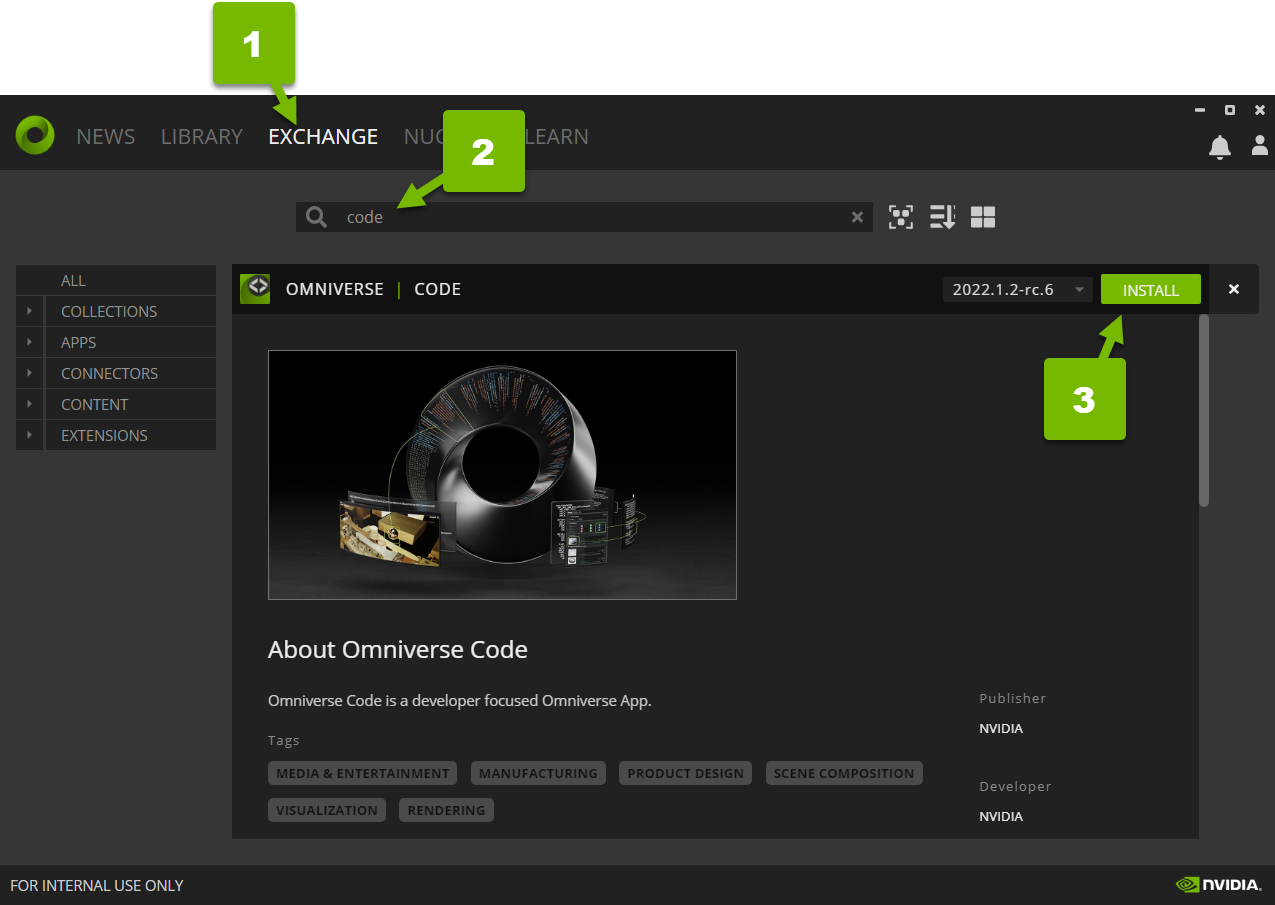
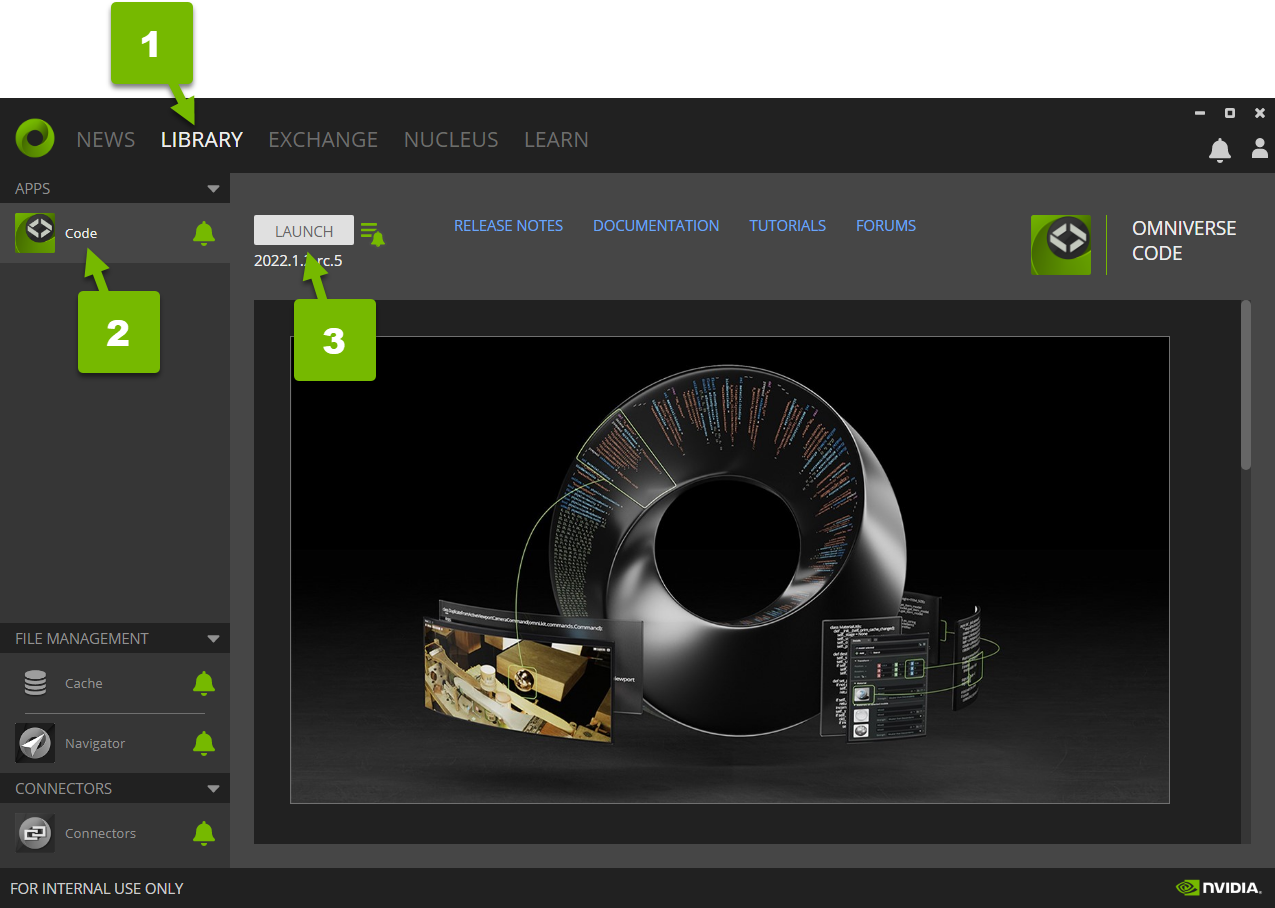
From the Omniverse launcher, navigate to the Exchange tab. Search for “code”, and click the Omniverse Code app. Click Install. The installation will proceed automatically from this point. Perform the standard installation. Use the default options. In this section, you create a new extension inside NVIDIA Omniverse™ Code. From the Omniverse Launcher, click Library, then Code, then
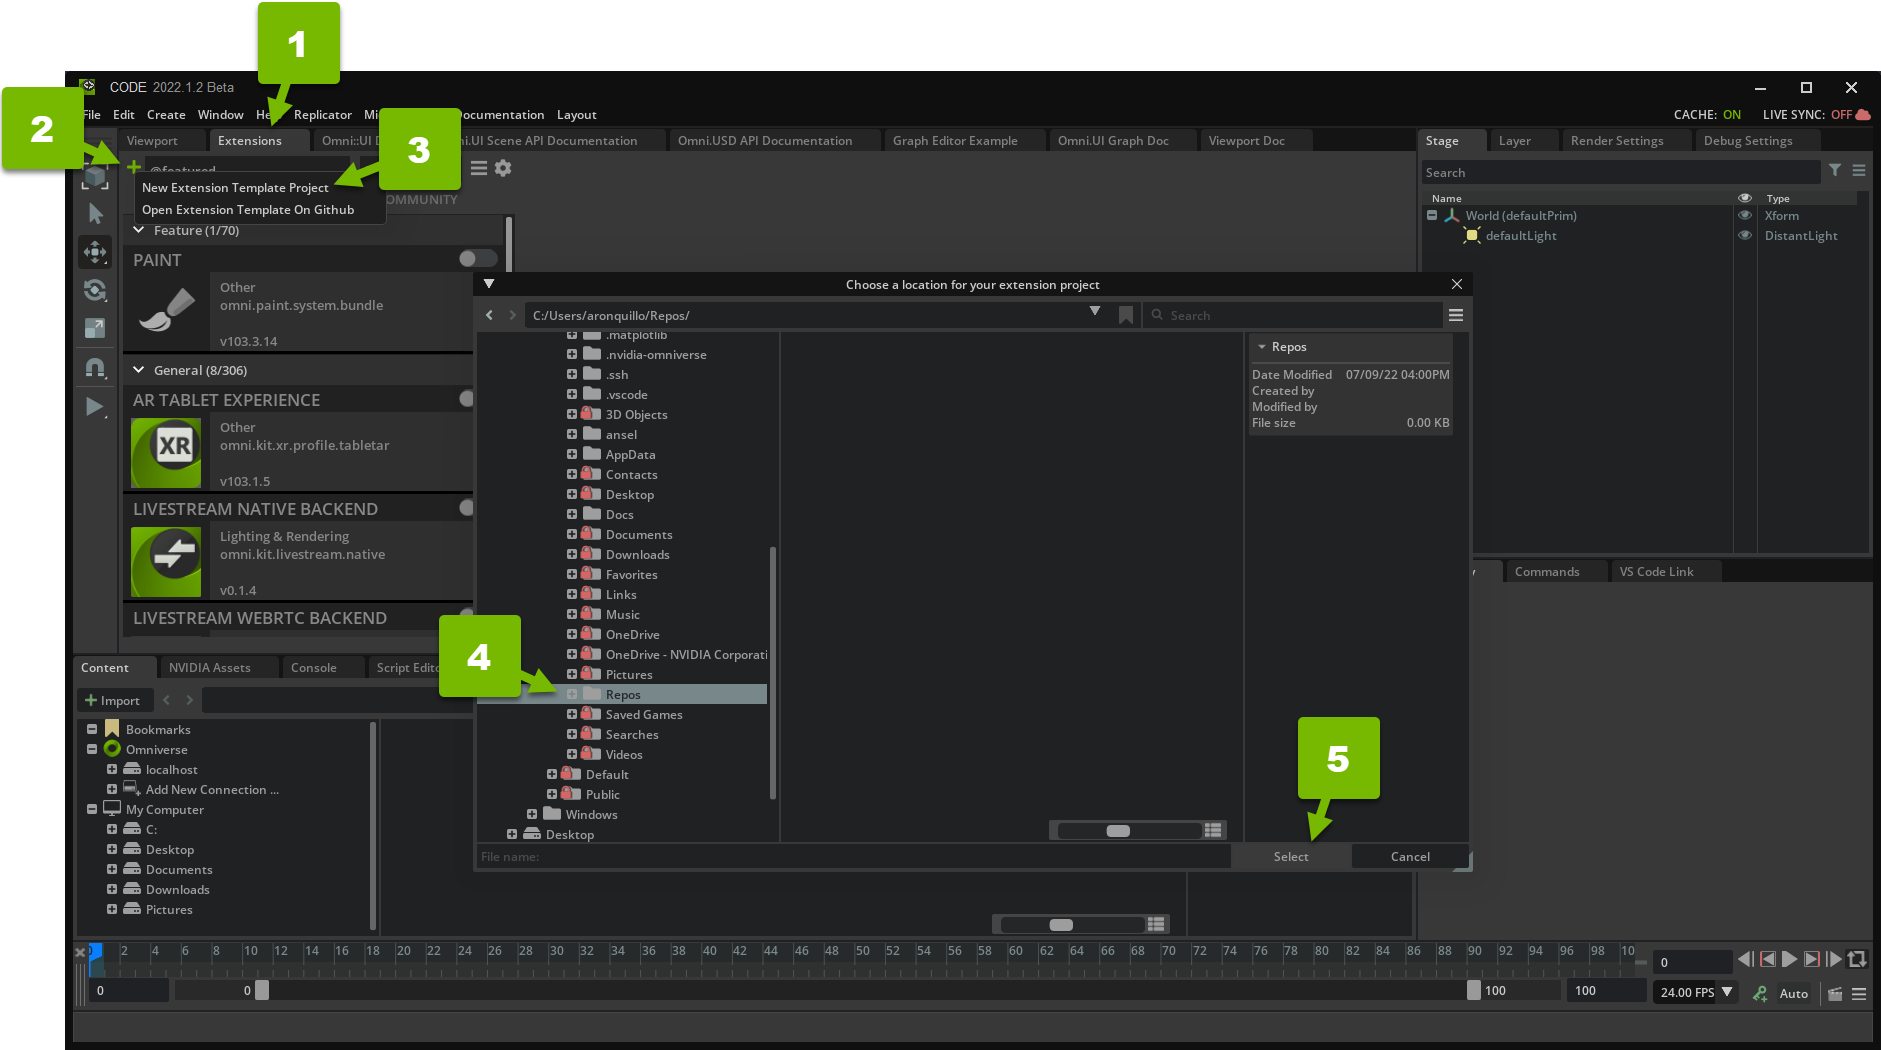
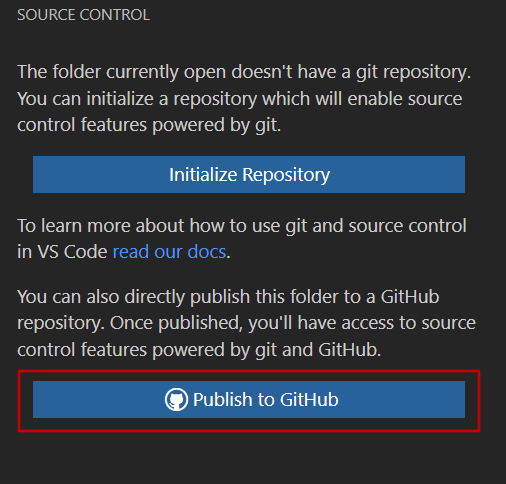
Launch: Choose a folder on your file system where you’ll store all of your repositories. For example, C:/Users/YOUR_USER_NAME/Repos if you’re on Windows. The rest of this tutorial refers to this as your project folder. In Omniverse Code, open the Extensions panel Click the ➕ icon Click New Extension Template Project Select your project folder Click Select Name the root folder for your Extension repository Name your Extension For the Extension name, use the following convention: In this convention, <namespace> is a unique name for your personal Extension space. Following your namespace is a series of one or two <extension_descriptor> elements. The first word should be general, and the second word, if you have one, should be specific. For example, an Excel reading sample Extension might have the name “UniqueNamespace.Sample.Excel”. When you submit your Extension, Visual Studio Code will be opened to your new Extension’s repository. Follow our tutorial on Creating your First Extension. Join Us: Join us on Discord where you can chat with community members and NVIDIA developers and participate in frequent Omniverse hangouts and hackathons. In this section, you create a Git repository containing your extension and publish it to GitHub. Navigate to the Source Control tab in Visual Studio Code: Click Publish to GitHub: If this is your first time connecting to GitHub from Visual Studio Code, click Allow and log in to GitHub. Click Publish to GitHub private repository. You can always change to a public repository when you are ready to share your Extension with the world. Note You may have to click through a few more setup prompts before moving on. While learning Git requires its own tutorial, get started with your
first commit: Write your code. Go back to the Source Control tab. Write a message in the Commit Message box. Click the check mark to commit your code. Click the Sync button to sync your code with the GitHub server. Note You may have to click through a few more setup prompts before moving on. For your Extension to show up in the Omniverse Extensions window, you
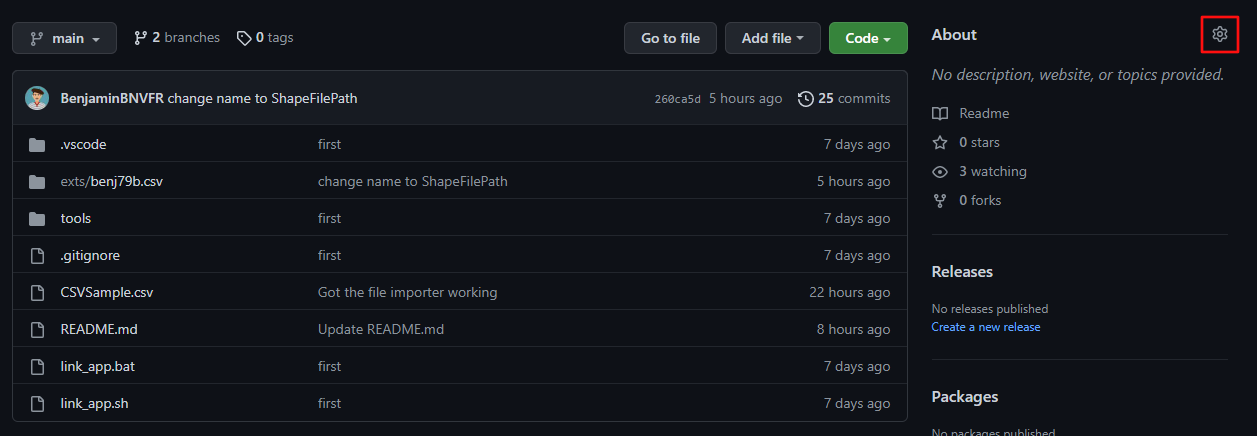
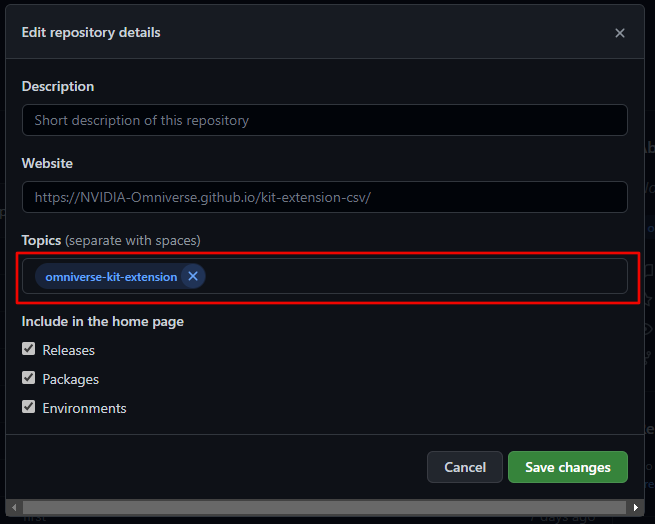
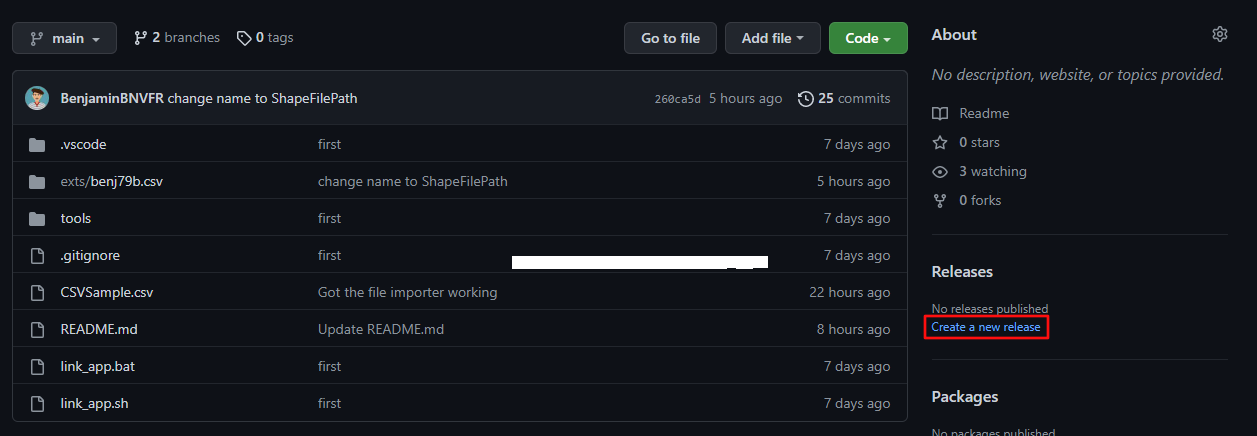
have to: Add the omniverse-kit-extension topic to your repo Create a release Make your repo public Start by navigating to your project in GitHub. Click on the gear in the About section of your repository. In the popup that appears, add omniverse-kit-extension to the topics
text field: Click Save changes. Under Releases, click Create a new release: Once you’re on the release page: Click Choose a tag Enter a name such as “v1.0” for your tag Click + Create a new tag Click Publish release When your Extension is complete, and you’re ready for it to appear in the Extension catalog within Omniverse, go to your repository settings, scroll down to the Danger Zone and make your repository public. In this tutorial, you learned how to: Install the software you need to create Omniverse extensions. Create a GitHub account. Create an Extension. Publish your Extension to GitHub. Make the Extension available to the community within Omniverse.Step 1: Install Omniverse

Step 2: Install Omniverse Code
Step 3: Install VS Code

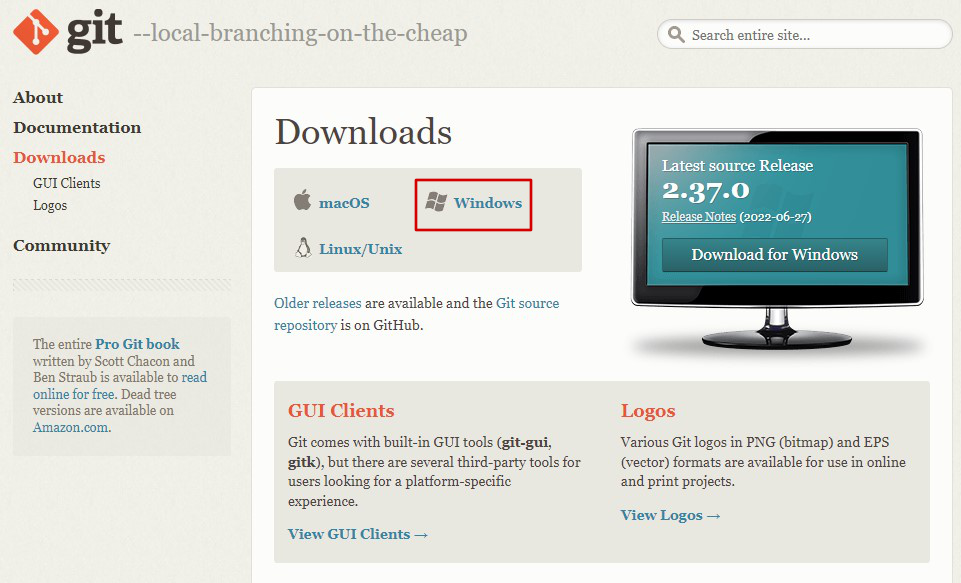
Step 4: Install Git
Step 5: Create a GitHub Account

Step 6: Create a New Extension
Step 6.1: Launch Code
Step 6.2: Establish a Project Folder
Step 6.3: Create an Extension Template
Step 6.4: Name your Extension
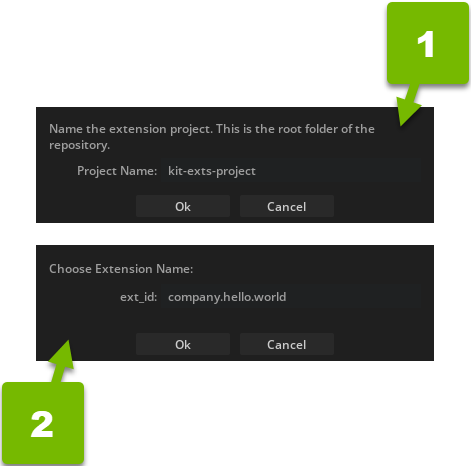
<namespace>.<extension_descriptor_1>.<extension_descriptor_2>
Step 6.5: Create Your Extension
Step 7: Create a GIT Repository
Step 7.1: Create Your Repository

Step 7.2: Publish the Repository to GitHub
Step 7.3: Choose a Public or Private Repository

Step 7.4: Open the Repository on GitHub
Step 8: Release Your Extension to the Omniverse Community
8.1: Add the omniverse-kit-extension Topic
8.2: Create a Release

8.3: Make the Repository Public
Conclusion