Tower Demopack Workflow
Overview
Learn how harness the power of OpenUSD and utilize Omniverse as a data aggregation platform in this immersive Tower Demopack experience. This documentation will walk you through a few common workflows that will enable you to effectively explore the Tower Demopack files and develop some critical skills that you can integrate into your daily work.
Learning Objectives
In this guide, you learn how to:
Utilize OpenUSD and Omniverse to assemble and experience large worlds and understand its value as a data aggregation platform.
Identify features and benefits of OpenUSD (payloads, references, layers, non-destructive editing)
Navigate a scene and utilize basic features of USD Composer.
Prerequisites
Install the Omniverse Launcher .
Install and open Omniverse USD Composer .
Omniverse compatible GPU .
Basic understanding of 3D design software.
Step 1: Opening the File
The Tower Demopack contains a series of files catered for different workflows. You can learn more about each demo the Read Me located in the folders.
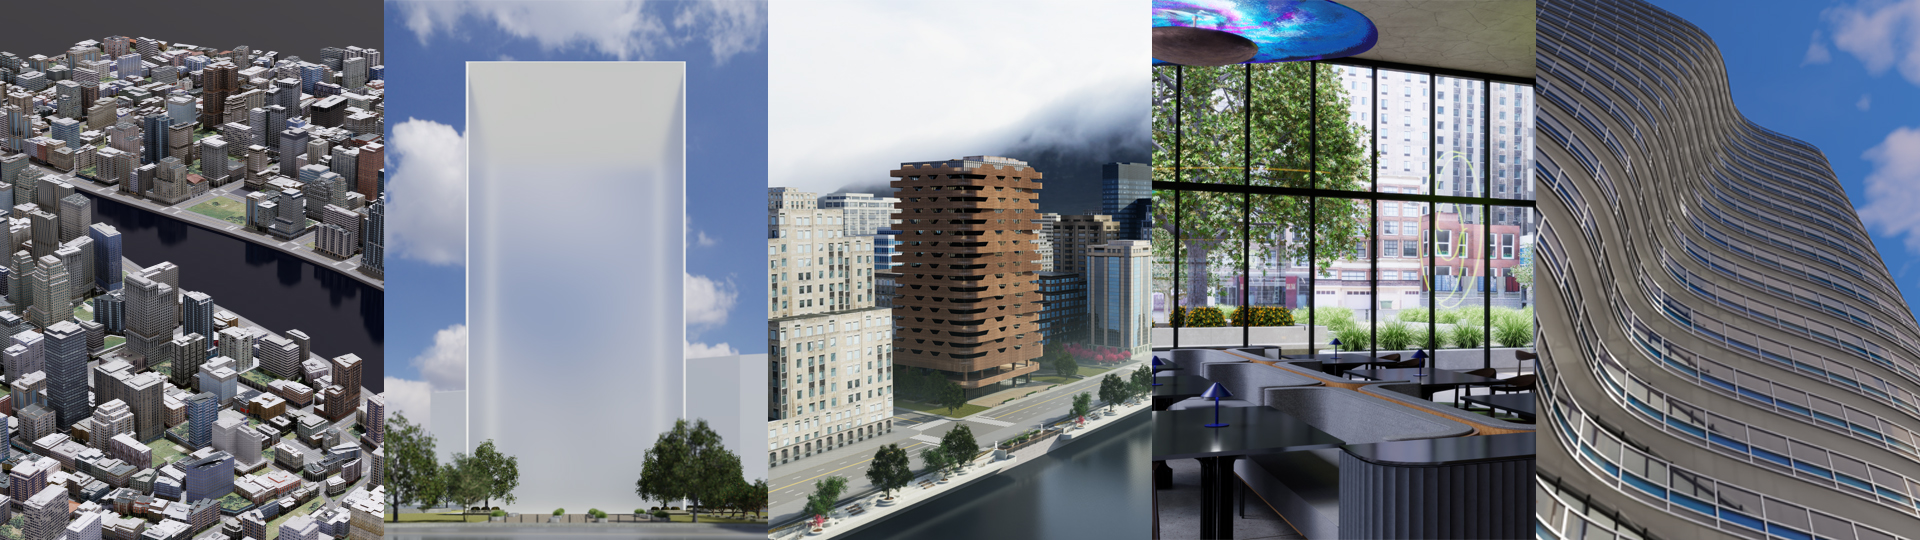
For this workflow, we are using CityMassingDemopack, which includes an abstracted model of the city and tower.
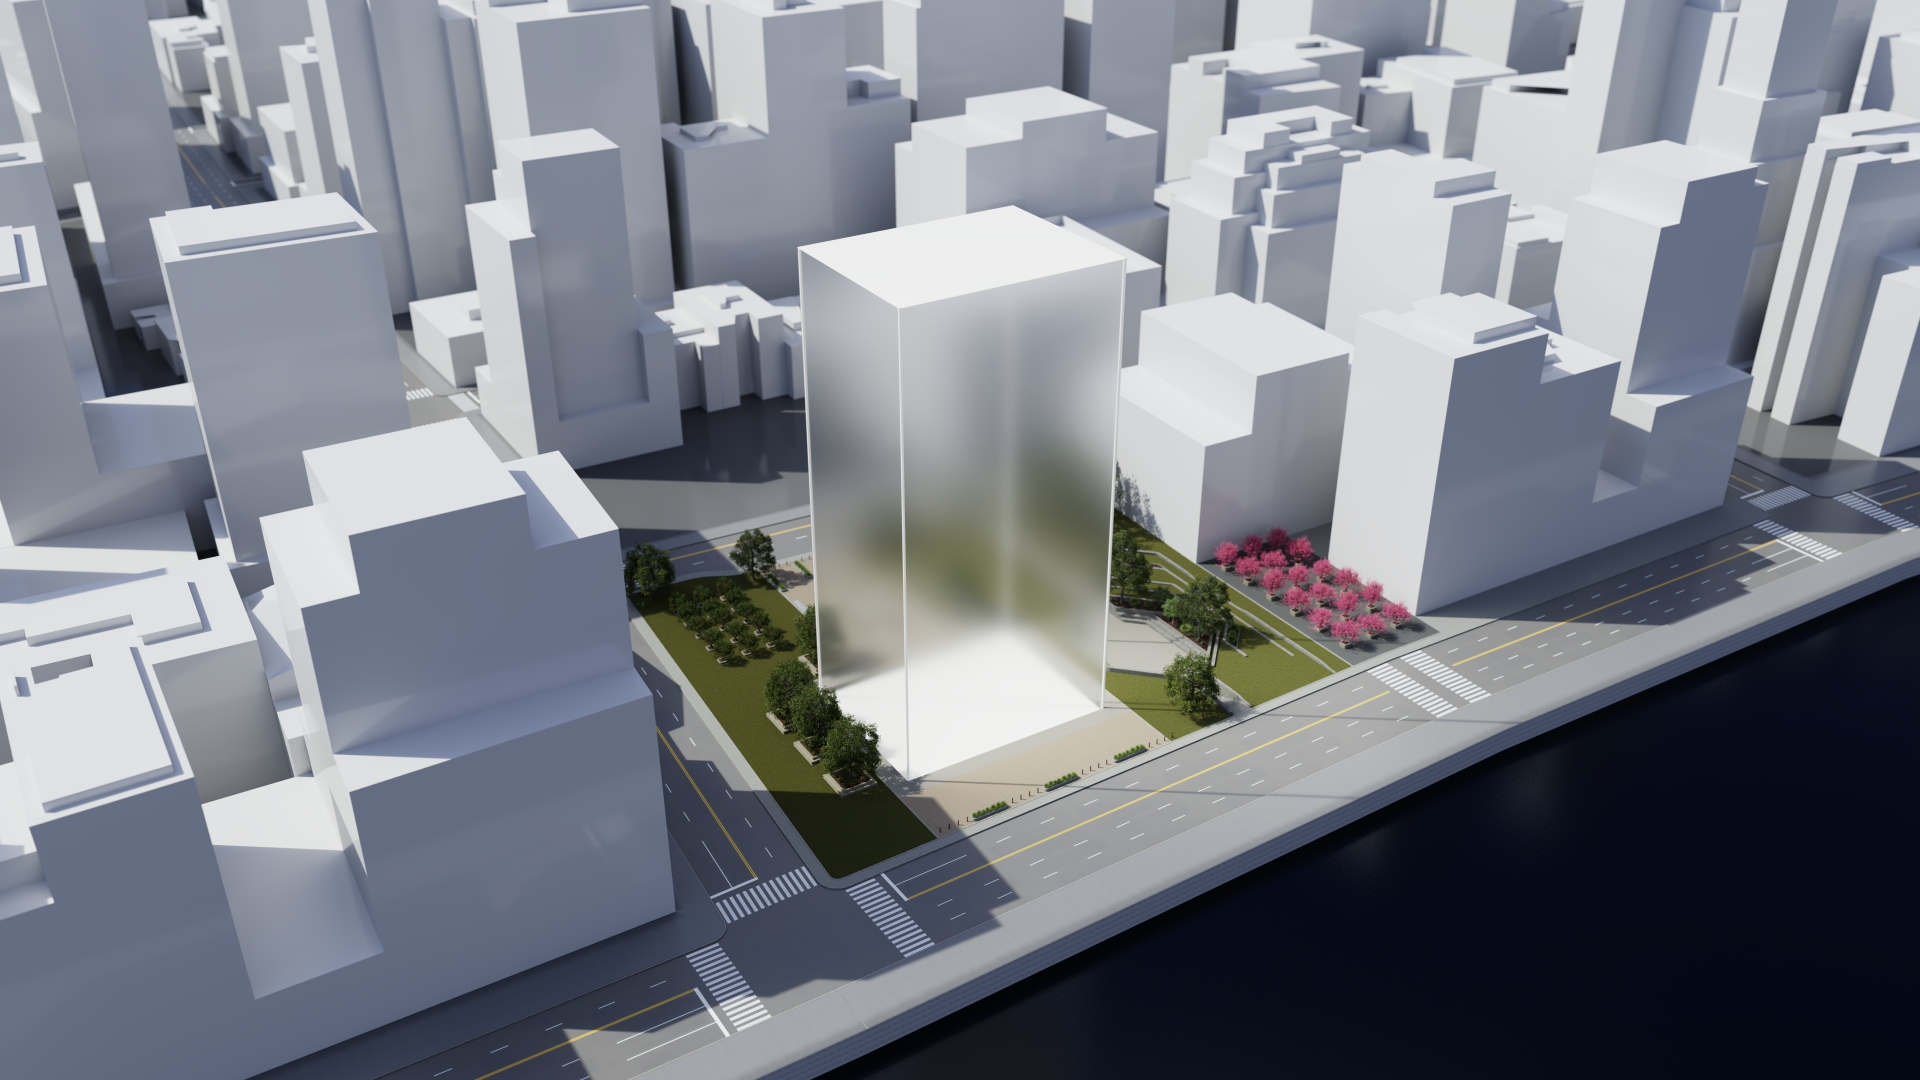
Description automatically generated
Step 1.1: Launch USD Composer
In the Omniverse Launcher, navigate to the Library. Locate USD Composer and select Launch. If you do not already have USD Composer installed, you can navigate to the Exchange tab and search for it there.
Step 1.2: Open CityMassingDemopack
Find the folder containing the demo and open World_CityMassingDemopack.usd.

The program will ask you if you’d like to “Open Original File” or “Open With New Edit Layer”.
Open With New Edit Layer: will prompt you to create a new USD file that you can author changes to.
If you want to use this setting, you can use the default naming, find a folder to save to that is not read-only, and hit save.
Note
This workflow is best when you want to make non-destructive changes to a USD file, such as a read-only file or a direct export from a DCC application.
Open Original File: will open this file in a read-only state with the Root Layer set as the authoring layer.
For now, let’s work in the Original File by selecting Open Original File.
Step 2: Understanding Render Modes
In Omniverse, there are various ways to experience your model.
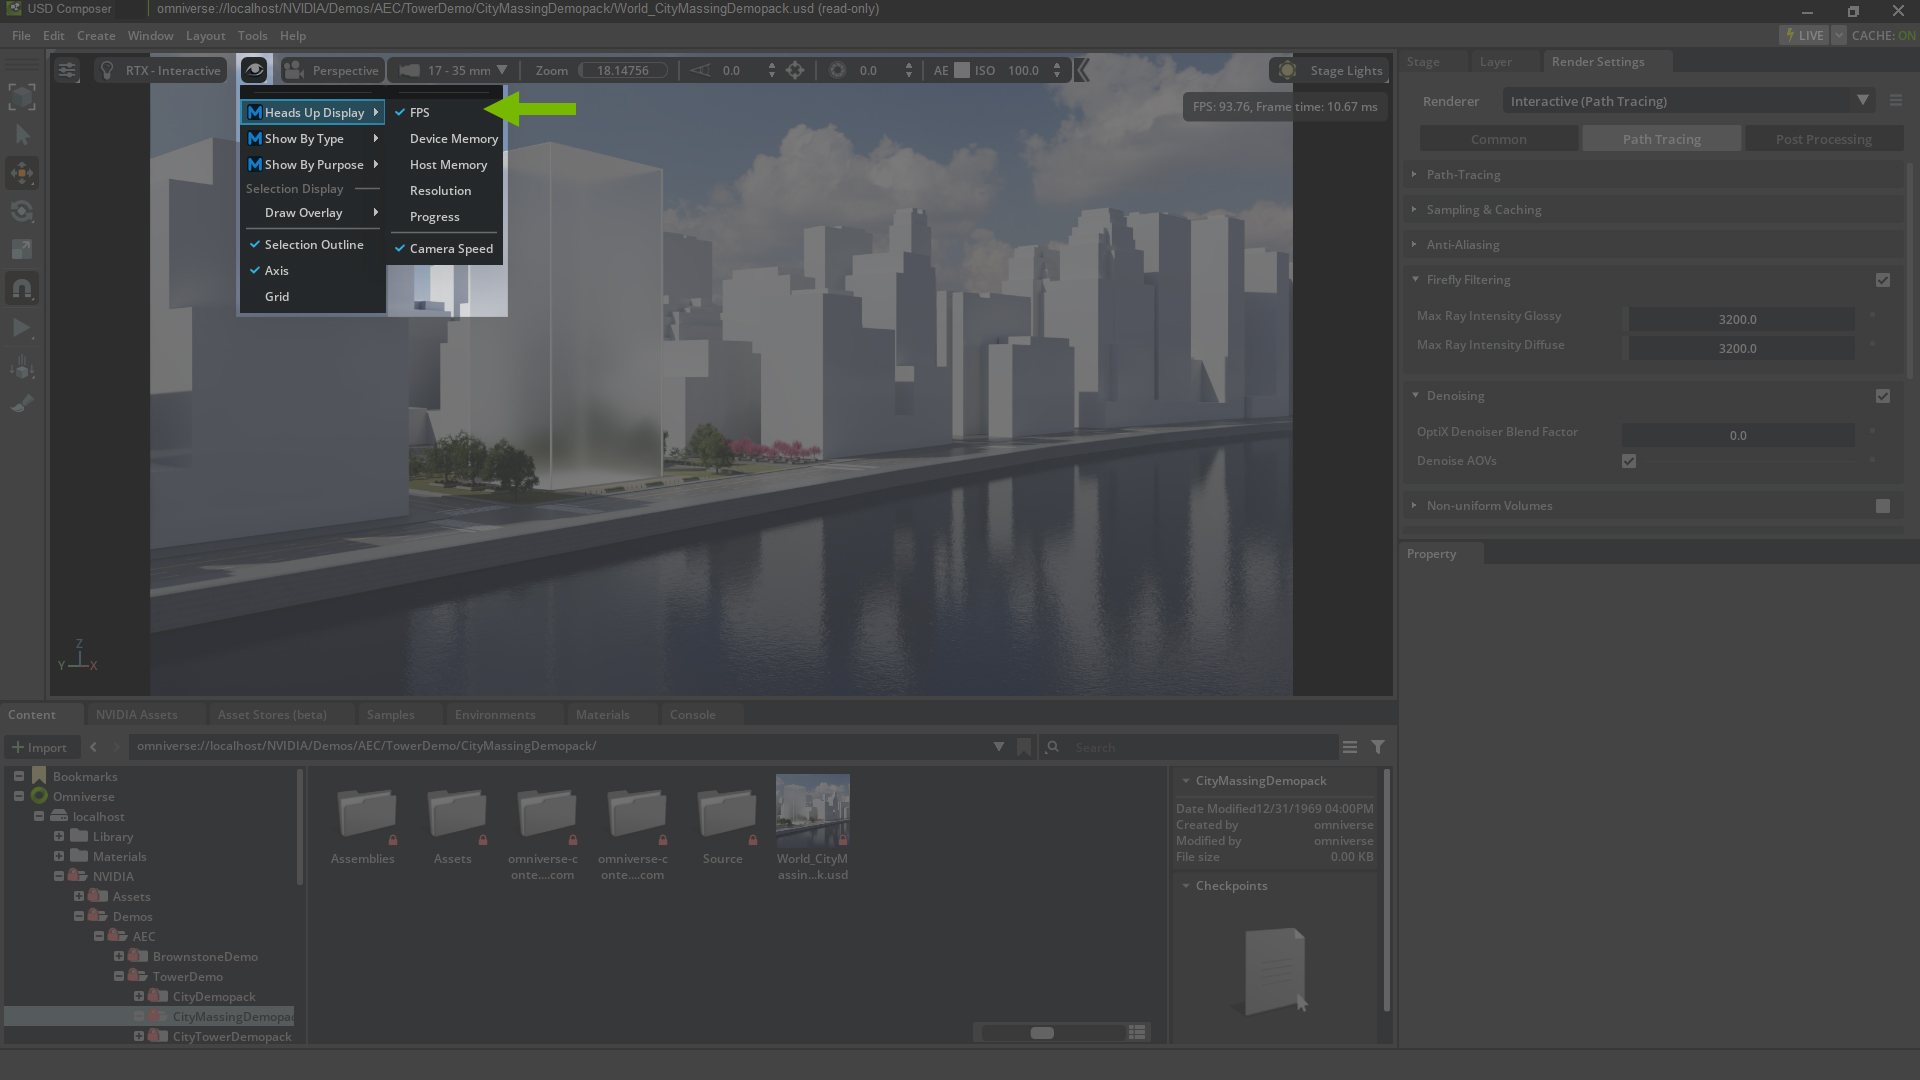
Different renderers or render modes are available in the drop-down menu in the Viewport. For now, flip between RTX Real Time and RTX Interactive to see how your experience changes.
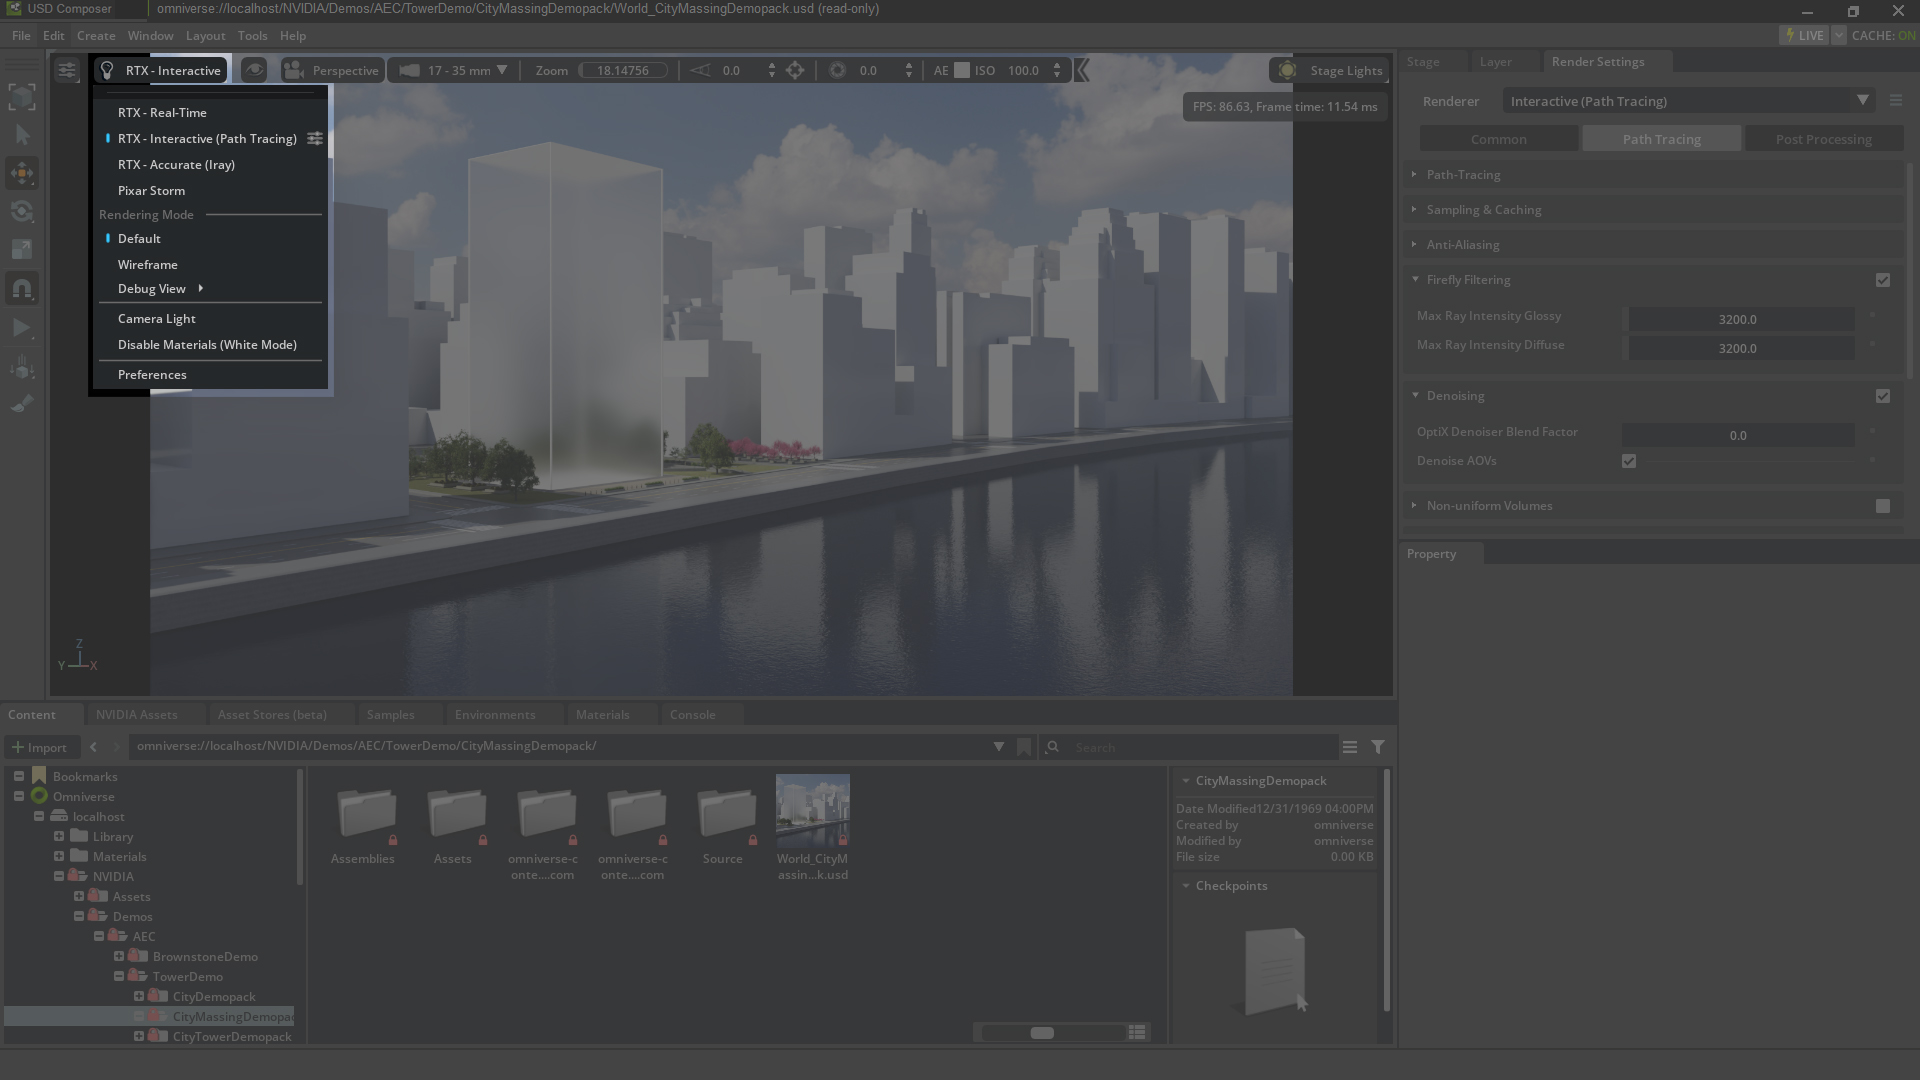
If you do not already have it visible, turn on FPS from the Heads Up Display settings to see how your frame rate changes between RTX Real Time and RTX Interactive. Depending on your hardware, you may find it easier to work in RTX Real Time where you get better performance. Select the setting that you prefer.
For more information on rendering and render modes, spend some time on the rendering documentation page.
Step 4: Adding and Editing Cameras
If you click on the Camera dropdown menu [4.1], you will notice there are several cameras already in the scene, as well as views for Perspective, Top, Front and Right.
While in Perspective mode, use your navigation tools to find an angle that you like, go back to your Camera drop down menu, and select Create from View [4.2].
This added a new camera to your scene, which you can see in the Stage as “Camera” [4.3]. You can continue to move the camera once it is created by using your navigation tools or adjusting the camera properties (which are visible in the Property panel [4.4] when the camera is selected in the stage).
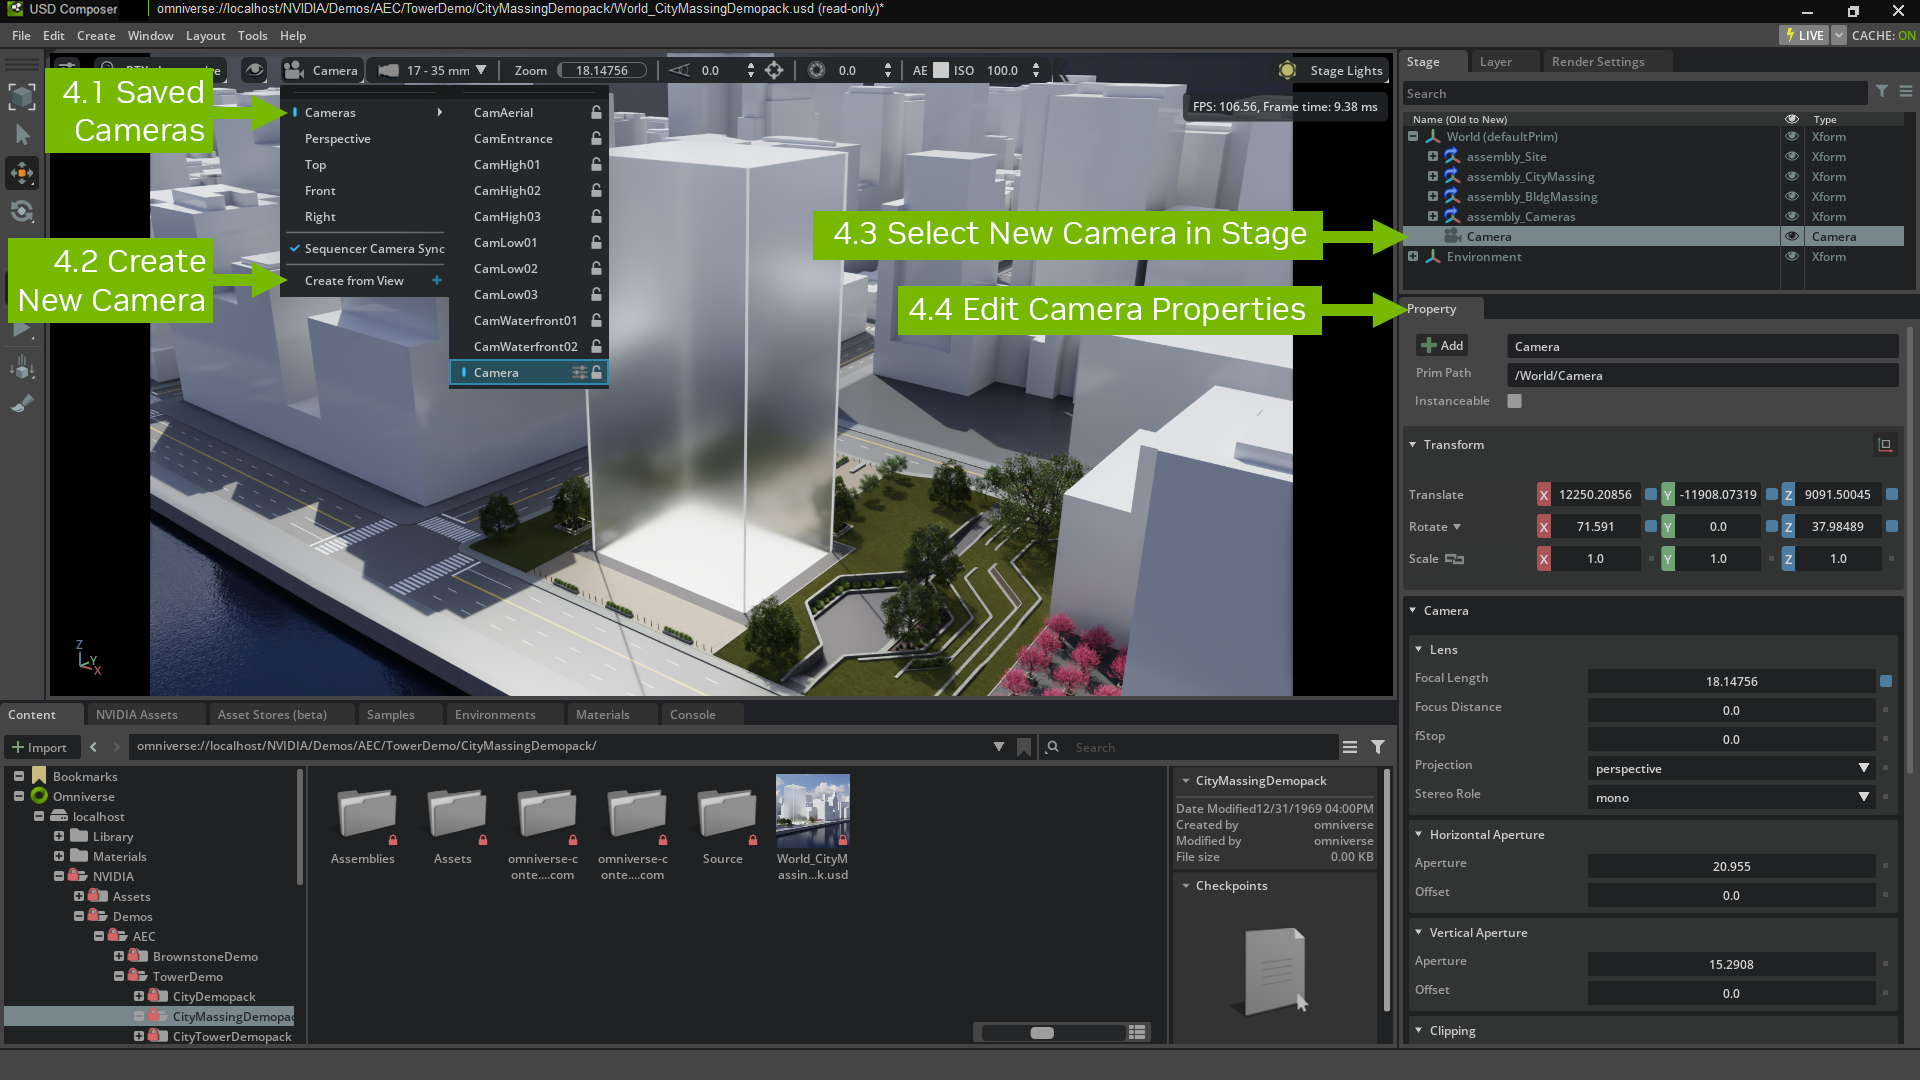
Visit the Camera documentation page to learn more about using cameras and camera properties to adjust your camera.
Step 5: Modify the Sun Position
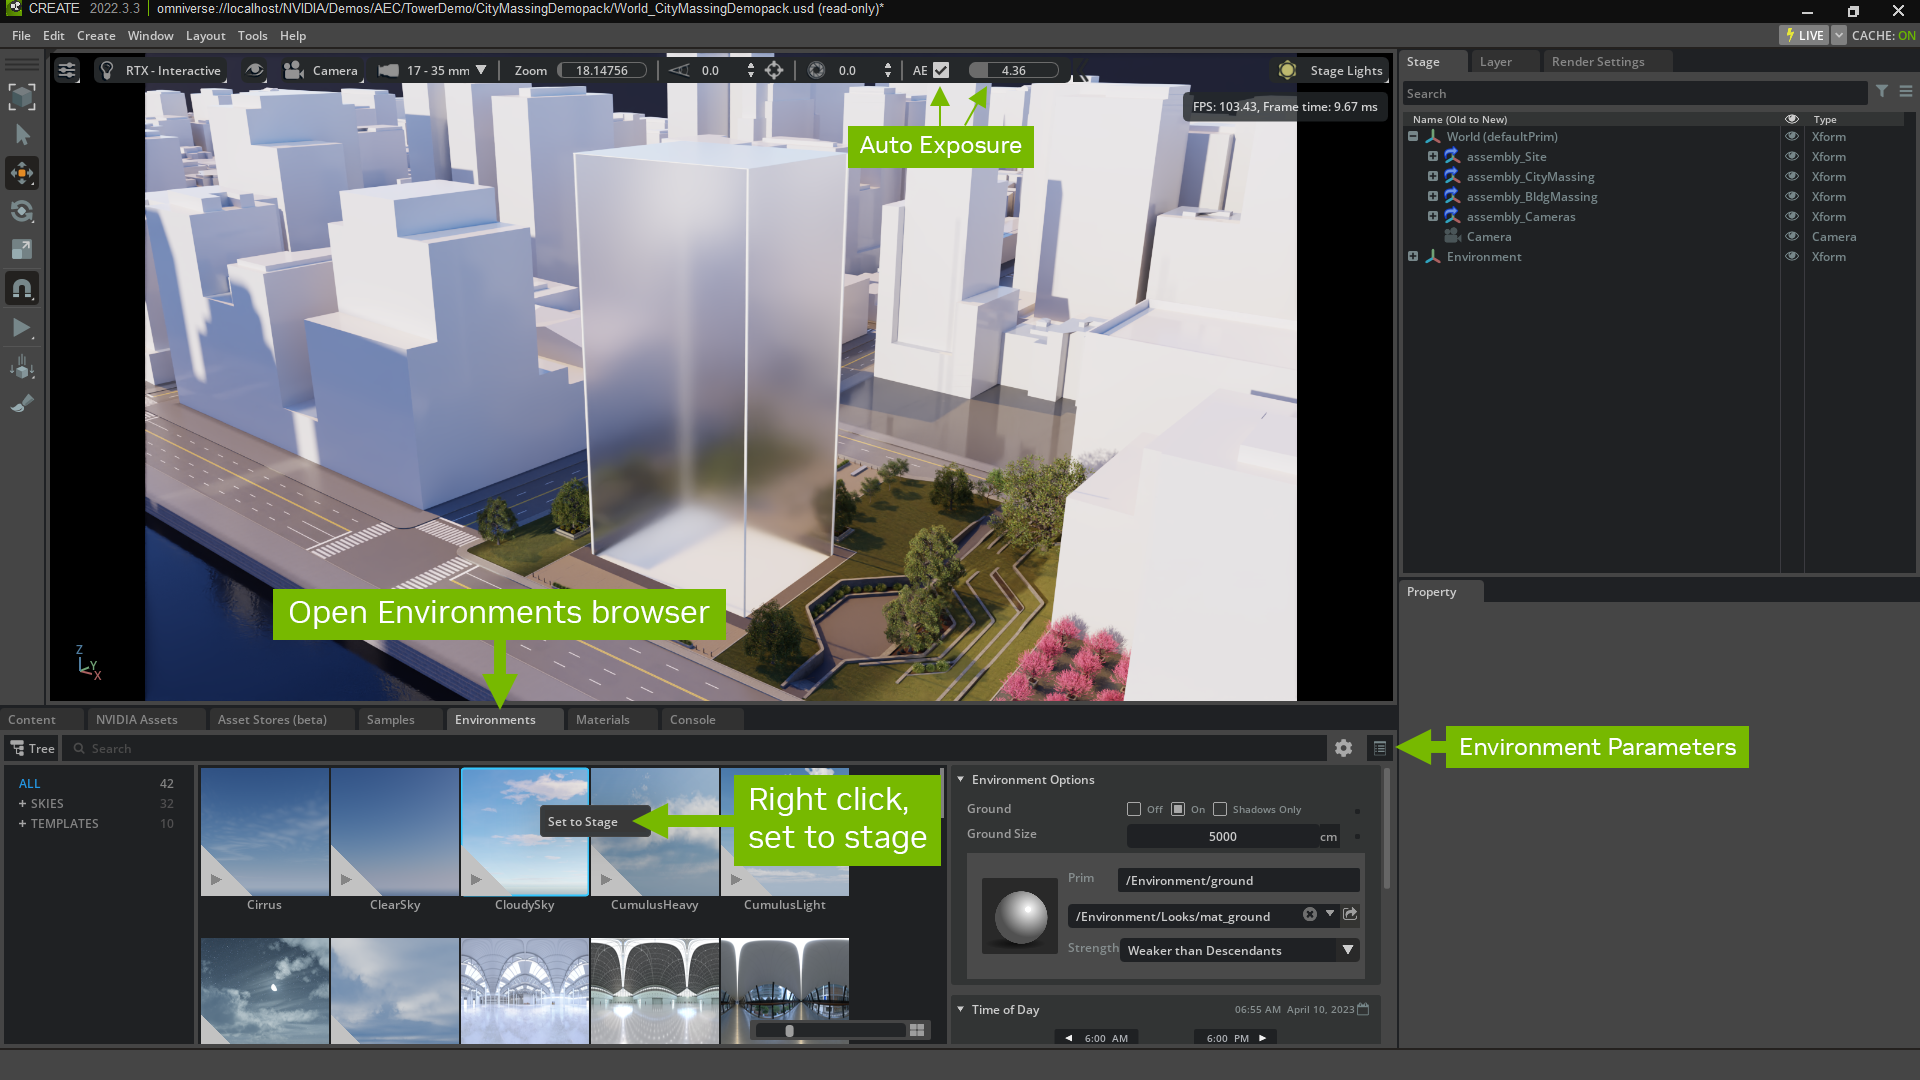
Omniverse provides several pre-built environments that can be loaded into your scene, including Dynamic Skies. In the Environments browser, you can see which skies are dynamic because they have a play button icon in the bottom left corner.
Step 5.1: Add a dynamic sky
Pick a dynamic sky, like CloudySky, right click and add to scene. You’ll notice the quality of light in the scene changed. You may want to adjust your auto exposure if the scene feels blown out.
Step 5.2: Play the sun study
Open the environment parameters and hit the play button under time of day to simulate sun over time. You can also manually adjust the time of day or type in the date, time, and year.
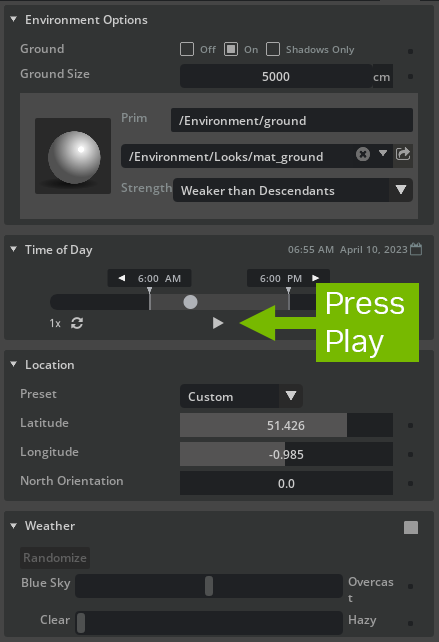
Step 5.3: Adjust environment parameters
Play with the other settings, including setting a location for your site, the direction of North, and weather.
Note
To see which direction is north, go to your Stage, drop down the Environments Xform until you see Arrows NWSE. Turn the visibility on and rotate your north orientation in the environment parameter.
Find a sun position that you like and move on to the next step.
Step 6: Adding Geometry
One of the superpowers of Omniverse and the OpenUSD framework is the ability to aggregate files from multiple sources into one scene. In this case, we are calling that top level scene a World file, with various Assembly files brought in as payloads.
You can see those Assembly files in the stage (assembly_Site, assembly_CityMassing, etc). Each one of these Xforms is a payload that is a separate USD file referenced into the scene. As you expand each one of these Xforms, see that they are made up of many parts, including additional payloads and geometry coming from DCC applications.
Note
What’s the difference between a payload and a reference?
The key difference between payloads and references is that payloads are not always consumed when a stage is built. Payloads are weaker than references, and if you decide not to load them, they’ll will be recorded, but not consumed.
Payloads and references are great to work with because they can easily be swapped in the scene. For example, assembly_BldgMassing is a simplified massing of a tower design.
Step 6.1.1: Add your own design
Design a new tower in your favorite design software (or use something you’ve already created). The footprint of the existing massing is approximately 28m x 36m, and the origin is in the bottom left corner of the building.
Note
If you do not have your own design, skip to 6.2.
You will need to download the connector for your application. Confirm if there is an existing connector for your favorite design tool, as well as instructions on how to use each connector to get started. Once installed, follow the user manual to successfully send your file to Omniverse. We recommend sending your file as a prop.
Step 6.1.2: Replace the current massing model
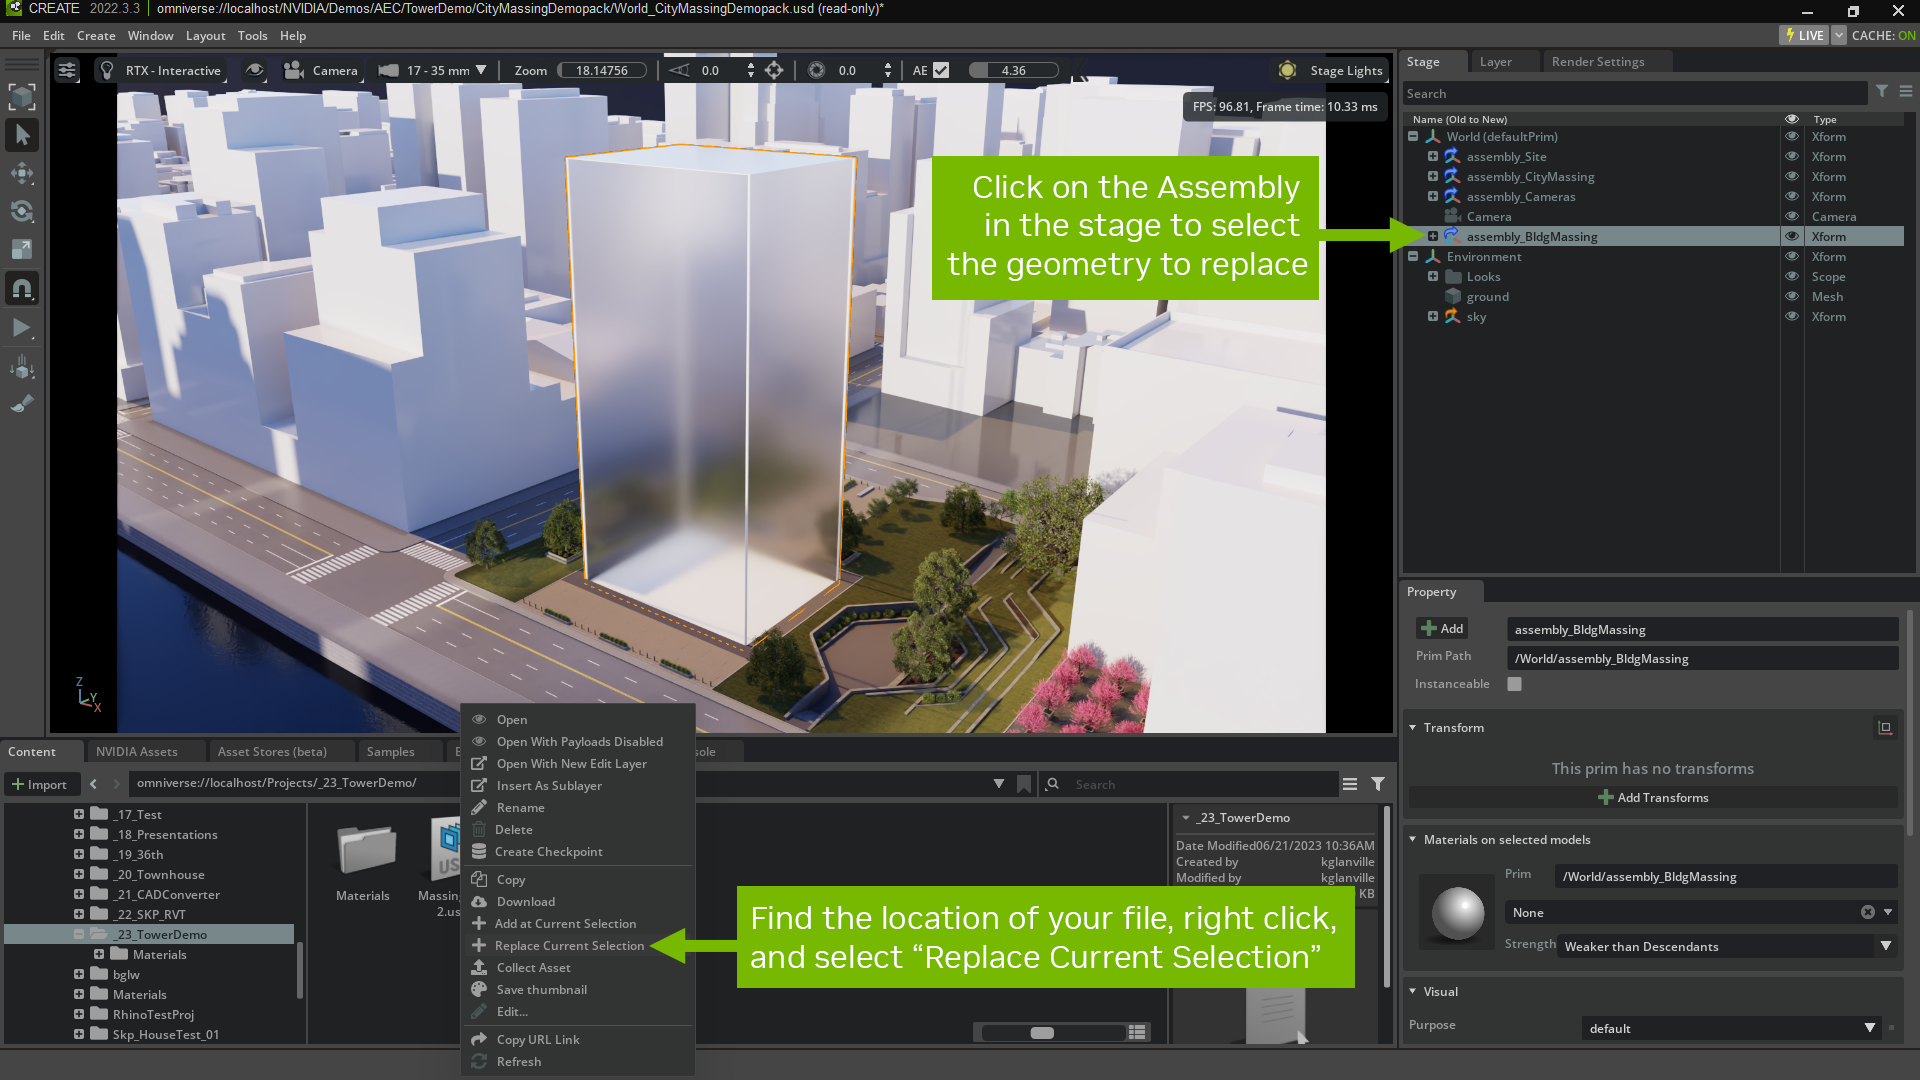
Once your file is saved to Nucleus as an OpenUSD file, find the location in your content browser.
Then, select the current massing in your scene. You can be sure you are selecting the entire massing file by selecting the assembly_BldgMassing payload in your Stage.
Once the existing massing is selected, right click on your new file in the content browser and select “Replace at Current Selection”. This will unload the assembly_BldgMassing payload, and replace it with your new design.
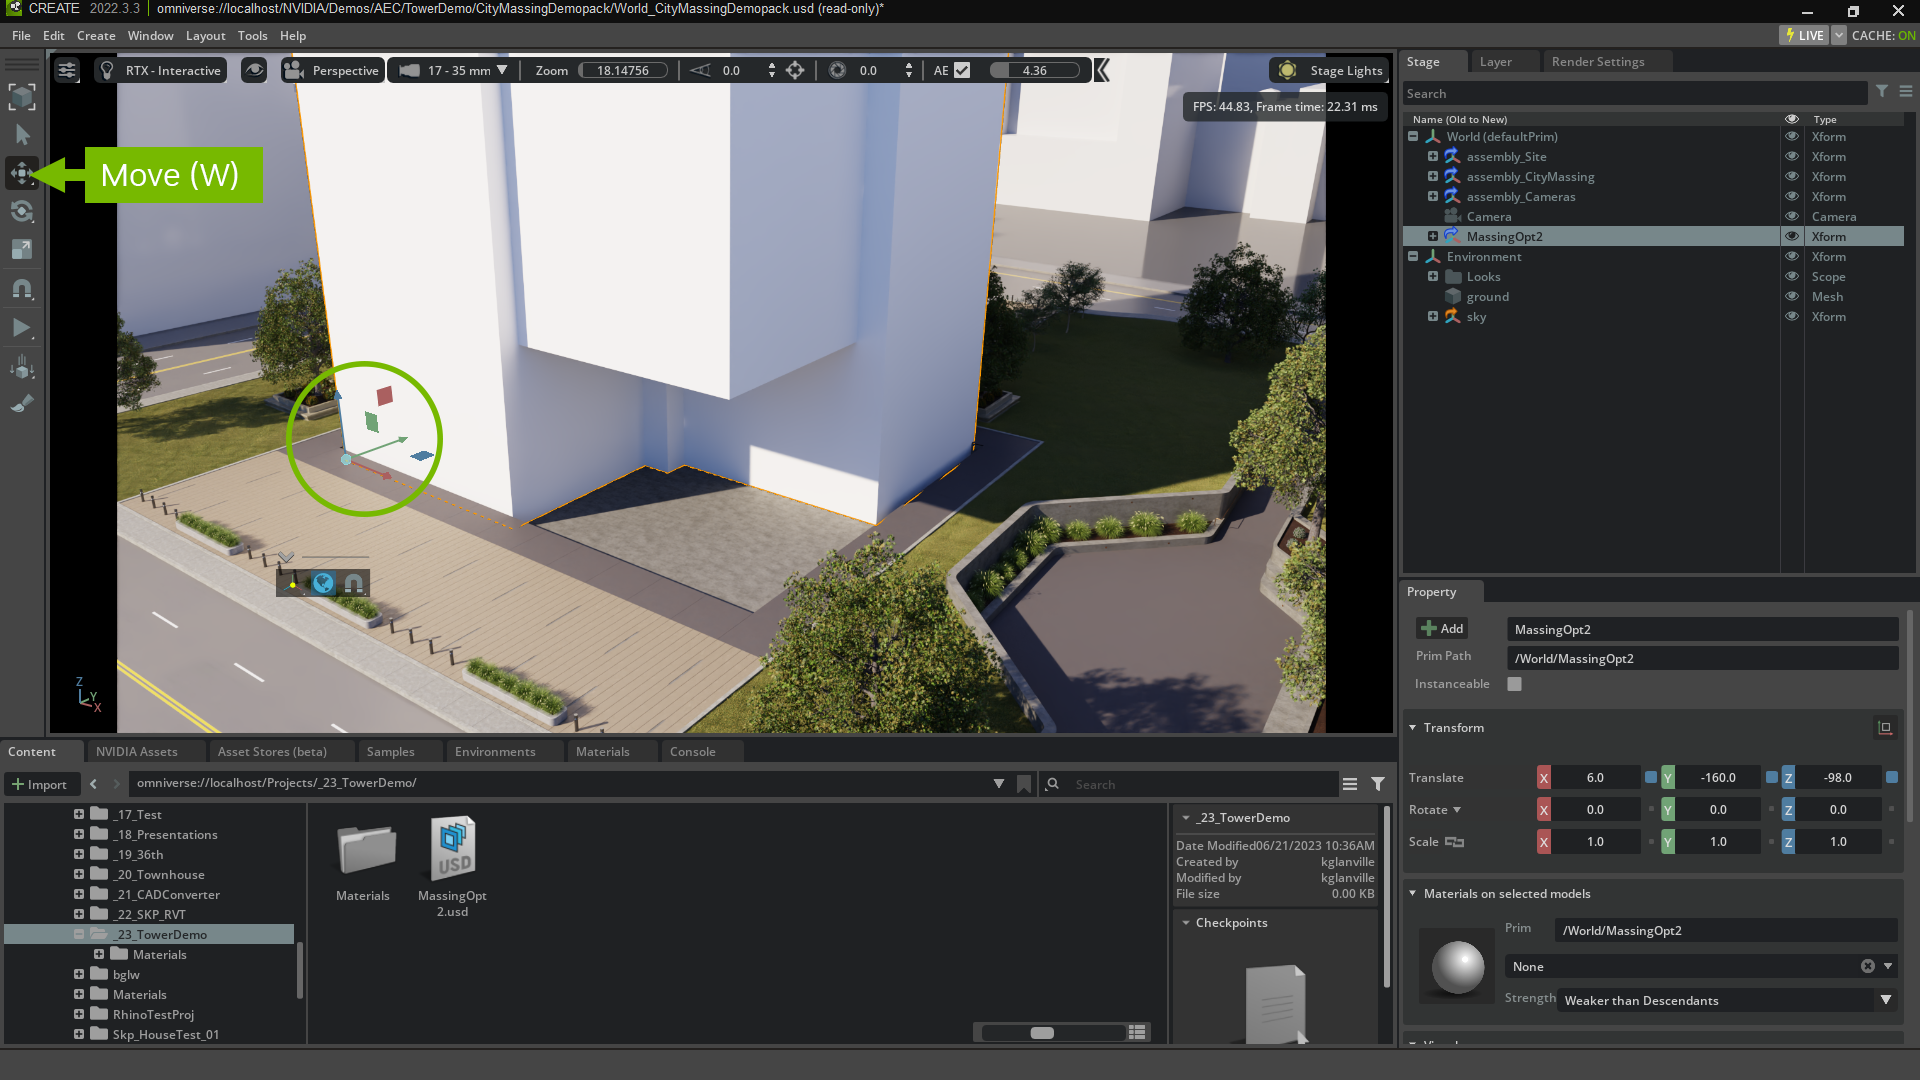
Step 6.1.3: Adjust the location of your file
You may have to move your model a little to get the placement correct. Hit the “W” key or select the “Move” icon from your toolbar to toggle the move gizmo, then move your model until it is in the correct position.
Now you’ve assembled a new world file using your own creation. This is just the beginning!
You will notice that you can change the geometry from your design tool of choice and push your changes to Omniverse, where you can see the model update in USD Composer. You can use USD layers to make non-destructive changes to your source geometry, which you can see examples of in any of the Assembly files.
Step 6.2.1: Replace massing with a completed Assembly file
If you do not want to use your own design, you can swap out the massing model for a more detailed building that is already complete.
Step 6.2.2: Replace the current massing model
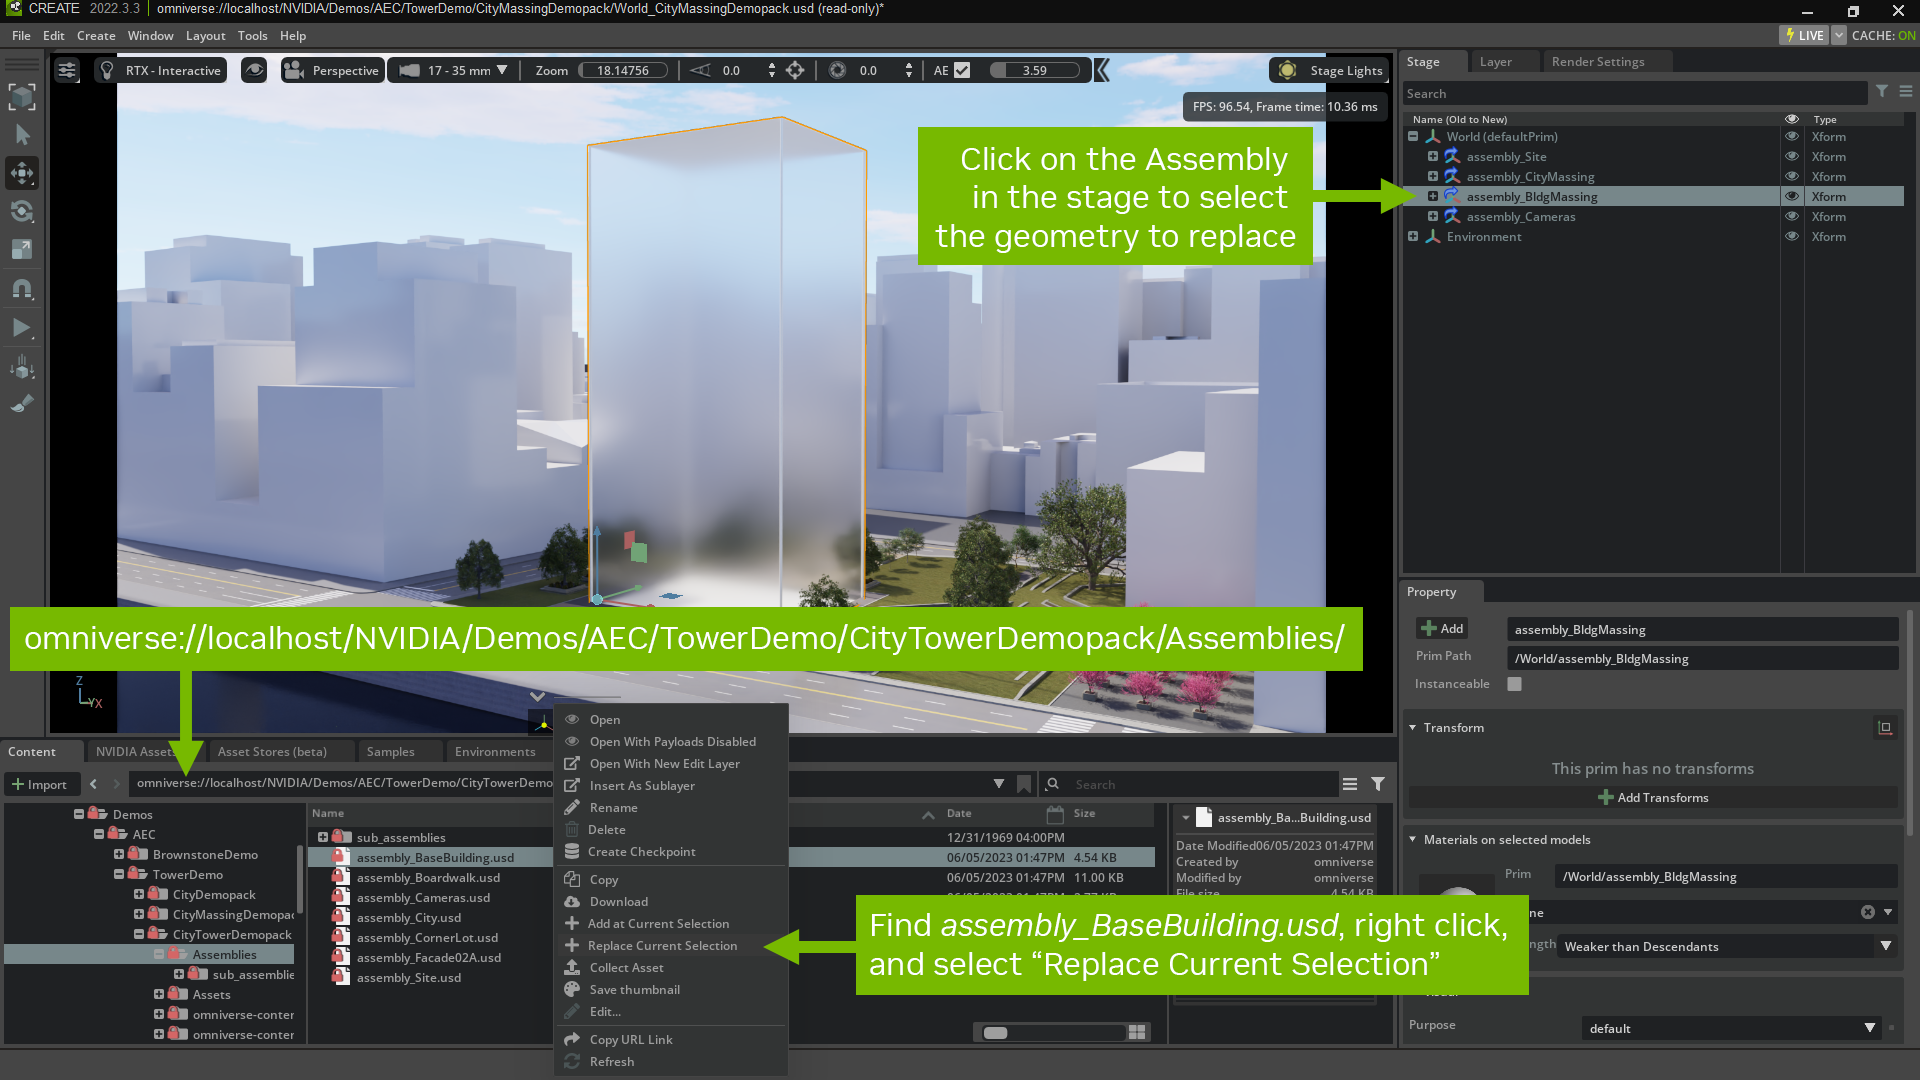
Navigate to one of the other demopack folders, CityTowerDemopack, and find the Assemblies folder.
Then, select the current massing in your scene. You can be sure you are selecting the entire massing file by selecting the assembly_BldgMassing payload in your Stage.
Once the existing massing is selected, right click on assembly_BaseBuilding.usd in the content browser and select “Replace at Current Selection”. This will unload the assembly_BldgMassing payload, and replace it with your new design.
You’ve just learned how to build up a World file with assemblies! You can continue to add assemblies from the other demopacks, add assets via the Asset browser, adjust materials via the Materials browser, create new layers for non-destructive changes, or enjoy exploring your new World file as is.
Step 7: Conclusion
By now, you should have a basic understanding of how to navigate the Tower Demopack files and even how to integrate your own designs.
Take the time to explore some of the other Tower Demos and their assembly files to get a better understanding of the various ways you can utilize OpenUSD and Omniverse in your work.