Adding Particle Systems#
RTX Remix lets you add ray-traced GPU particle effects directly to your mods. Particles are defined per-emitter using the ParticleSystemAPI USD schema, giving each emitter its own independent set of parameters. The Particle System supports:
Keyframe animation via the Curve Editor
Physics behaviors including attractors, collision modes, and drag
Visual controls for size, orientation, and sprite sheet playback
Editing in the Remix Runtime#
The Runtime is the quickest way to get particles into a game scene. You tag a texture as a particle emitter directly in the Developer Settings, and all particles share a single global preset. This approach is ideal for rapid prototyping, though for per-emitter control and advanced animation you will want to use the Toolkit.
Turn Any Texture into a Particle Emitter#
In the Runtime, assigning a “Particle Emitter” Render Category to any texture will create a particle system.
This is a quick and easy way to see particle effects in game. However there are a couple limitations:
All particles will use a single set of global settings
Can only be added to textures
To tag a texture:
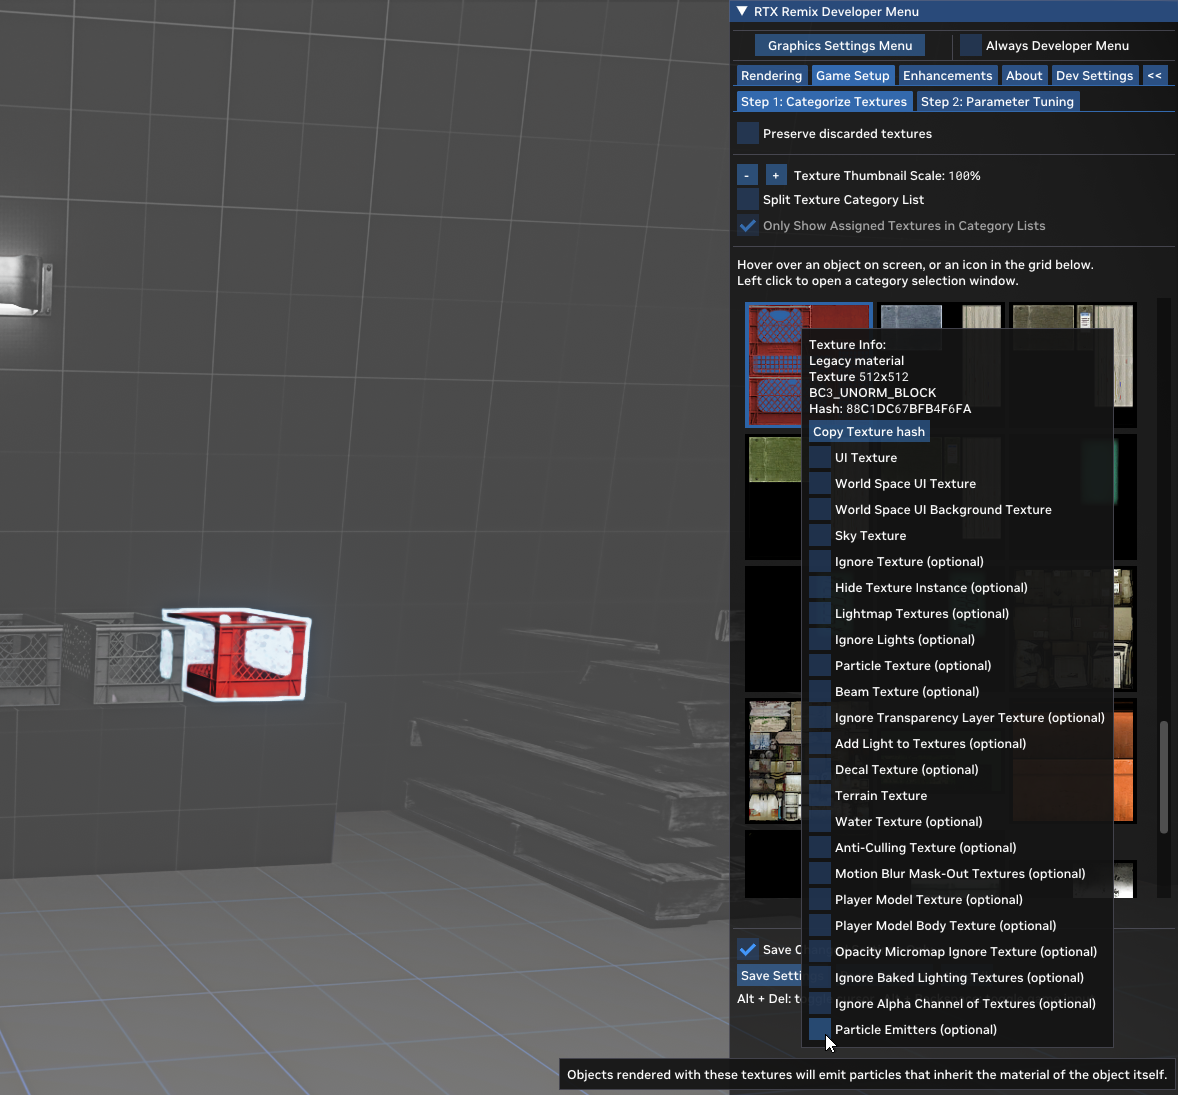
Open the Developer Settings
Go to the Game Setup tab
Click on a texture or right-click on an object in the game
Add the Particle Emitters (optional) category
Tune Global Particle Settings#
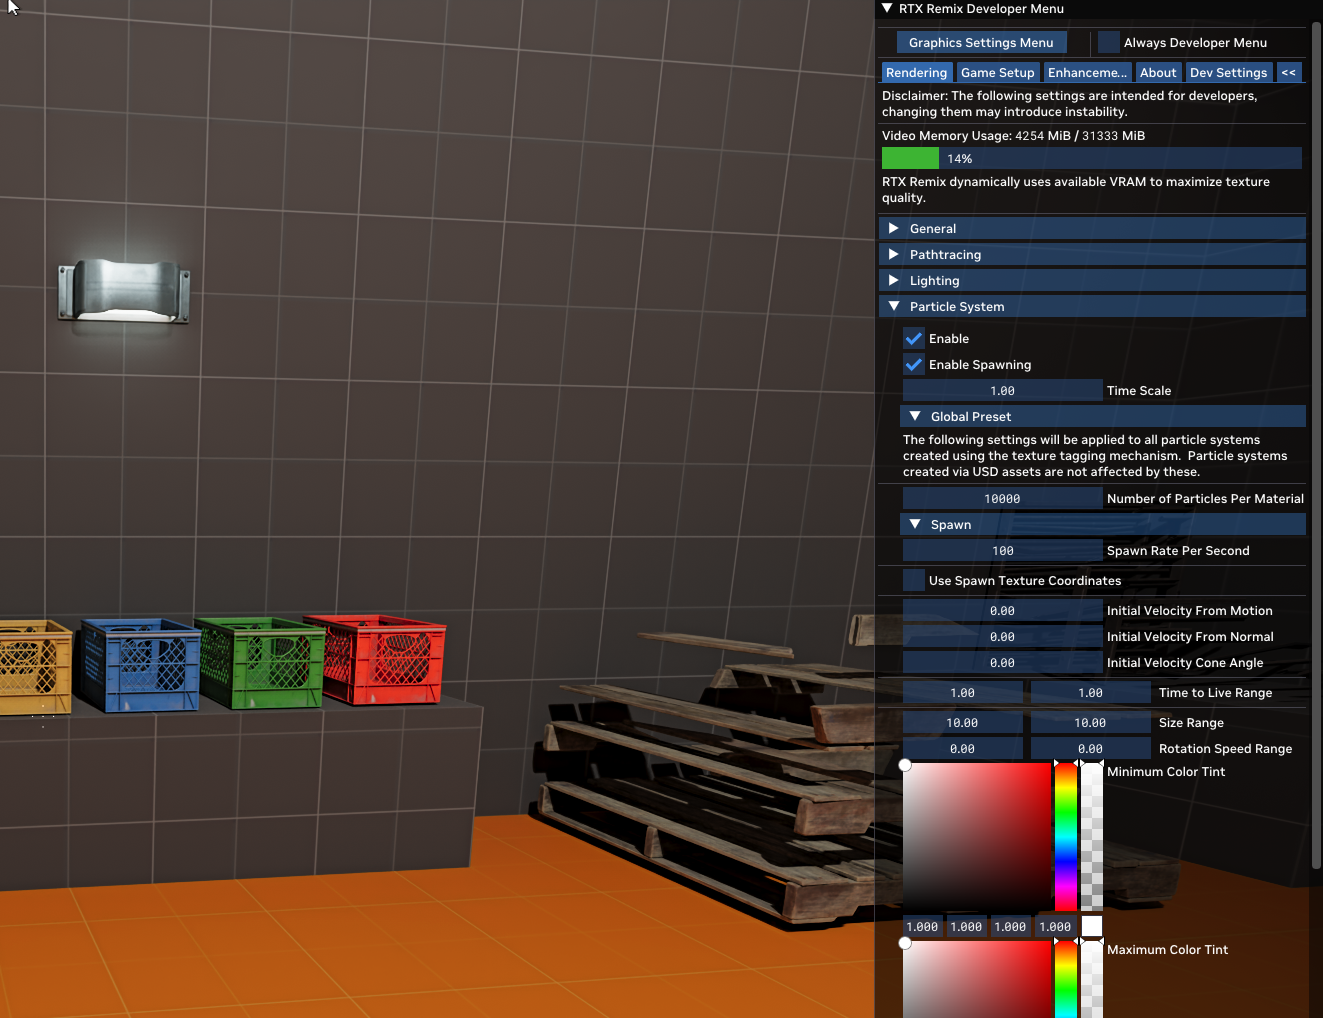
Open the Developer Settings
Go to the Rendering tab
Change the Particle System > Global Preset settings
For animatable parameters such as color, size, and rotation speed, the Runtime exposes Spawn and Target value controls. The particle interpolates linearly between these two values over its lifetime. This is the Runtime equivalent of the Toolkit’s Curve Editor — simpler, but sufficient for many effects.
Tip
If you are using the Remix Logic system alongside particles, save your rtx.conf when Logic graph effects are not
active to avoid Logic overrides being written into your particle configuration.
For more complex effects with per-emitter control and keyframe animation, use the Remix Toolkit.
Editing in the Remix Toolkit#
The Toolkit gives you full control over particle systems — one set of parameters per emitter, configured through the Properties panel. Each particle emitter is stored as USD data in your mod’s layer files, so effects carry over to the Runtime automatically when you save your mod.
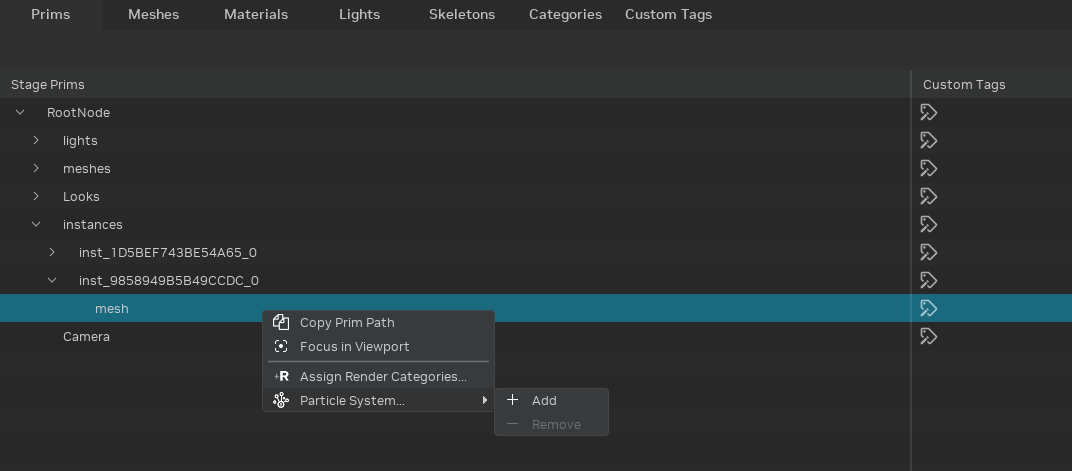
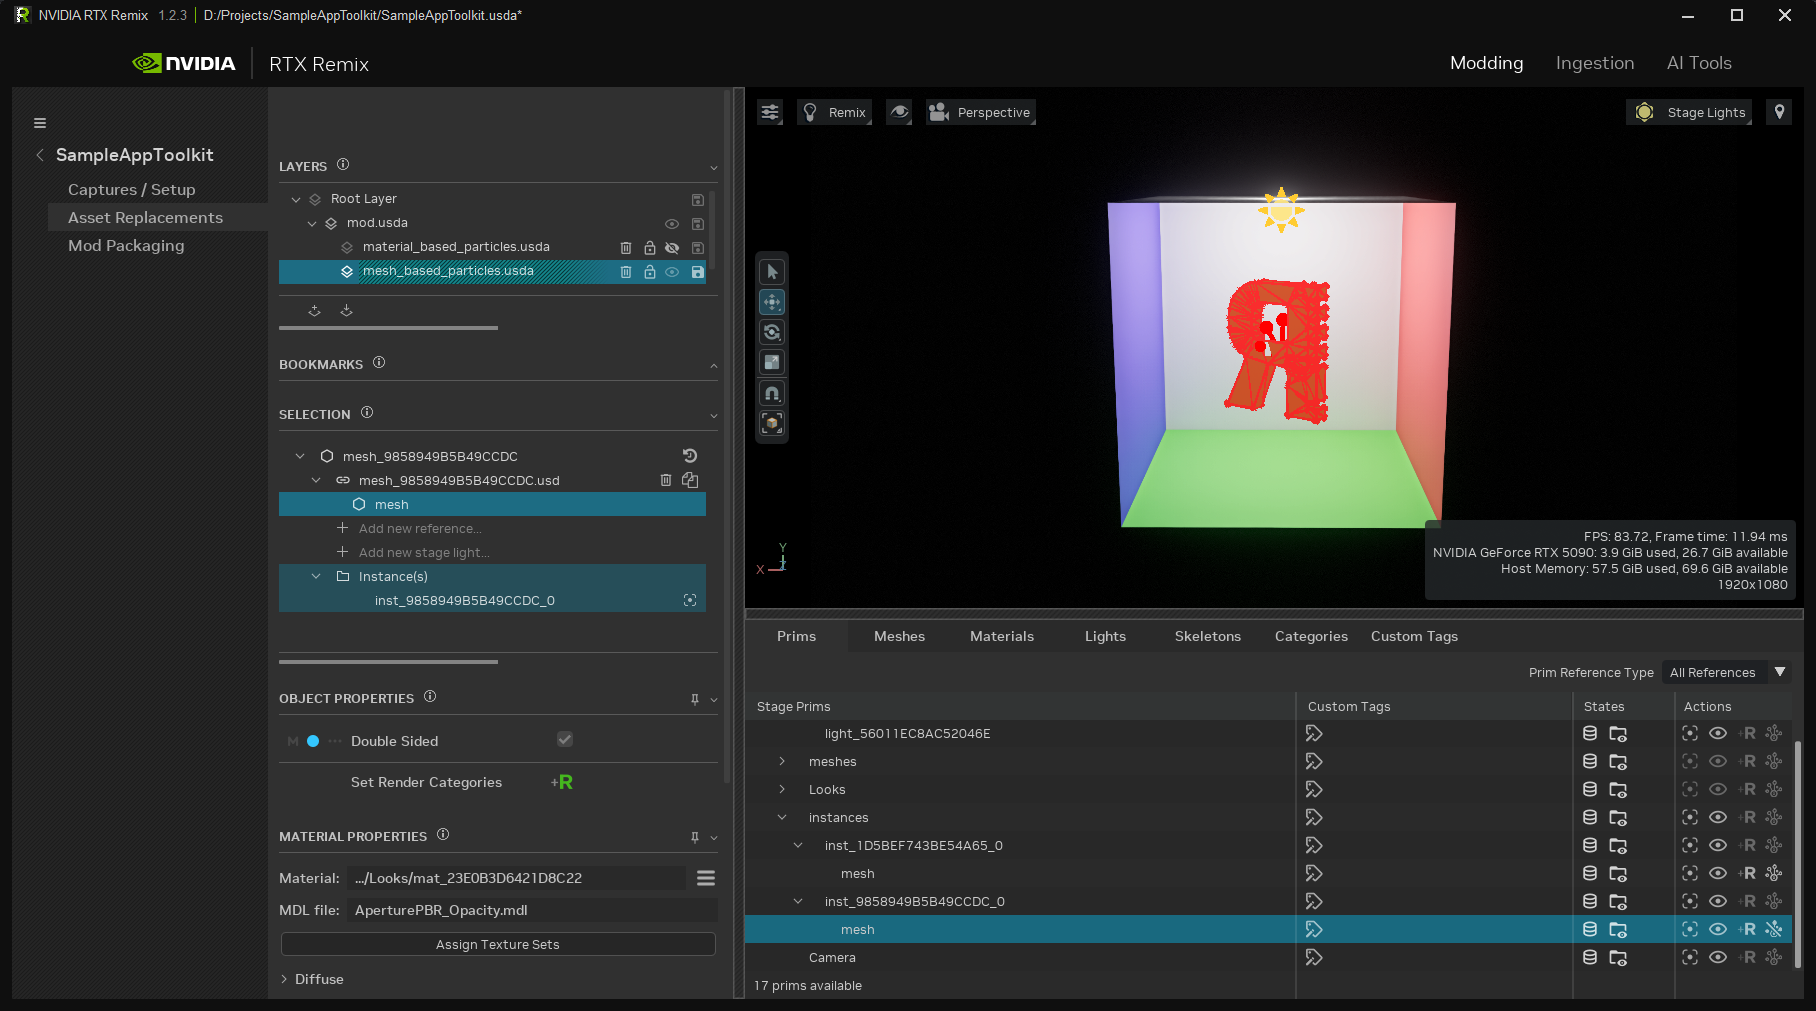
Creating a Particle System#
Right-click on any mesh or material prim in the Stage Manager to add a particle system directly to that prim:
Right click -> Particle System… -> Add
Note
The ParticleSystemAPI can be applied to mesh or material prims.
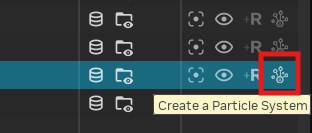
You can also use the action buttons in the Stage Manager to create or remove particle systems on a prim. The buttons are only enabled on prims that support particle systems.
Lastly, you can use the Create Particle System action in the Properties pane.
To see an effect, set the Spawn Rate Per Second attribute to a non-zero value. From there you can dial in the look.
Particle System Gizmo#
To select a particle system in the viewport, click on the blue spike icon. Rectangle select also works if the icon is hard to click.
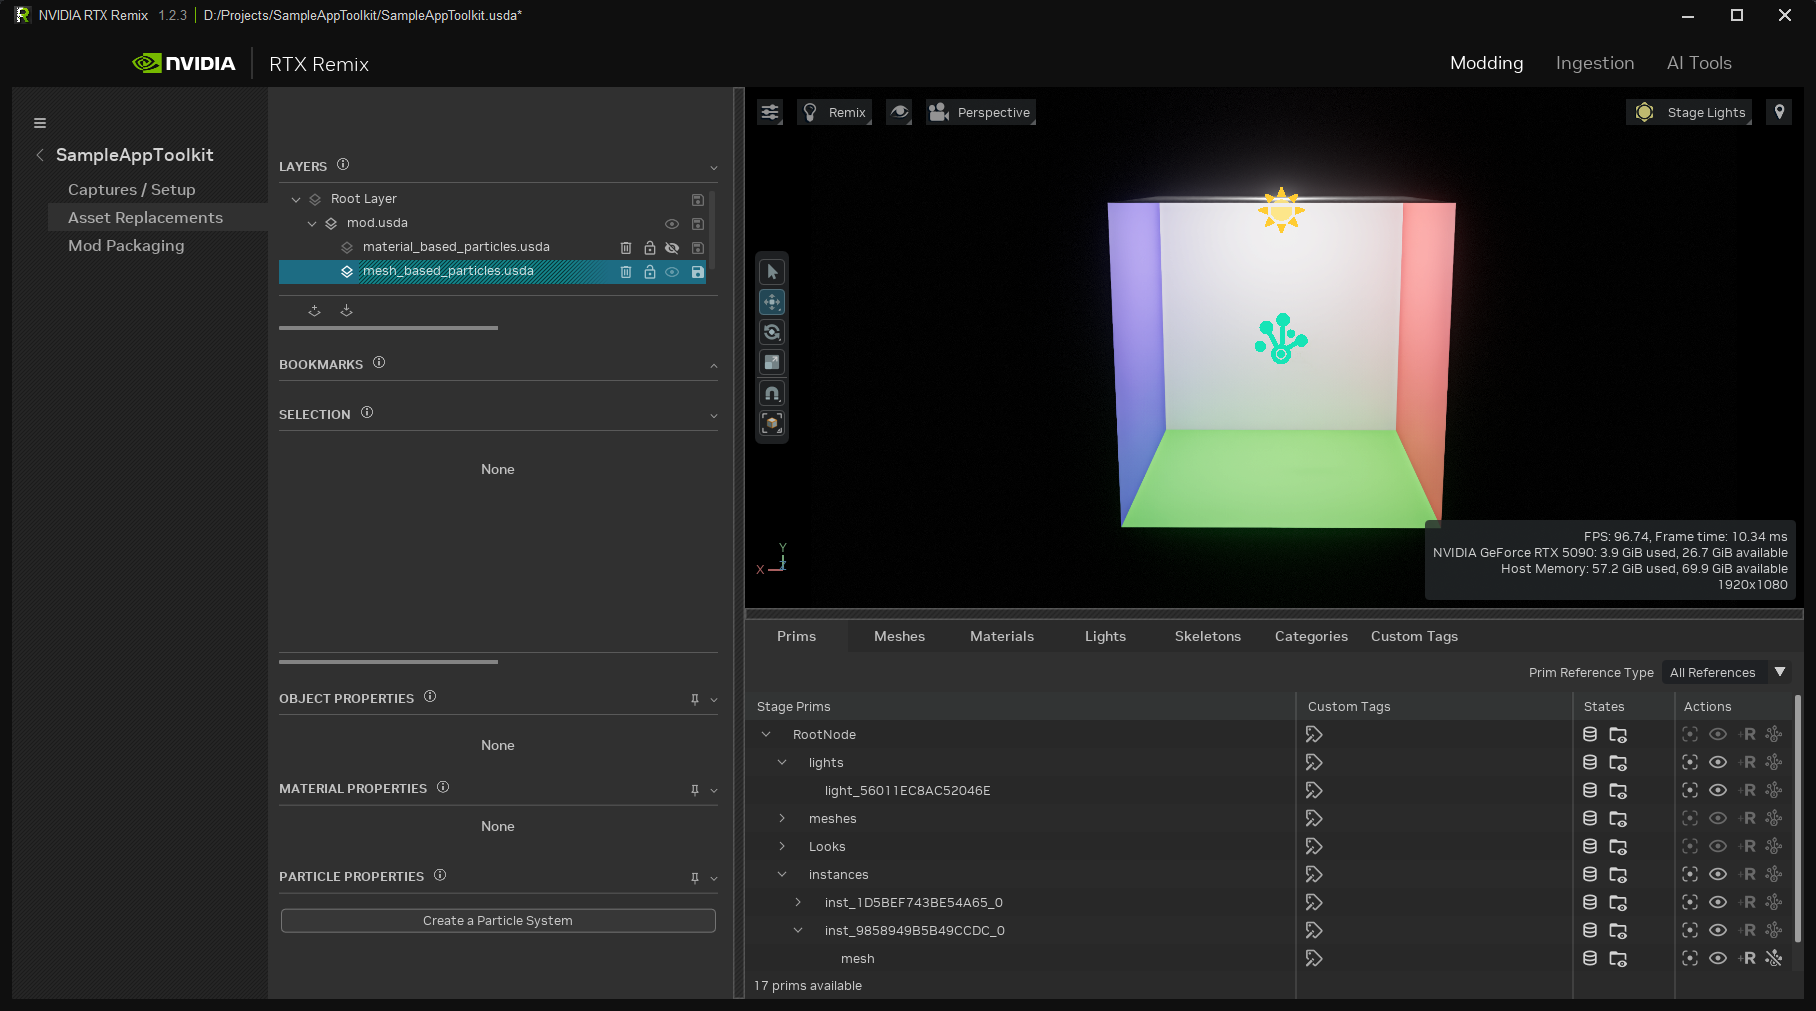
Once selected, you will see a hologram for hidden emitters or a wireframe outlining visible ones.
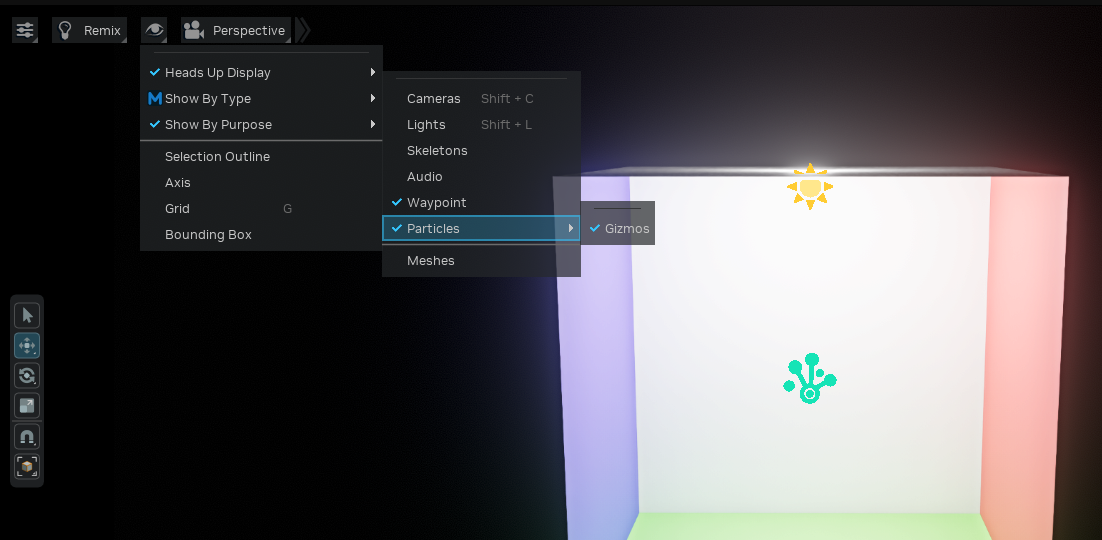
You can toggle particle gizmos on and off in the viewport menu.
Configuring a Particle System#
When a prim with the ParticleSystemAPI schema applied is selected, its properties appear in the Properties panel.
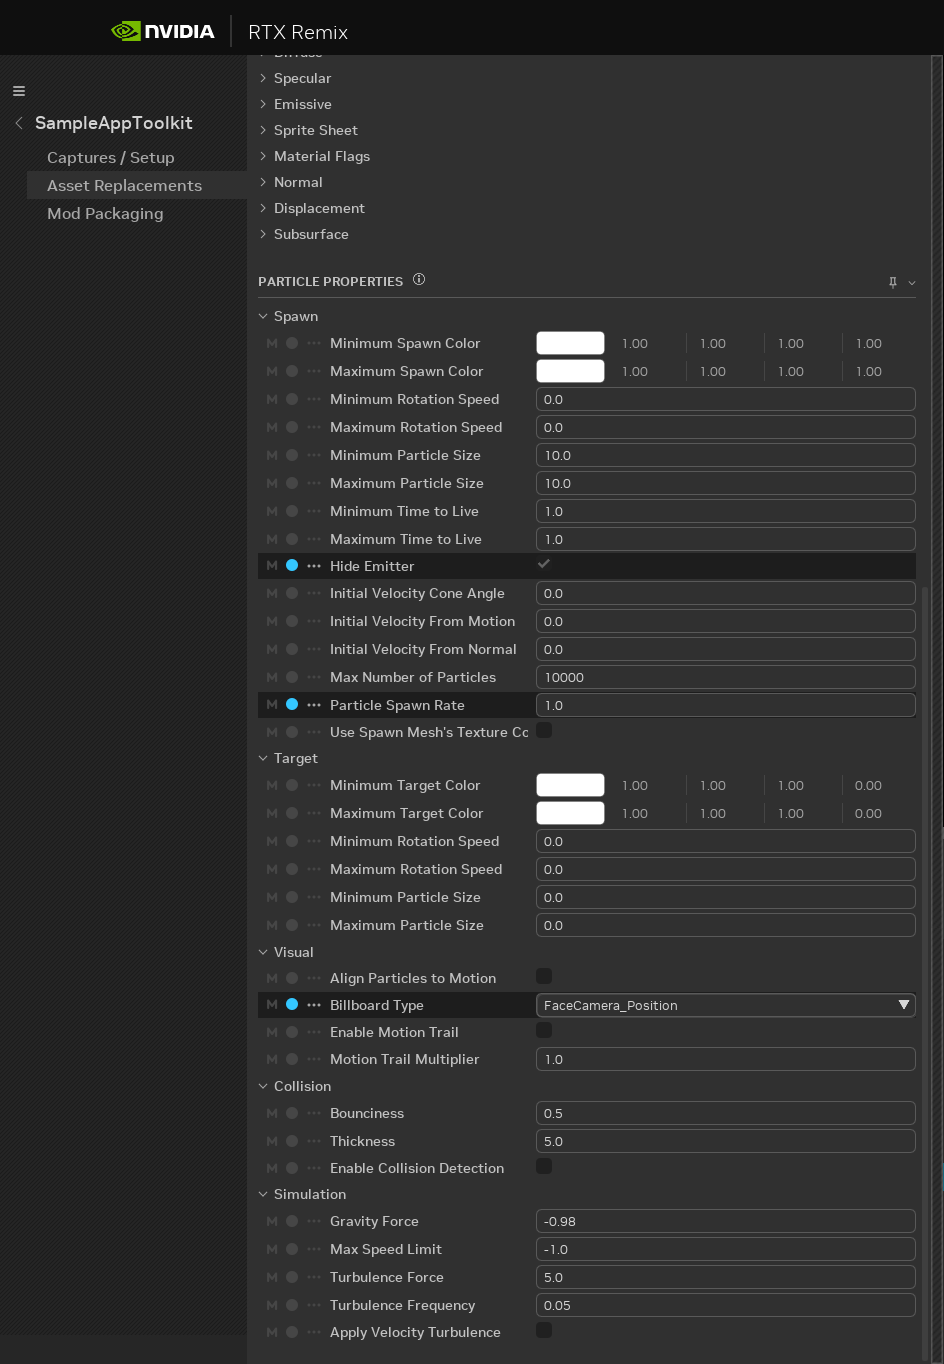
Particle System Controls#
See also
Remix Particle System Schema — complete parameter list with descriptions, default values, and valid ranges.
Visual Controls#
2D Particle Size (1.4)
Particle size now has independent width and height (minSize/maxSize as Float2), enabling rectangular particles.
Both dimensions are animatable via the Curve Editor. Useful for raindrops (tall and narrow), leaves (wide and short),
or any effect where square billboards look unnatural.
Motion Trail (1.4)
The Enable Motion Trail (enableMotionTrail) toggle elongates particles along their velocity vector, creating
a streak effect for fast-moving particles like sparks, meteors, or tracer rounds. The Motion Trail Multiplier
(motionTrailMultiplier, default 1.0) scales the trail length — values above 1.0 lengthen the trail, values
below shorten it.
Note
Motion trail stretches the center of the particle quad; edges preserve the texture boundary. For best results, use simple or uniform textures rather than detailed sprite sheets.
Random Axis Flipping (1.4)
The Random Axis Flipping (randomFlipAxis) setting flips particle textures at spawn to break up repetitive
patterns in dense effects:
None (default) — No flipping
Horizontal — Random horizontal flip at spawn
Vertical — Random vertical flip at spawn
Both — Random flip in both directions at spawn
Initial Rotation Deviation (1.4)
The Initial Rotation Deviation (initialRotationDeviationDegrees) adds a randomized starting angle to each
particle at spawn. The value (0–180 degrees) sets the randomization range. Combined with random axis flipping, this
makes even simple textures look varied across a particle field.
Physics Controls#
Attractor (1.4)
The attractor introduces a force-field system. You define a point in world space with a configurable radius and force strength. Particles within the radius are pulled toward the point (positive force) or pushed away from it (negative force). Three parameters control this:
attractorPosition— World-space coordinates of the force pointattractorForce— Strength in cm/s²; positive attracts, negative repelsattractorRadius— Falloff radius; particles outside this radius are unaffected
Collision Modes — Stop and Kill (1.4)
The Collision Mode (collisionMode) parameter now supports three behaviors. Enable collision detection first with
the enableCollisionDetection toggle, then choose:
Bounce (default) — Particles reflect off surfaces. Bounciness (
collisionRestitution) controls velocity retained on impact:1.0= perfectly elastic,0.0= completely inelastic.Stop — Particles halt immediately on contact and remain at the collision point for the rest of their lifetime. Useful for snowflakes settling on a surface or debris coming to rest.
Kill — Particles are destroyed on contact. Useful for raindrops that disappear on impact or sparks that extinguish when they hit the ground.
Burst Duration (1.4)
The Burst Duration (spawnBurstDuration) parameter enables periodic bursting instead of continuous emission. A
value of 0 (default) means continuous spawning. Values greater than 0 spawn particles in bursts separated by the
specified number of seconds. Useful for explosions, muzzle flashes, and spark effects.
Drag / Air Resistance (1.4)
The Drag Coefficient (dragCoefficient) slows particles over time, simulating air resistance. A value of 0
(default) means no drag. Higher values cause particles to decelerate more quickly after spawn.
Axis Restriction (1.4)
Three toggles constrain particle motion to specific axes or planes:
restrictVelocityX— Prevents movement along the X axisrestrictVelocityY— Prevents movement along the Y axisrestrictVelocityZ— Prevents movement along the Z axis
Enable Restrict Y to create particles that move only horizontally (ground-level dust or fog). Enable Restrict X and Restrict Z to create particles that only move vertically (rising smoke or falling rain).
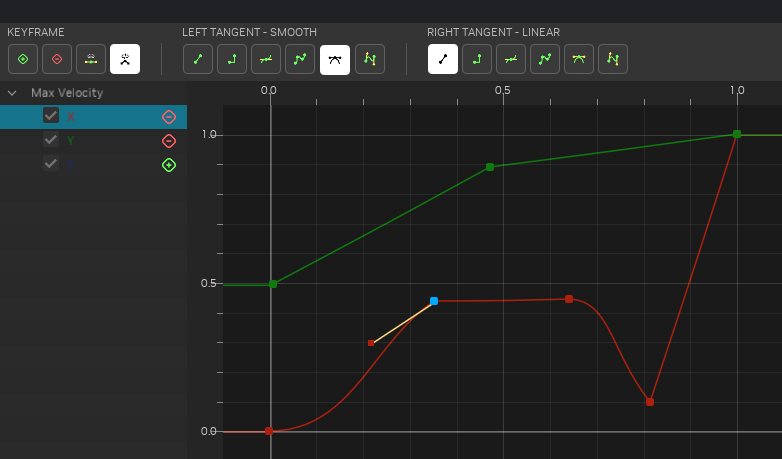
The Curve Editor (1.4)#
The Curve Editor replaces the simple start-and-end-value system with a full keyframe animation editor. Instead of defining only how a parameter starts and ends, you can add multiple keyframes with tangent-controlled interpolation across the particle’s 0-to-1 lifetime.
The following parameters support curve-based animation:
Color (min/max) — RGBA gradient over the particle’s lifetime. The Color Gradient widget lets you place color stops along the particle’s 0-to-1 lifetime to create a smooth animated color transition from spawn to death. The alpha channel of each stop controls opacity, making it the primary tool for fade-in and fade-out effects. The widget also includes built-in presets for common gradient patterns.
Size X / Size Y (min/max) — Independent width and height, each animatable separately.
Rotation Speed (min/max) — Rotation speed in revolutions per second over the particle’s lifetime.
Max Velocity X / Y / Z — Per-axis velocity cap, each independently animatable.
Tangent types control the interpolation shape between keyframes:
Linear — Straight-line interpolation between keyframes.
Auto — Automatically calculates smooth slopes through keyframes.
Smooth — Rounded, continuous curve. Good for organic transitions like a fade-in.
Flat — Horizontal approach and departure; useful for hold values and plateaus.
Step — Holds the previous value until the keyframe, then immediately jumps. Useful for abrupt changes.
Custom — Manual tangent slope control for precise curve shaping.
Tangents can also be broken, meaning the incoming and outgoing tangents at a single keyframe can have different types. This enables effects like a slow fade-in that ends in an abrupt cutoff.
Creating Complex Particle Systems#
For elaborate effects like fire, you can layer multiple particle systems on different replacement meshes — one for flames, one for sparks, and one for smoke — each with its own emitter mesh and properties.
Controlling Particle Look with Material Properties#
Particles inherit properties from their emitter’s material, so adjusting material properties (emissive intensity, base color, opacity) is an effective way to control the overall appearance of a particle effect without changing the simulation parameters.
Animated Particles using a Sprite Sheet#
Create a sprite image sequence and configure it according to the Sprite Sheet instructions.
Sprite Sheet Modes — Override modes (1.4)
The Sprite Sheet Mode (spriteSheetMode) controls how particles play back a sprite sheet animation:
Use Material Sprite Sheet (default) — Uses the sprite sheet parameters defined in the bound material. All particles play in sync.
Override Material - Lifetime — Each particle independently plays through the full sprite sheet from spawn to death, regardless of other particles. Ideal for effects where each particle completes its own animation cycle (expanding rings, flickering flames).
Override Material - Random — Each particle randomly selects one sprite sheet frame at spawn and holds it for its entire lifetime. Useful for debris, leaves, or sparks where visual variety is more important than animation.
The ParticleSystemAPI Schema#
The ParticleSystemAPI is a USD applied schema that attaches particle simulation parameters to any mesh or material
prim. When you add a particle system in the Toolkit, this schema is written into your mod’s USD layer:
over "mesh_9858949B5B49CCDC"
{
    over "mesh" (
        active = true
        prepend apiSchemas = ["ParticleSystemAPI"]
    )
    {
        float primvars:particle:initialVelocityFromNormal = 1
        float primvars:particle:spawnRatePerSecond = 100
        token visibility = "inherited"
    }
}
All particle attributes use the primvars:particle: prefix. The schema is shared between the Toolkit and the Runtime,
so any particle system authored in the Toolkit renders correctly in the Runtime without additional conversion. For the
complete parameter list with default values and valid ranges, see the Remix Particle System Schema.
Need to leave feedback about the RTX Remix Documentation? Click here