Extension: omni.kit.viewport.docs-109.0.0 |
Documentation Generated: Jun 03, 2026 |
Overview#
Viewport Next is a preview of the next generation of Kit’s Viewport. It was designed to be as light as possible, providing a way to isolate features and compose them as needed to create unique experiences.
This documentation will walk through a few simple examples using this technology,
as well as how it can be used in tandem with the omni.ui.scene framework.
What is a Viewport#
Exactly what a viewport is can be a bit ill-defined and dependent on what you are trying to accomplish, so it’s best to define some terms up front and explain what this documentation is targeting.
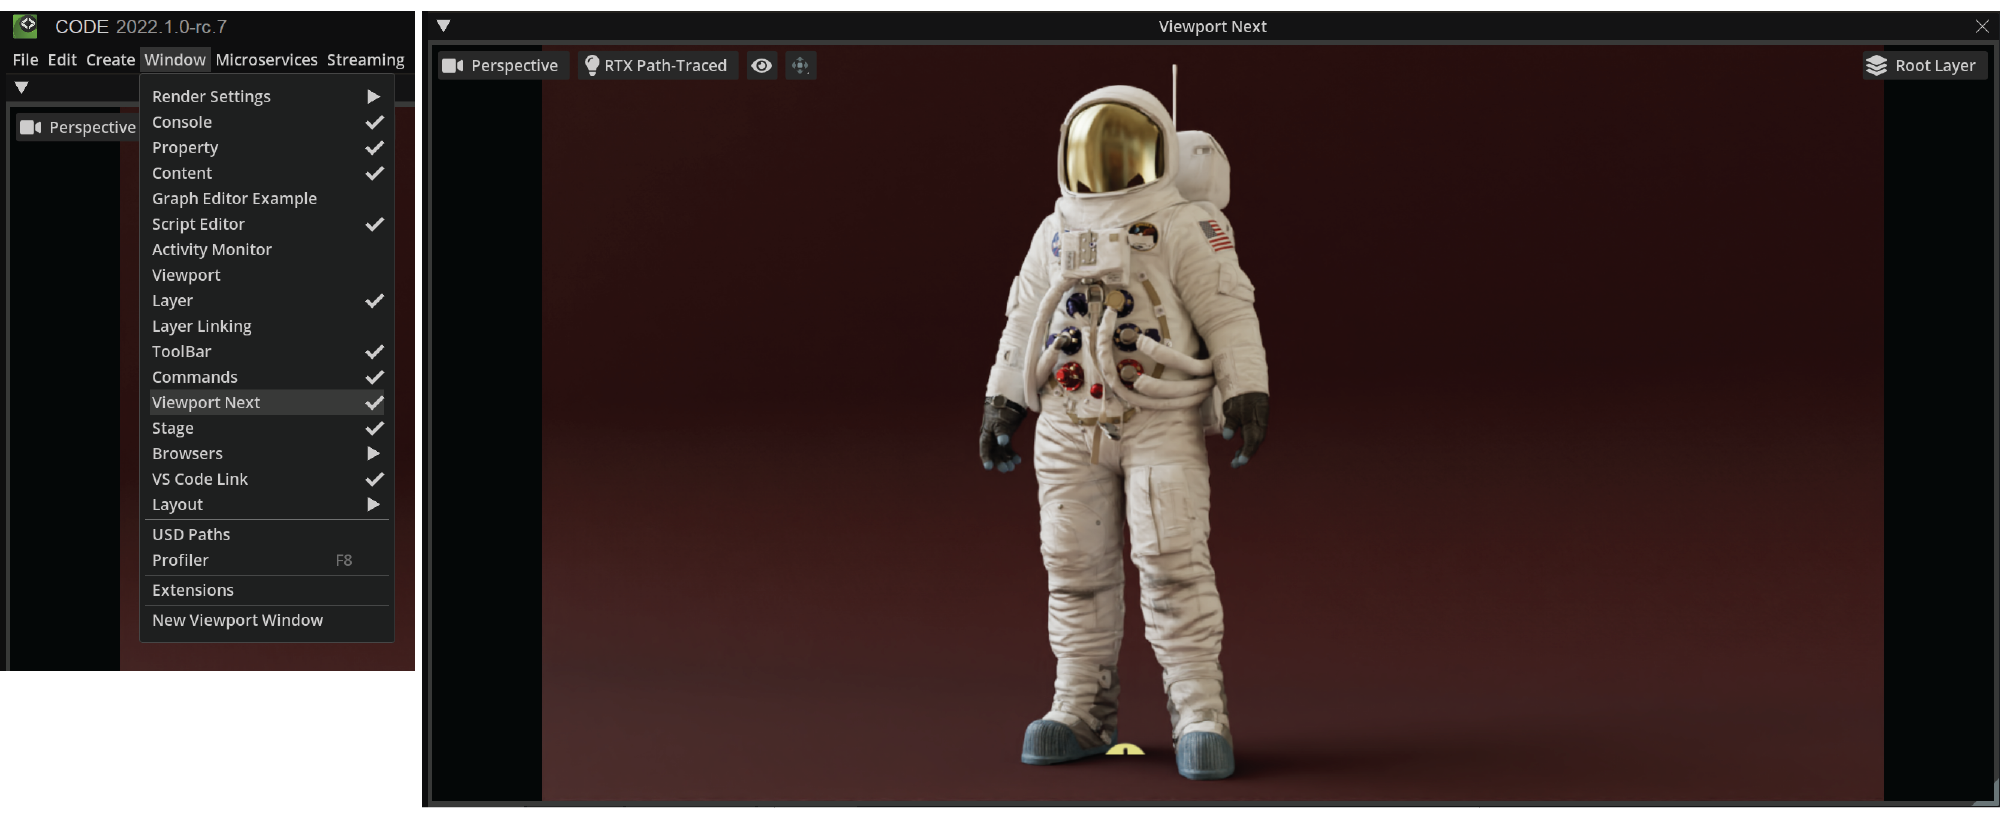
At a very high level a Viewport is a way for a user to visualize (and often interact with) a Renderer’s output of a scene. When you create a “Viewport Next” instance via Kit’s Window menu, you are actually creating a hierarchy of objects.
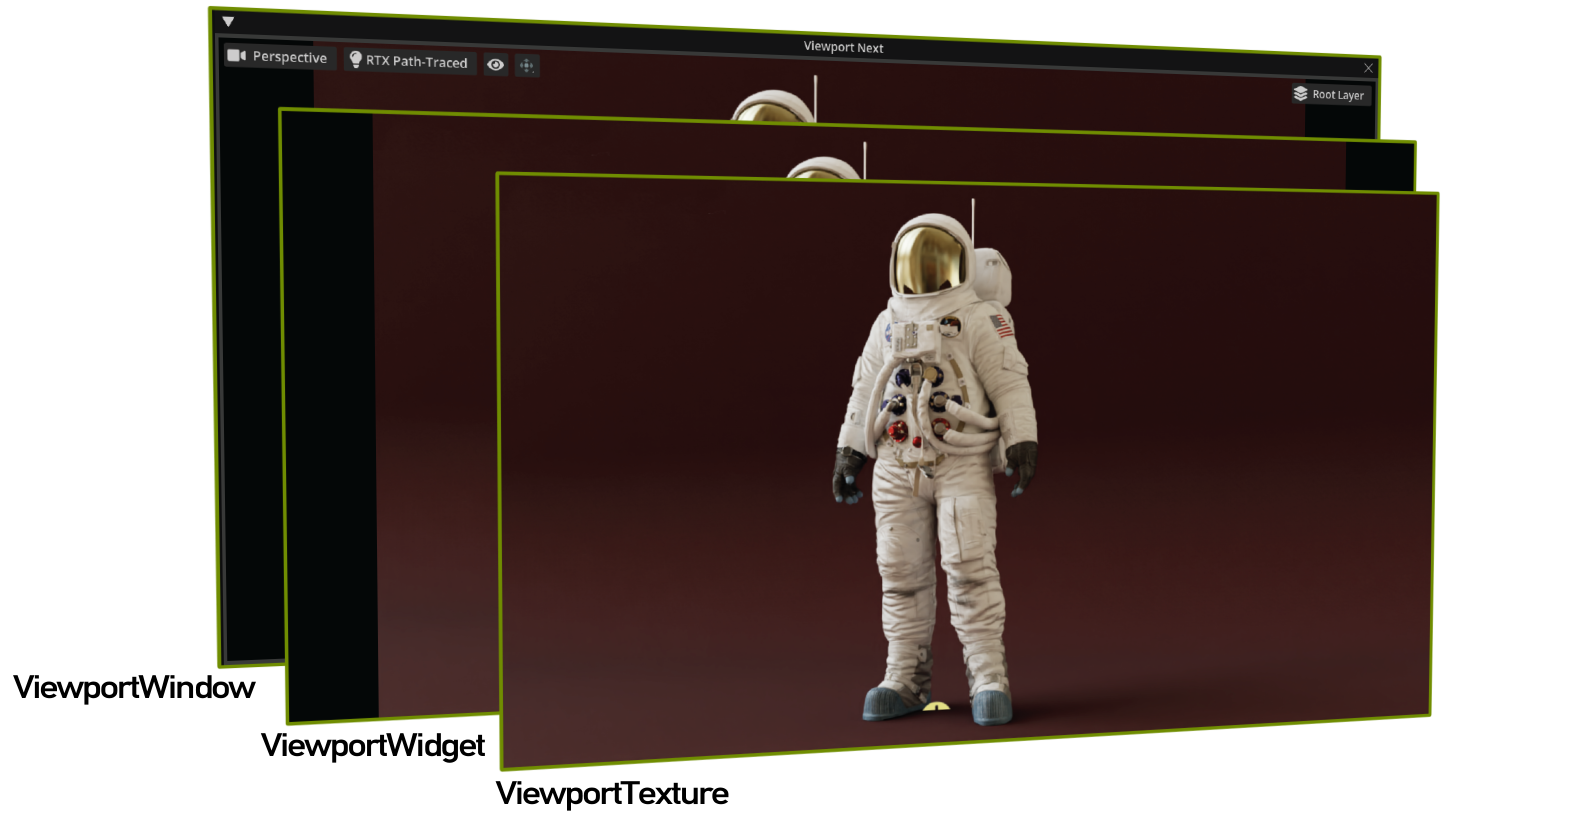
The three objects of interest in this hierarchy are:
The
ViewportWindow, which we will be re-implementing asStagePreviewWindowThe
ViewportWidget, one of which we will be instantiating.The
ViewportTexture, which is created and owned by theViewportWidget.
While we will be using (or re-implementing) all three of those objects, this documentation is primarily
targeted towards understanding the ViewportWidget and it’s usage in the omni.kit.viewport.stage_preview.
After creating a Window and instance of a ViewportWidget, we will finally add a camera manipulator built
with omni.ui.scene to interact with the Usd.Stage, as well as control aspects of the
Renderer’s output to the underlying ViewportTexture.
Even though the ViewportWidget is our main focus, it is good to understand the backing ViewportTexture is independent
of the ViewportWidget, and that a texture’s resolution may not neccessarily match the size of the ViewportWidget
it is contained in. This is particularly import for world-space queries or other advanced usage.
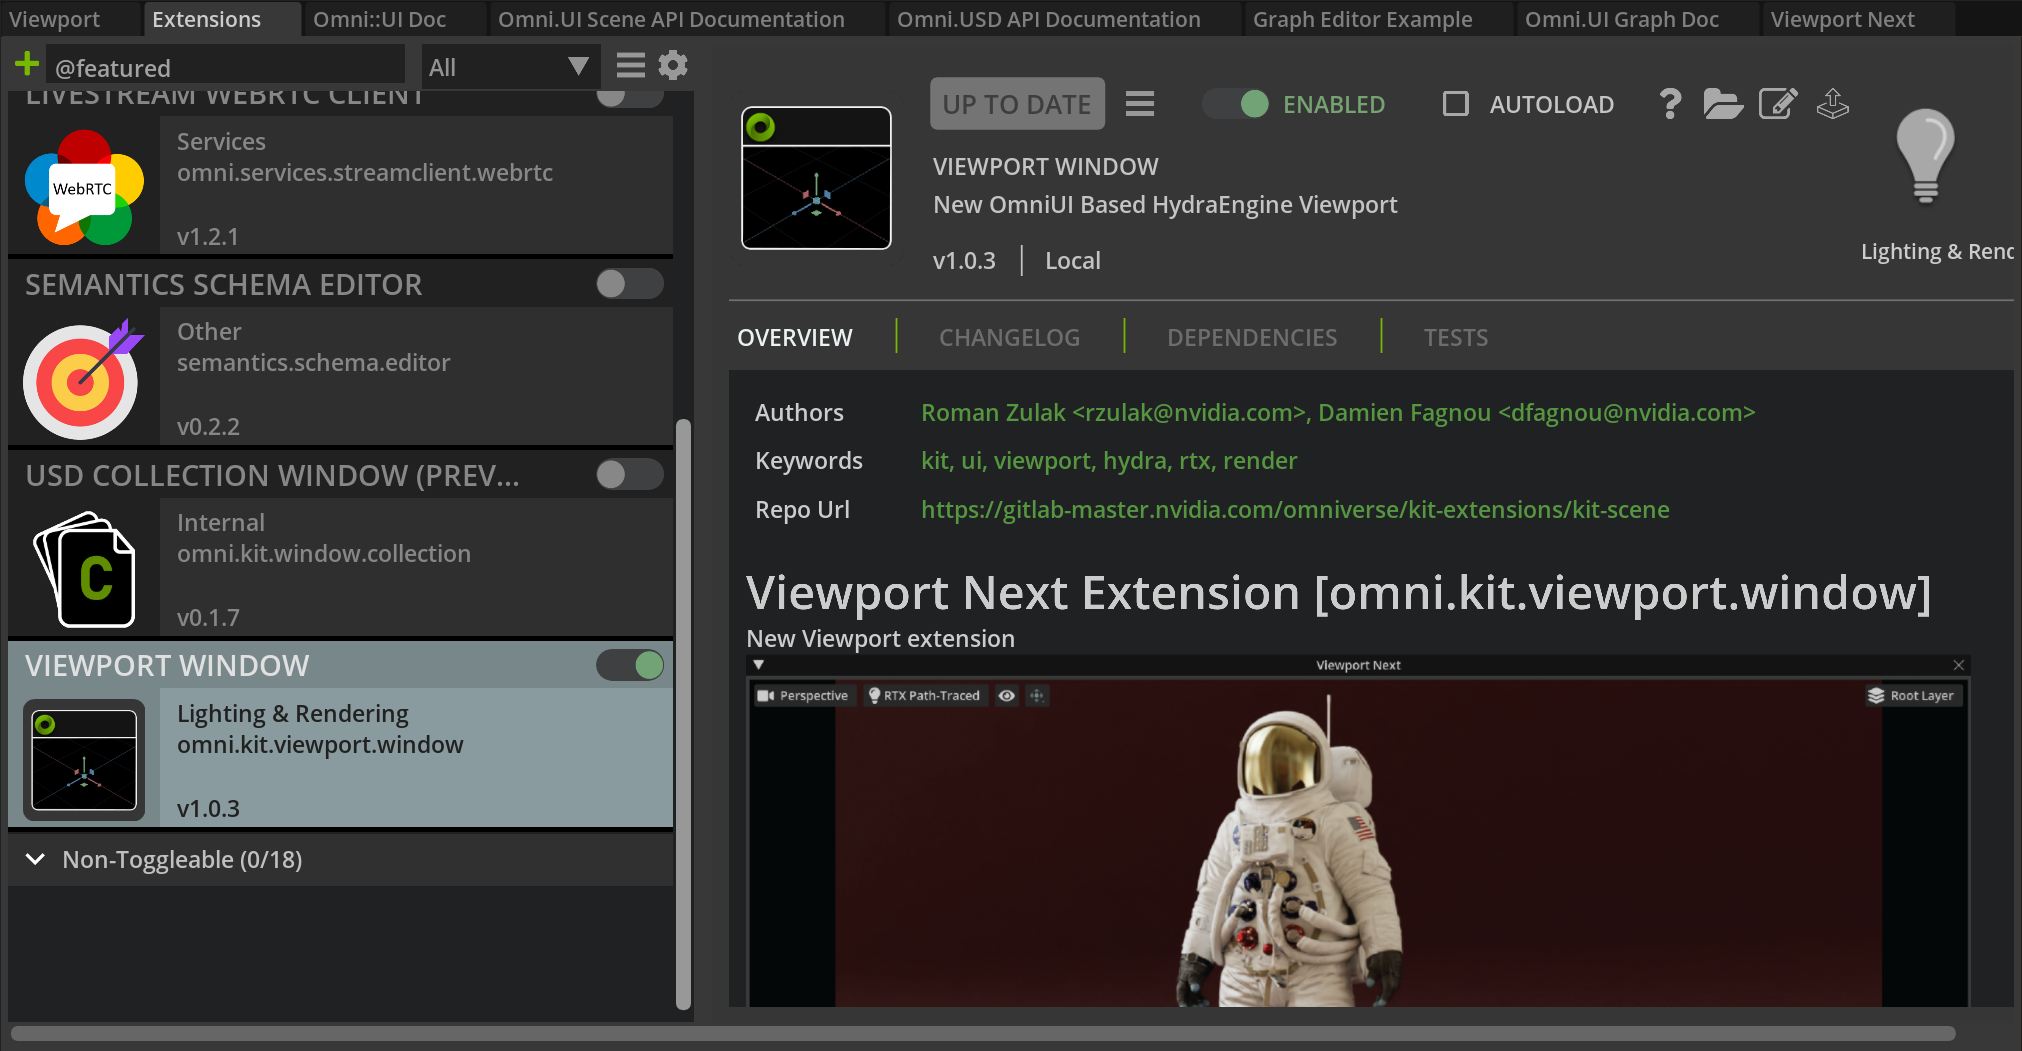
Enabling the extension#
To enable the extension and open a “Viewport Next” window, go to the “Extensions” tab
and enable the “Viewport Window” extension (omni.kit.viewport.window).
Simplest example#
The omni.kit.viewport.stage_preview adds additional features that make may make a first read of the code a bit harder.
So before stepping through that example, lets take a moment to reduce it to an even simpler case where we create
a single Window and add only a Viewport which is tied to the default UsdContext and Usd.Stage.
We won’t be able to interact with the Viewport other than through Python, but because we are associated with the
default UsdContext: any changes in the Usd.Stage (from navigation or editing in another Viewport or adding a Usd.Prim
from the Create menu) will be reflected in our new view.
from omni.kit.widget.viewport import ViewportWidget
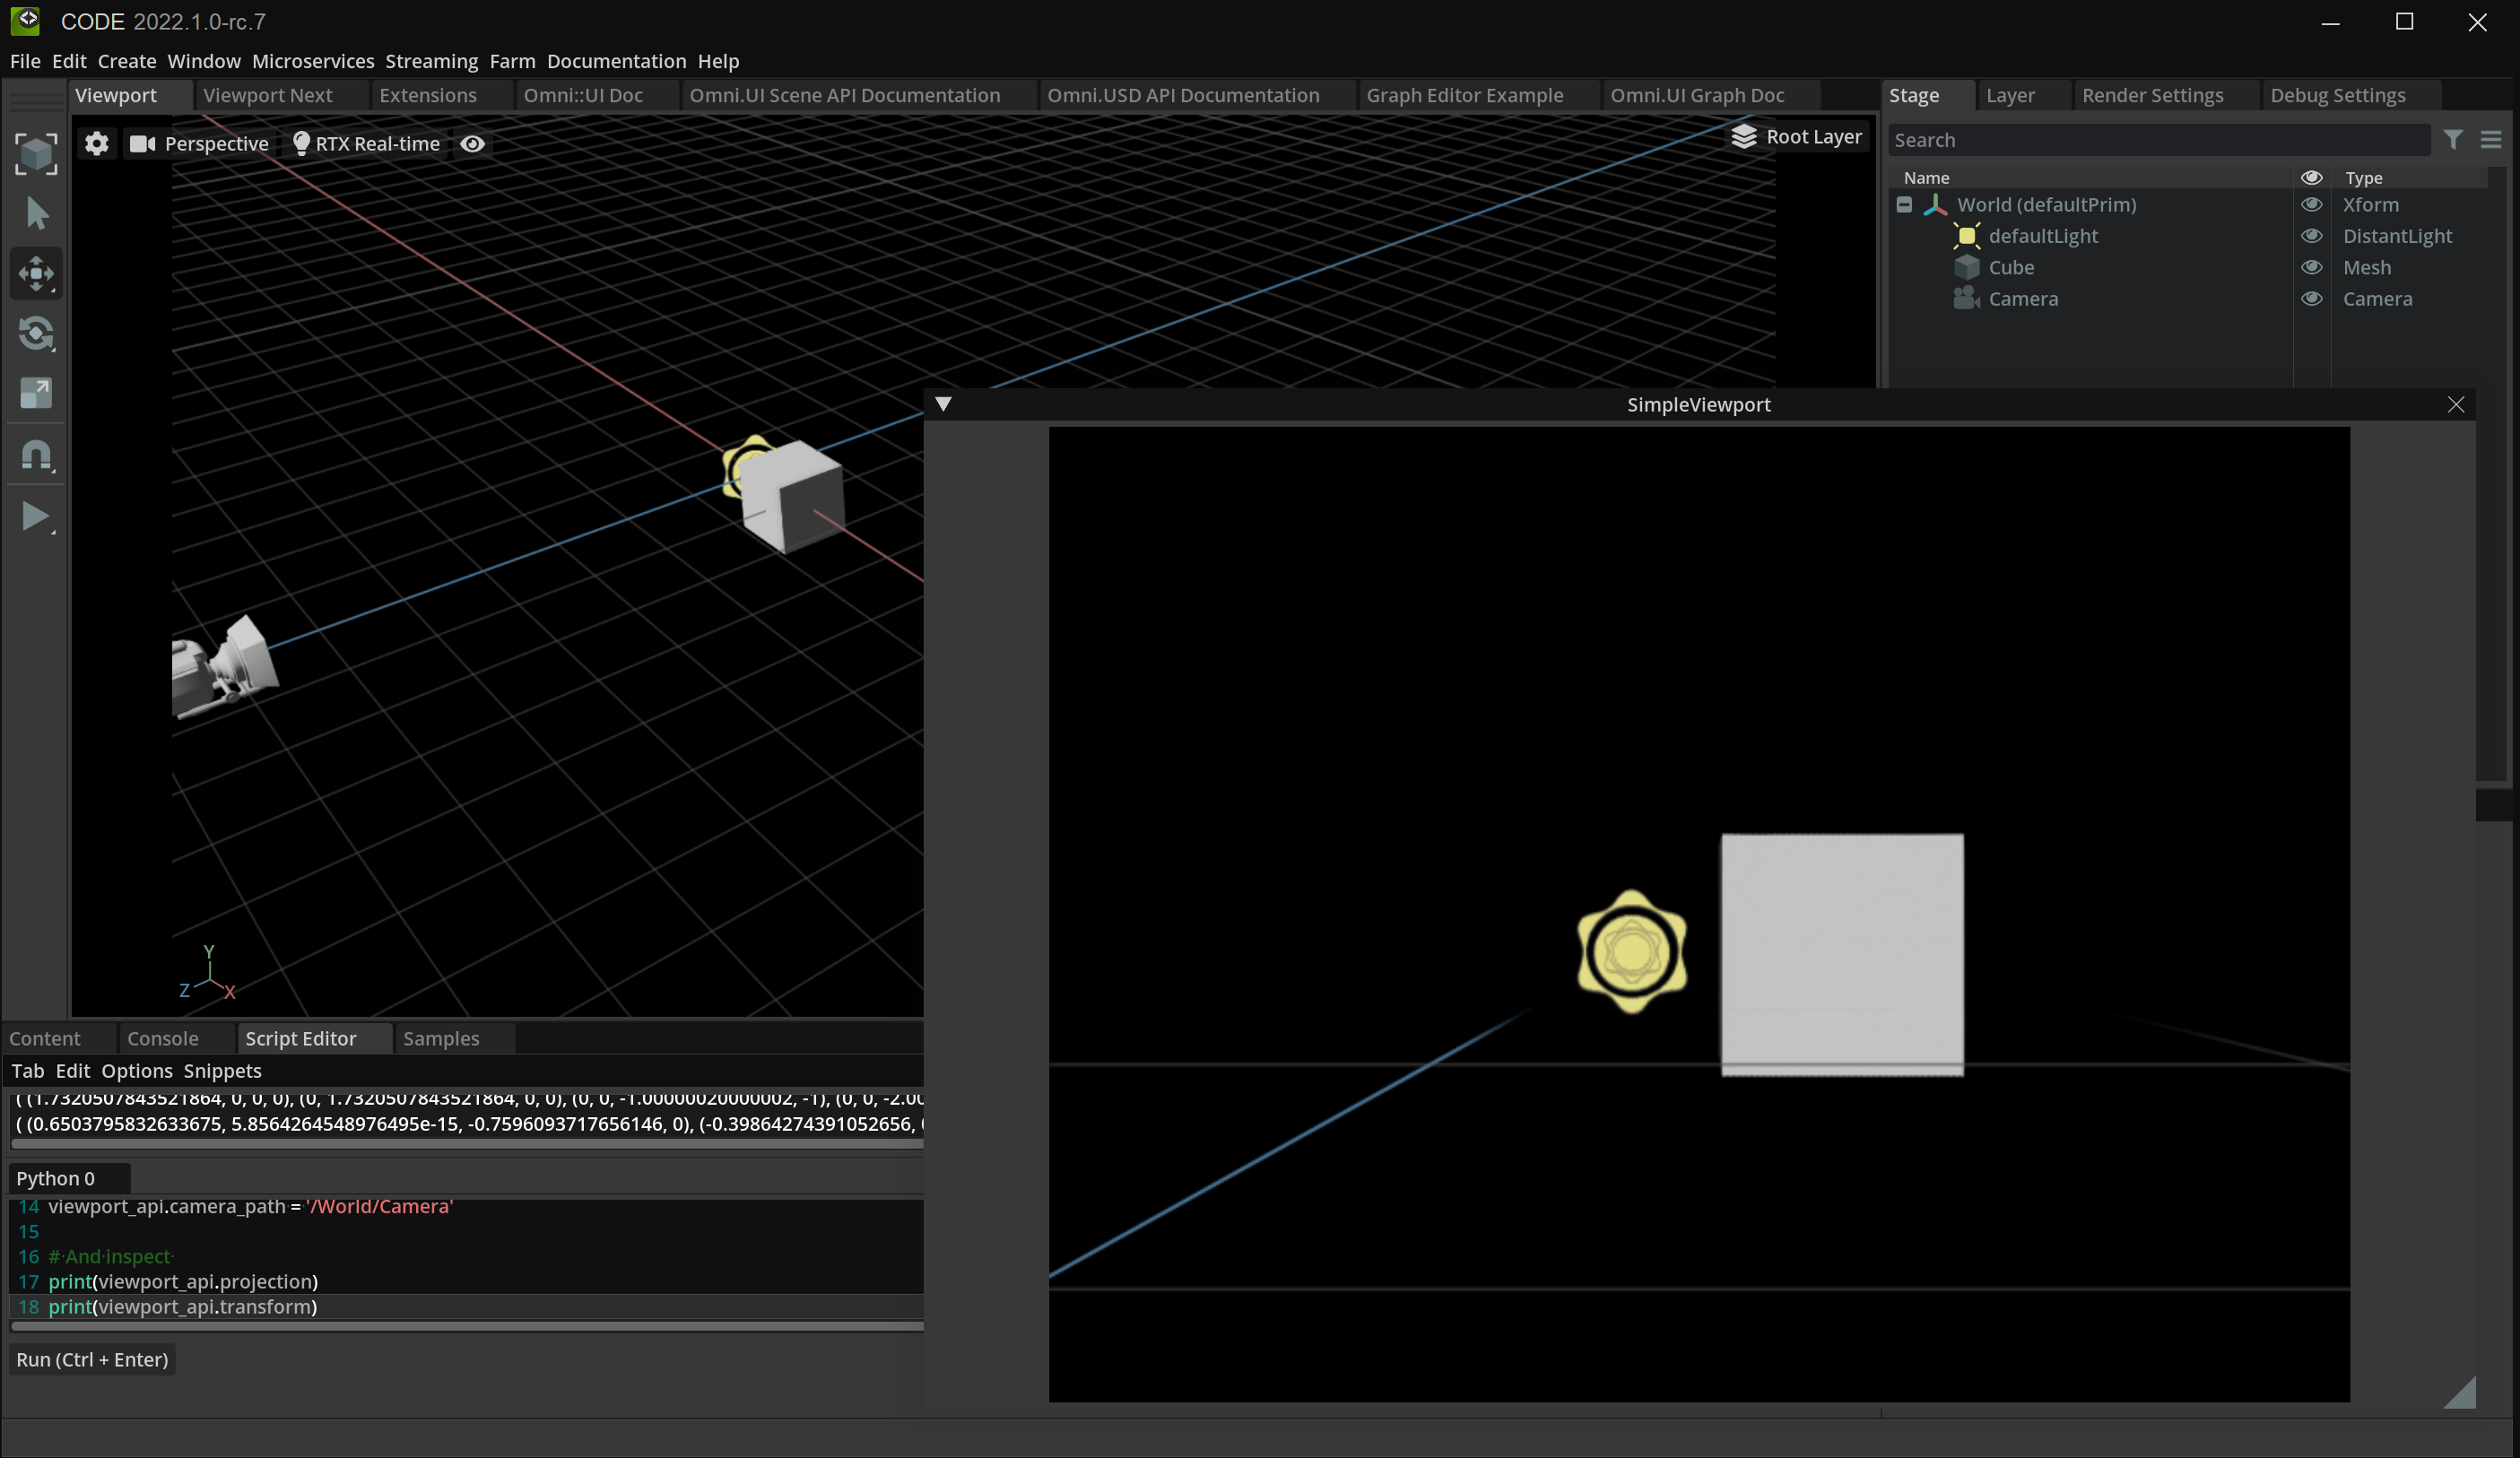
viewport_window = omni.ui.Window('SimpleViewport', width=1280, height=720+20) # Add 20 for the title-bar
with viewport_window.frame:
viewport_widget = ViewportWidget(resolution = (1280, 720))
# Control of the ViewportTexture happens through the object held in the viewport_api property
viewport_api = viewport_widget.viewport_api
# We can reduce the resolution of the render easily
viewport_api.resolution = (640, 480)
# We can also switch to a different camera if we know the path to one that exists
viewport_api.camera_path = '/World/Camera'
# And inspect
print(viewport_api.projection)
print(viewport_api.transform)
# Don't forget to destroy the objects when done with them
# viewport_widget.destroy()
# viewport_window.destroy()
# viewport_window, viewport_widget = None, None