Kit C++ Extension Template
Omniverse Kit C++ Extension Template
This project contains everything necessary to develop extensions that contain C++ code, along with a number of examples demonstrating best practices for creating them.
What Are Extensions?
While an extension can consist of a single extension.toml file, most contain Python code, C++ code, or a mixture of both:
                                                     Kit
                                                      |
                   ___________________________________|___________________________________
                  |                                   |                                   |
             Python Only                            C++ Only                            Mixed
(eg. omni.example.python.hello_world)  (eg. omni.example.cpp.hello_world)  (eg. omni.example.cpp.pybind)
Extensive documentation detailing what extensions are and how they work can be found here.
Prerequisites and Environment Setup
Please see Kit App Template Prerequisites for the latest information on general Kit prerequisites and environment setup.
Please see Windows Developer Configuration for the latest information on Windows specific setup.
Getting Started
Clone the GitHub repo to your local machine.
Open a command prompt and navigate to the root of your cloned repo.
Run
./build.baton Windows or./build.sh packageon Linux to bootstrap your dev environment and build the example extensions.Run
./_build\{platform}\release\omni.app.example.extension_browser.bat|.shto open an example kit application.Run
omni.app.example.viewport.bat|.shinstead if you want the renderer and main viewport to be enabled.Run
omni.app.kit.dev.bat|.shinstead if you want the full kit developer experience to be enabled.
From the menu, select
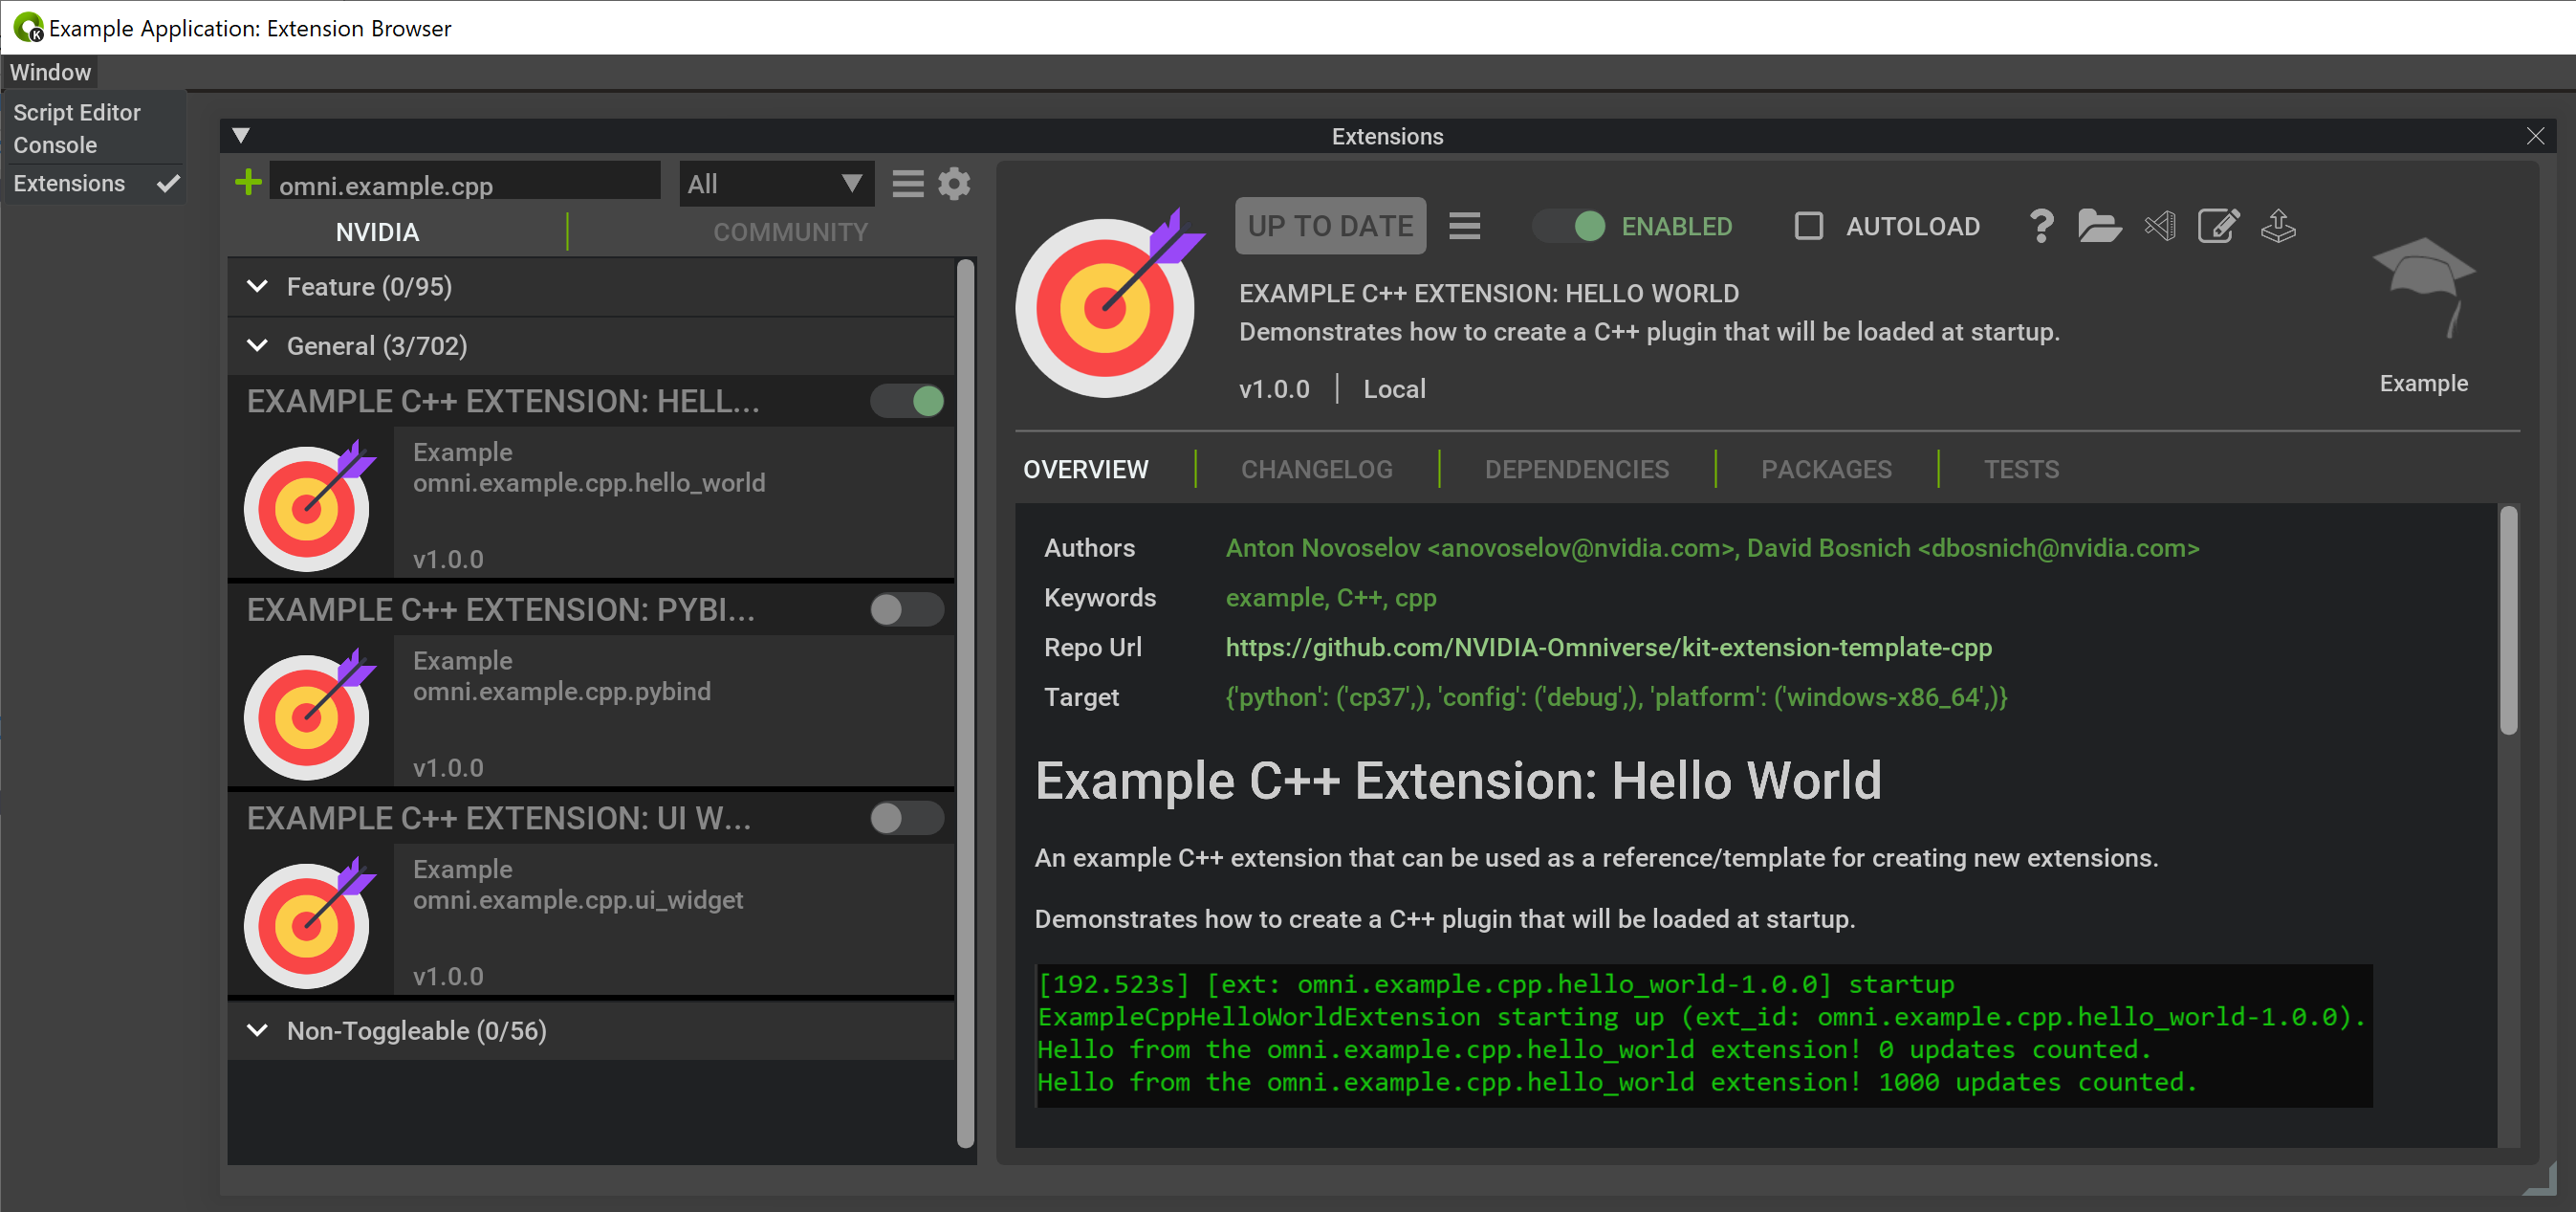
Window->Extensionsto open the extension browser window.Enter
omni.example.cppin the search bar at the top of the extension browser window to view the example extensions included with this repo.
Debugging C++ Extensions
Run
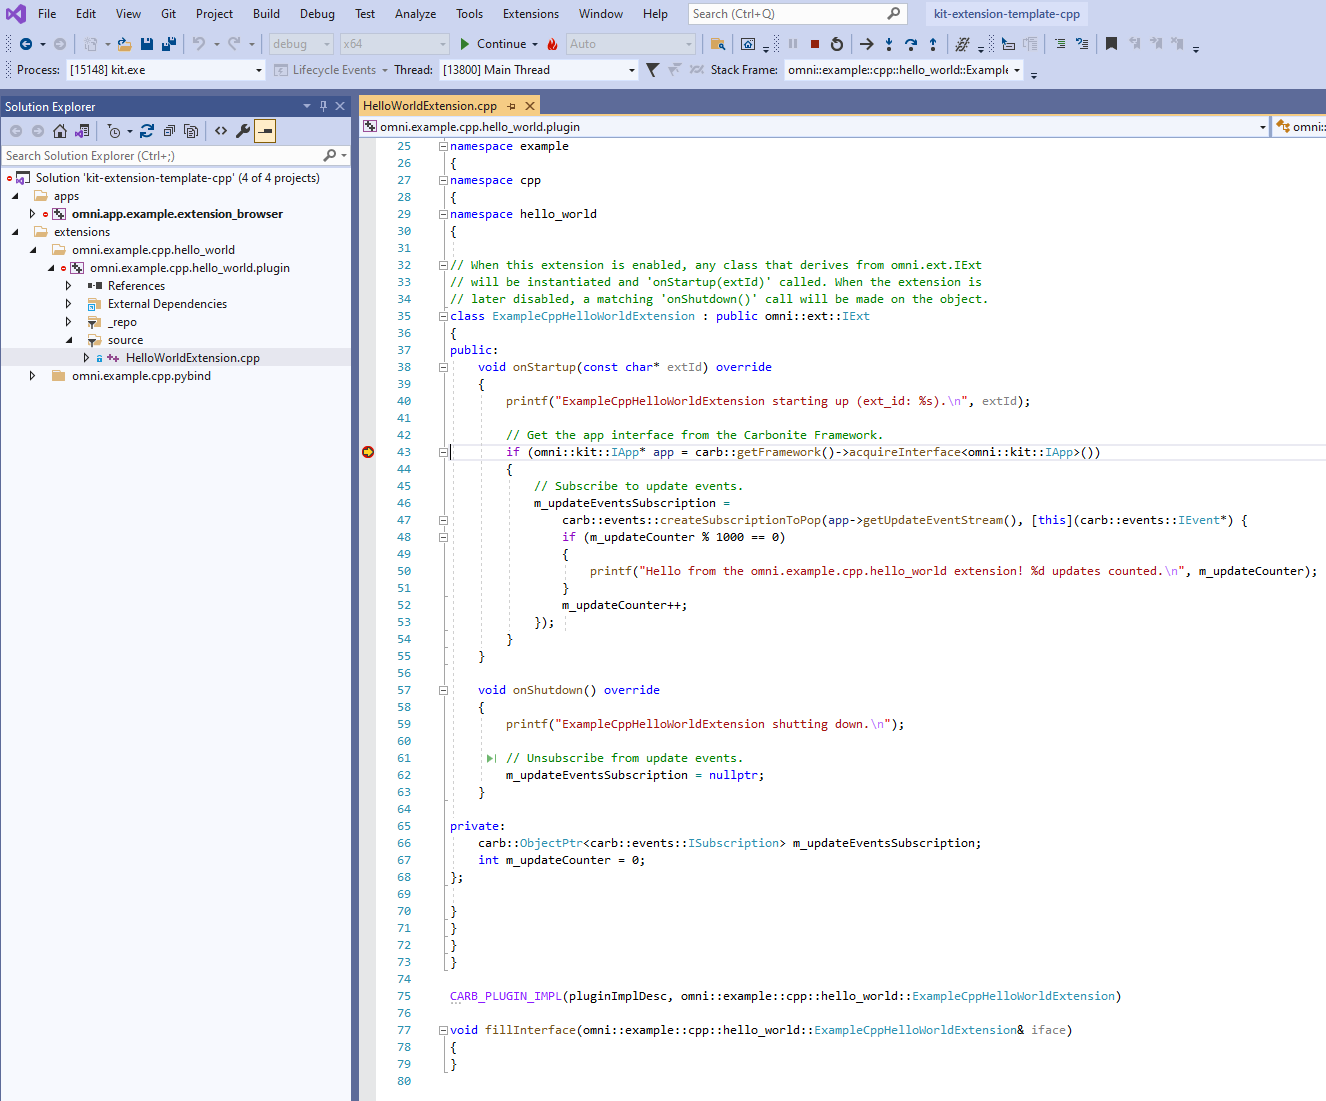
./build.baton Windows (if you haven’t already) to generate the solution file.Open
./_compiler\vs2019\kit-extension-template-cpp.slnusing Visual Studio 2019.Select
omni.app.example.extension_browseras the startup project (if it isn’t already).Select
omni.app.example.viewportinstead if you want the renderer and main viewport to be enabled.Select
omni.app.kit.devinstead if you want the full kit developer experience to be enabled.
Run/debug the example kit application, using the extension browser window to enable/disable extensions.
Creating New C++ Extensions
Copy one of the existing extension examples to a new folder within the
source/extensionsfolder.The name of the new folder will be the name of your new extension.
The omni prefix is reserved for NVIDIA applications and extensions.
Update the fields in your new extension’s
config/extension.tomlfile as necessary.Update your new extension’s
premake5.luafile as necessary.Update your new extension’s C++ code in the
pluginsfolder as necessary.Update your new extension’s Python code in the
pythonfolder as necessary.Update your new extension’s Python bindings in the
bindingsfolder as necessary.Update your new extension’s documentation in the
docsfolder as necessary.Run
./build.bat|.shto build your new extension.Refer to the Getting Started section above to open the example kit application and extension browser window.
Enter the name of your new extension in the search bar at the top of the extension browser window to view it.
Generating Documentation
Run
./repo.bat docson Windows to generate the documentation for the repo, including all extensions it contains.You can generate the documentation for a single extension by running
repo.bat docs -p {extension_name}
Open
_build/docs/kit-extension-template-cpp/latest/index.htmlto view the generated documentation.
Publishing
Developers can publish publicly hosted extensions to the community extension registry using the following steps:
Tag the GitHub repository with the omniverse-kit-extension tag.
Create a GitHub release.
Upload the packaged extension archives, created with
./repo.bat packageon Windows or./repo.sh packageon Linux, to the GitHub release. You must rename the packaged extension archive to match the following convention:Linux:
{github-namespace}-{github-repository}-linux-x86_64-{github-release-tag}.zipWindows:
{github-namespace}-{github-repository}-windows-x86_64-{github-release-tag}.zip
For example, the v0.0.2 release of the extension at https://github.com/jshrake-nvidia/kit-community-release-test/releases/tag/v0.0.2 has archives named jshrake-nvidia-kit-community-release-test-linux-x86_64-v0.0.2.zip and jshrake-nvidia-kit-community-release-test-windows-x86_64-v0.0.2.zip for Linux and Windows, respectively.
Our publishing pipeline runs nightly and discovers any publicly hosted GitHub repository with the omniverse-kit-extension tag. The published extensions should be visible in the community registry the day following the creation of a GitHub release.
Refer to the kit extension documentation for how to specify the Kit version compatibility for your extension. This ensures that the correct version of your extension is listed in any given Kit application.
Contributing
The source code for this repository is provided as-is and we are not accepting outside contributions.