Implementing a Viewport Capture Service
Overview
Through the various sections describing the features, design and inner workings of Omniverse Services, we have illustrated the many ways the microservices stack shipped with Omniverse applications can be used. As we know, however, a picture is worth a thousand words, and a practical example can help illustrate features better than abstract concepts.
In this section, we will be designing a service to capture a still image from a viewport of an Omniverse application. Offering this feature as a microservice will make it possible to expose the feature to a large number of different use cases, and to a large number of Users and automated workflows alike, from only a single machine hosting the service.
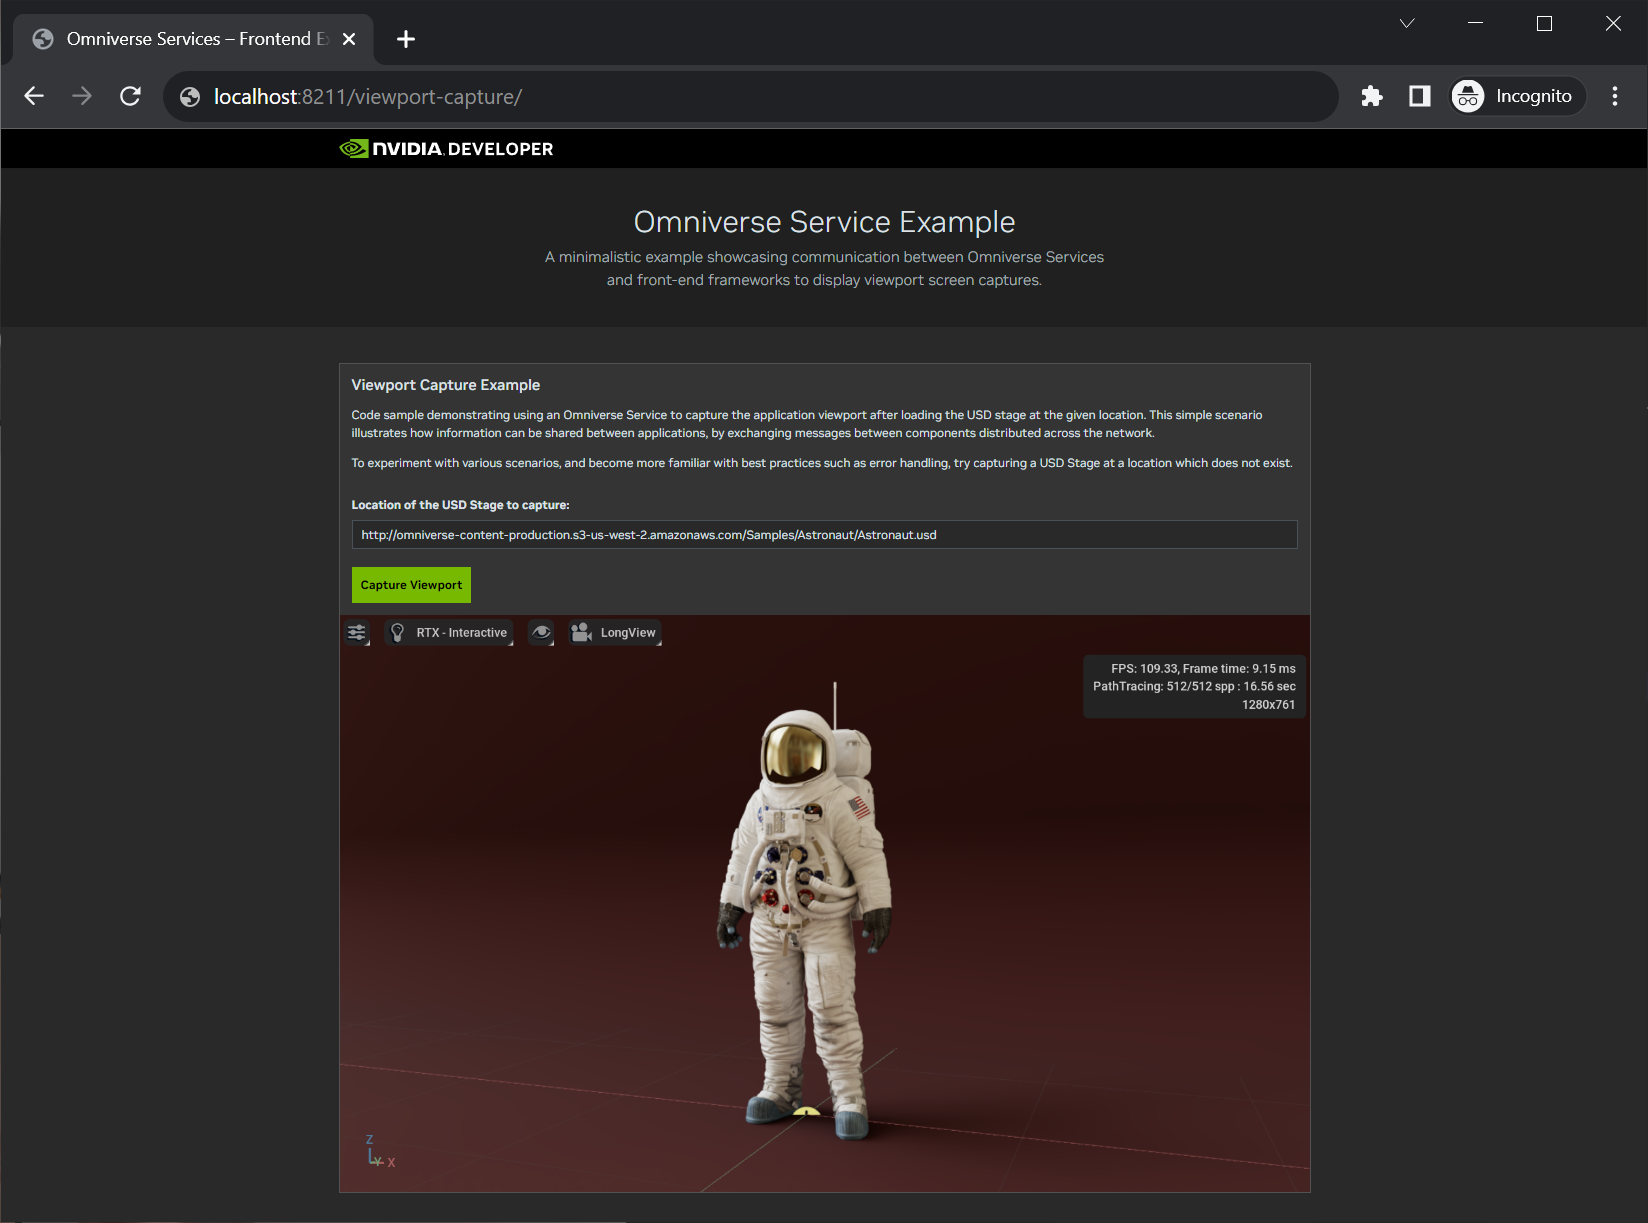
By the end of this tutorial, we should have a working microservice allowing us to present Users with a representation of the application’s viewport through a REST API, as well as a minimalistic web interface:
While we do not claim that this tutorial series will provide an complete overview of all the entire design, implementation, operation and maintenance of microservices or technological projects in general, we do wish that these few pages will provide you with sufficient information to guide you through the minimal steps to create your own Service. Where we may not be able to provide all the context due to brevity reasons, we will provide links to additional resources for a complete learning journey.
Planning ahead
First things first, let’s list the elements we desire to have from this service. This will make it clearer to move ahead as we implement the service, but also make it easier to design in terms of ease of use for those who will be using it, and who may not be familiar with USD, 3D modeling, rendering or interactive applications, but who may be interested in these concepts and wishing to learn more after being exposed to the simple, well-defined workflows we’ll offer.
What we wish to obtain by the end of this series:
A microservice capturing an image from a given USD scene, and making that image accessible from a network location.
A REST-like service accepting requests to render a specific scene, and serving responses about the success of the operation.
One could imaging bringing this set of features even further, by also including:
The option to show or hide viewport features when capturing the image.
Specifying the camera from which to capture the image.
Specifying the timestamp of the frame to capture.
Specifying the renderer to use when capturing images.
And many more exciting features!
Throughout this series, we will also cover topics such as:
Demonstrating healthy development practices, and shipping automated tests along with the feature.
Providing resources such as creating Docker containers to deploy the feature to production.
Steps
For convenience, we have broken down our tutorial into a series of steps each focusing on a particular area of the Service stack:
Getting started will provide you with information about accessing resources and setting up your environment.
Implementing the service will provide you with snippets implementing a minimalistic end-to-end Service.
Exploring the API will walk you through a brief overview of the Service stack, from your User’s point of view.
Capturing screenshots will present how to introduce small functional components to wrap up the implementation of our Service.
Providing unit tests will provide a brief set of best practices surrounding testing when developing Services.
Containerising the service will provide a short overview of the steps to build a Docker container with the Service.
Serving a frontend site will guide you with a brief tutorial about building and host web experiences around the Service.
| Next section: Getting started » |