Exploring the API
Now that we have brought together most of the components our Service will be using, let’s take a moment to validate that it is correctly receiving incoming requests, and take a brief tour of what the OpenAPI specification format offers us.
When enabling the Services API, a web server integrated with the instance of the Omniverse application exposes a REST-capable API allowing external parties to submit requests over the network to query for information or to execute specific tasks. By default, a list of available APIs is accessible over the HTTP(S) port of the web server, under the /docs page.
Note
Each Omniverse application features a different HTTP(S) port by default, as overlapping port numbers on the same system are generally not supported. Featuring different default port numbers by default for each Omniverse application allows you to run a number of them side-by-side at the same time without their capabilities interfering with one another.
If multiple instances of the same Omniverse application are running simultaneously, obtaining the port number of a specific instance can be accomplished by inspecting its start-up log, or querying for the port number used by the HTTP server using this Python snippet:
import carb
http_server_port = carb.settings.get_settings().get_as_int("exts/omni.services.transport.server.http/port")
carb.log_info(f"The OpenAPI specifications can be accessed at: http://localhost:{http_server_port}/docs")
Accessing the OpenAPI documentation
Now that we have defined a minimalistic end-to-end workflow for our Service, let’s confirm we can accurately handle incoming requests.
We can access the OpenAPI specification page for our host application after enabling our extension. As a reminder, this can be accomplished by specifying the location of our extension and enabling it.
On Windows:
1kit.exe ^
2    ./apps/omni.code.kit ^
3    --ext-folder <path of the "/exts" folder of the forked the Kit template repository> ^
4    --enable omni.services.example.viewport_capture.core ^
5    --no-window
On Linux:
1./kit \
2    ./apps/omni.code.kit \
3    --ext-folder <path of the "/exts" folder of the forked the Kit template repository> \
4    --enable omni.services.example.viewport_capture.core \
5    --no-window \
6    --allow-root
Once the host Omniverse application launched, we can navigate to the OpenAPI documentation page to interactively explore and experience the Services that have been registered:
For Kit:
http://localhost:8011/docsFor USD Composer:
http://localhost:8111/docsFor Code:
http://localhost:8211/docsFor Kaolin:
http://localhost:8311/docs
When navigating to this page in a web browser, you should be presented with a page similar to the following:
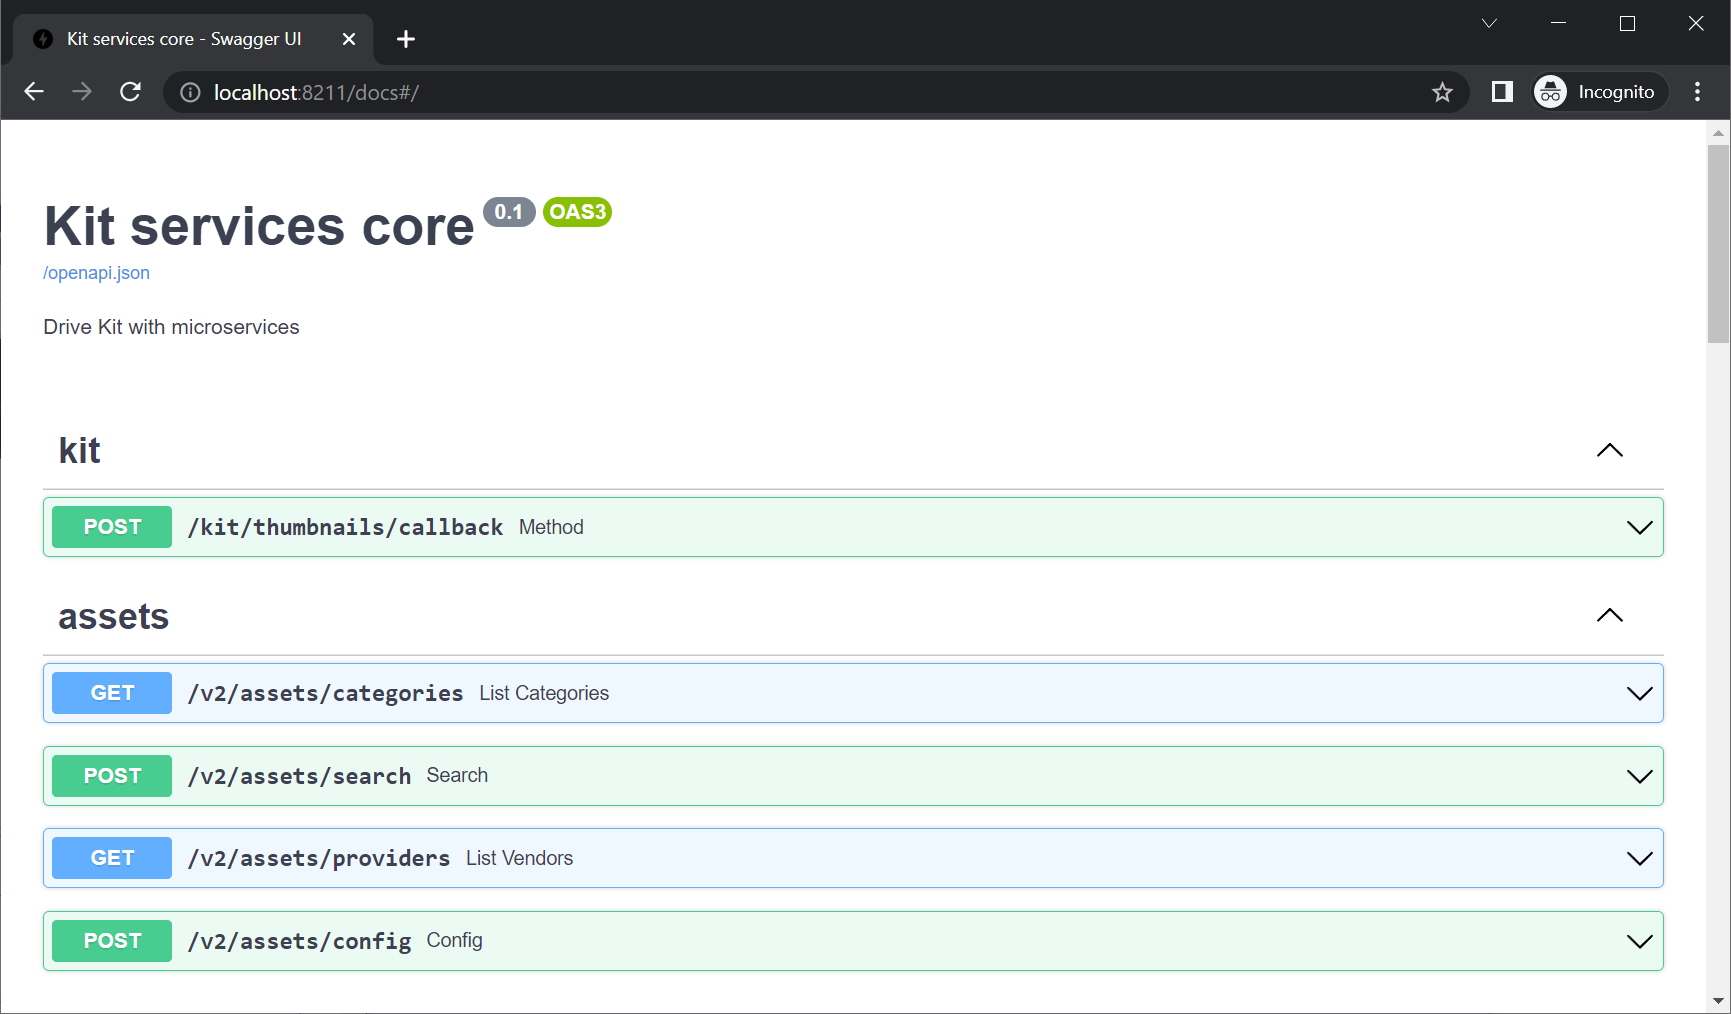
Locate the Service we implemented and enabled, which should be prefixed by /viewport-capture if you followed along with this guide.
Expand the /viewport-capture/capture API registered by the Service by clicking on its POST section, which should reveal the documentation we provided with descriptive information about the service, the arguments it supports and the responses it provides:
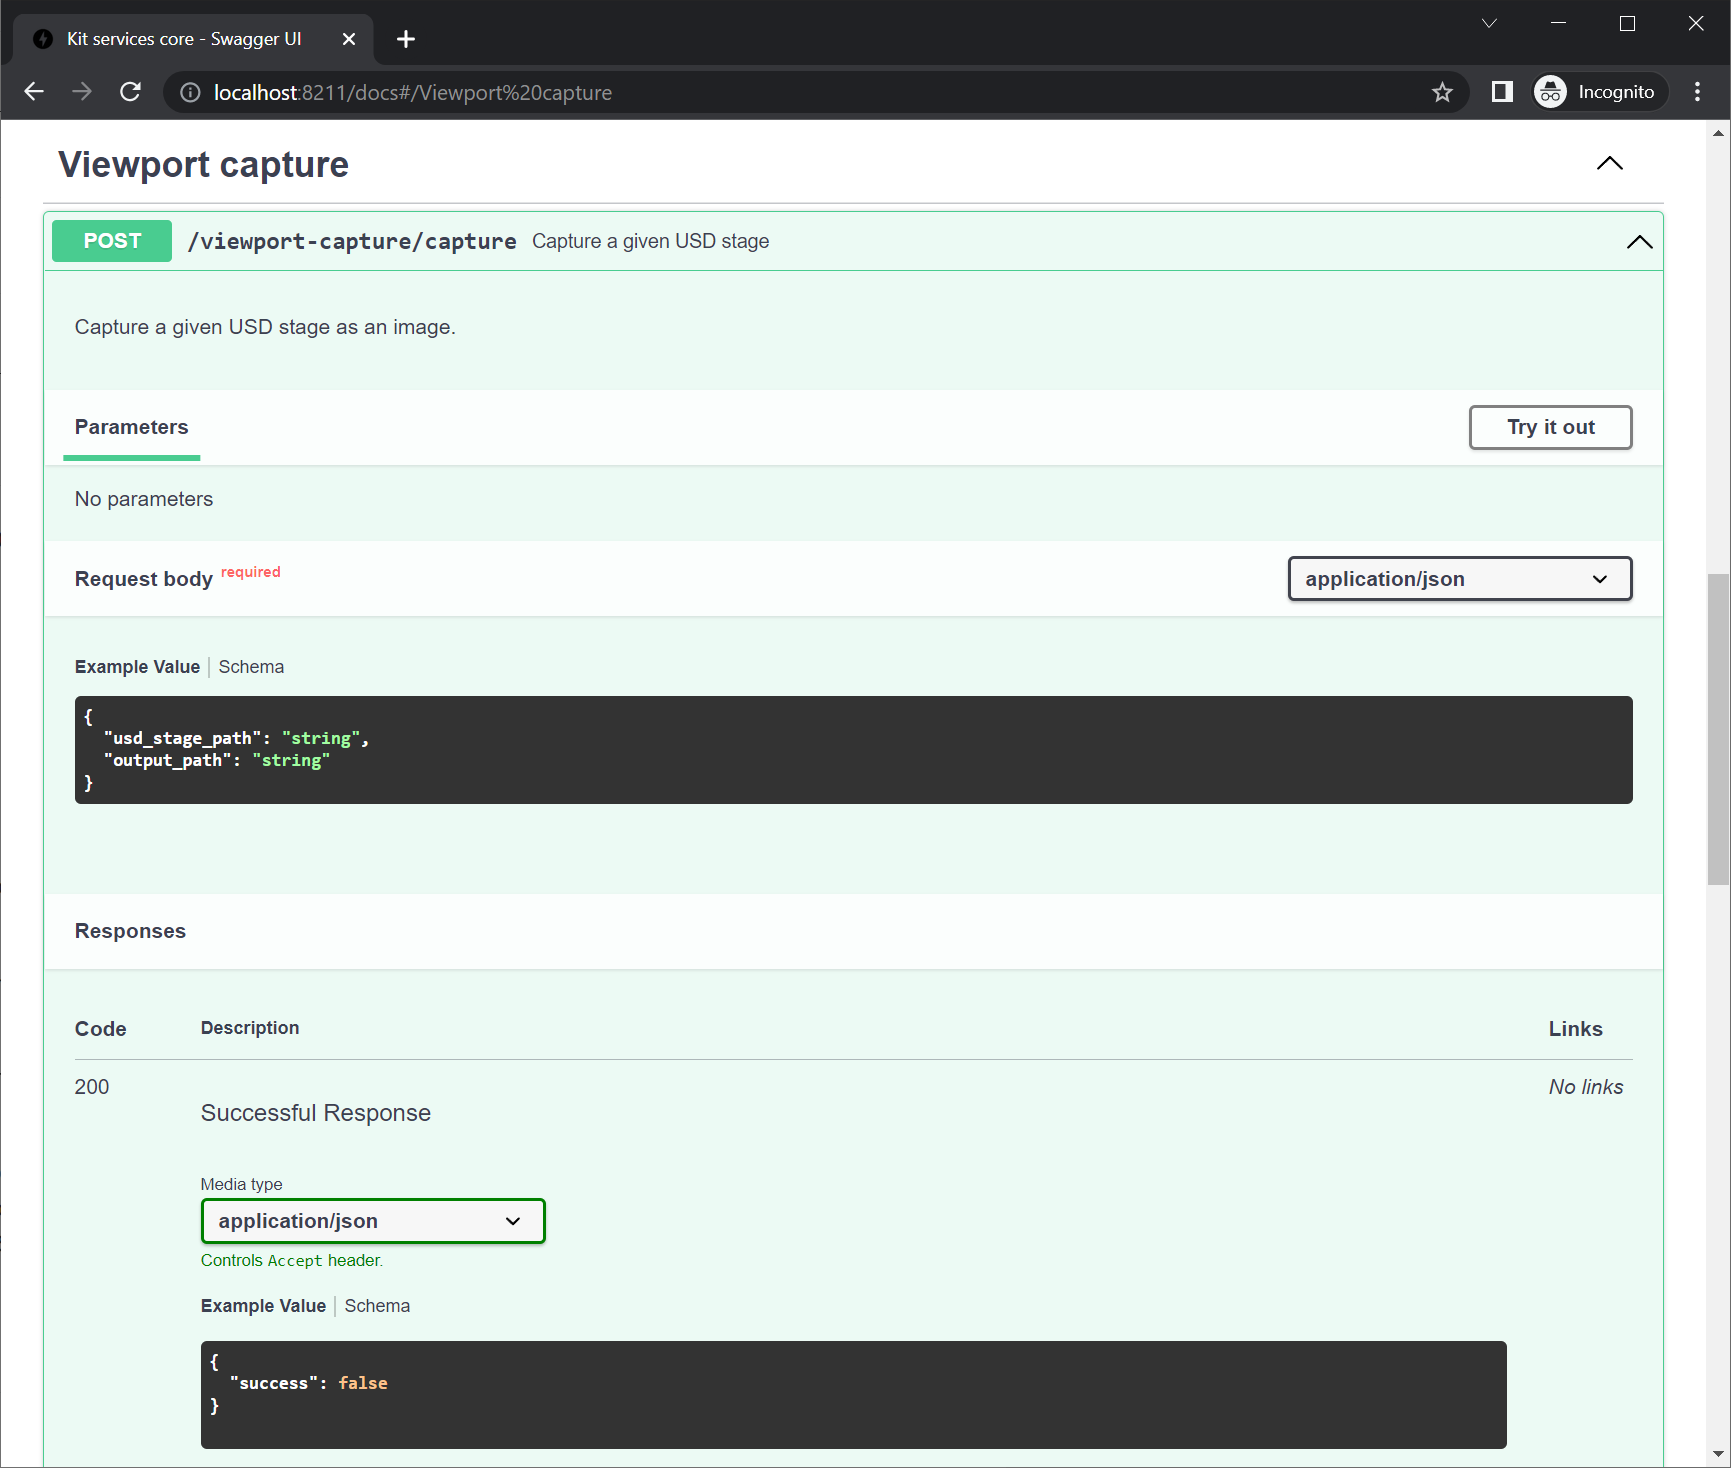
Clicking the Try it out button conveniently located in the OpenAPI documentation page will additionally provide you with a textarea containing the schema of the JSON-formatted arguments our Service is expecting.
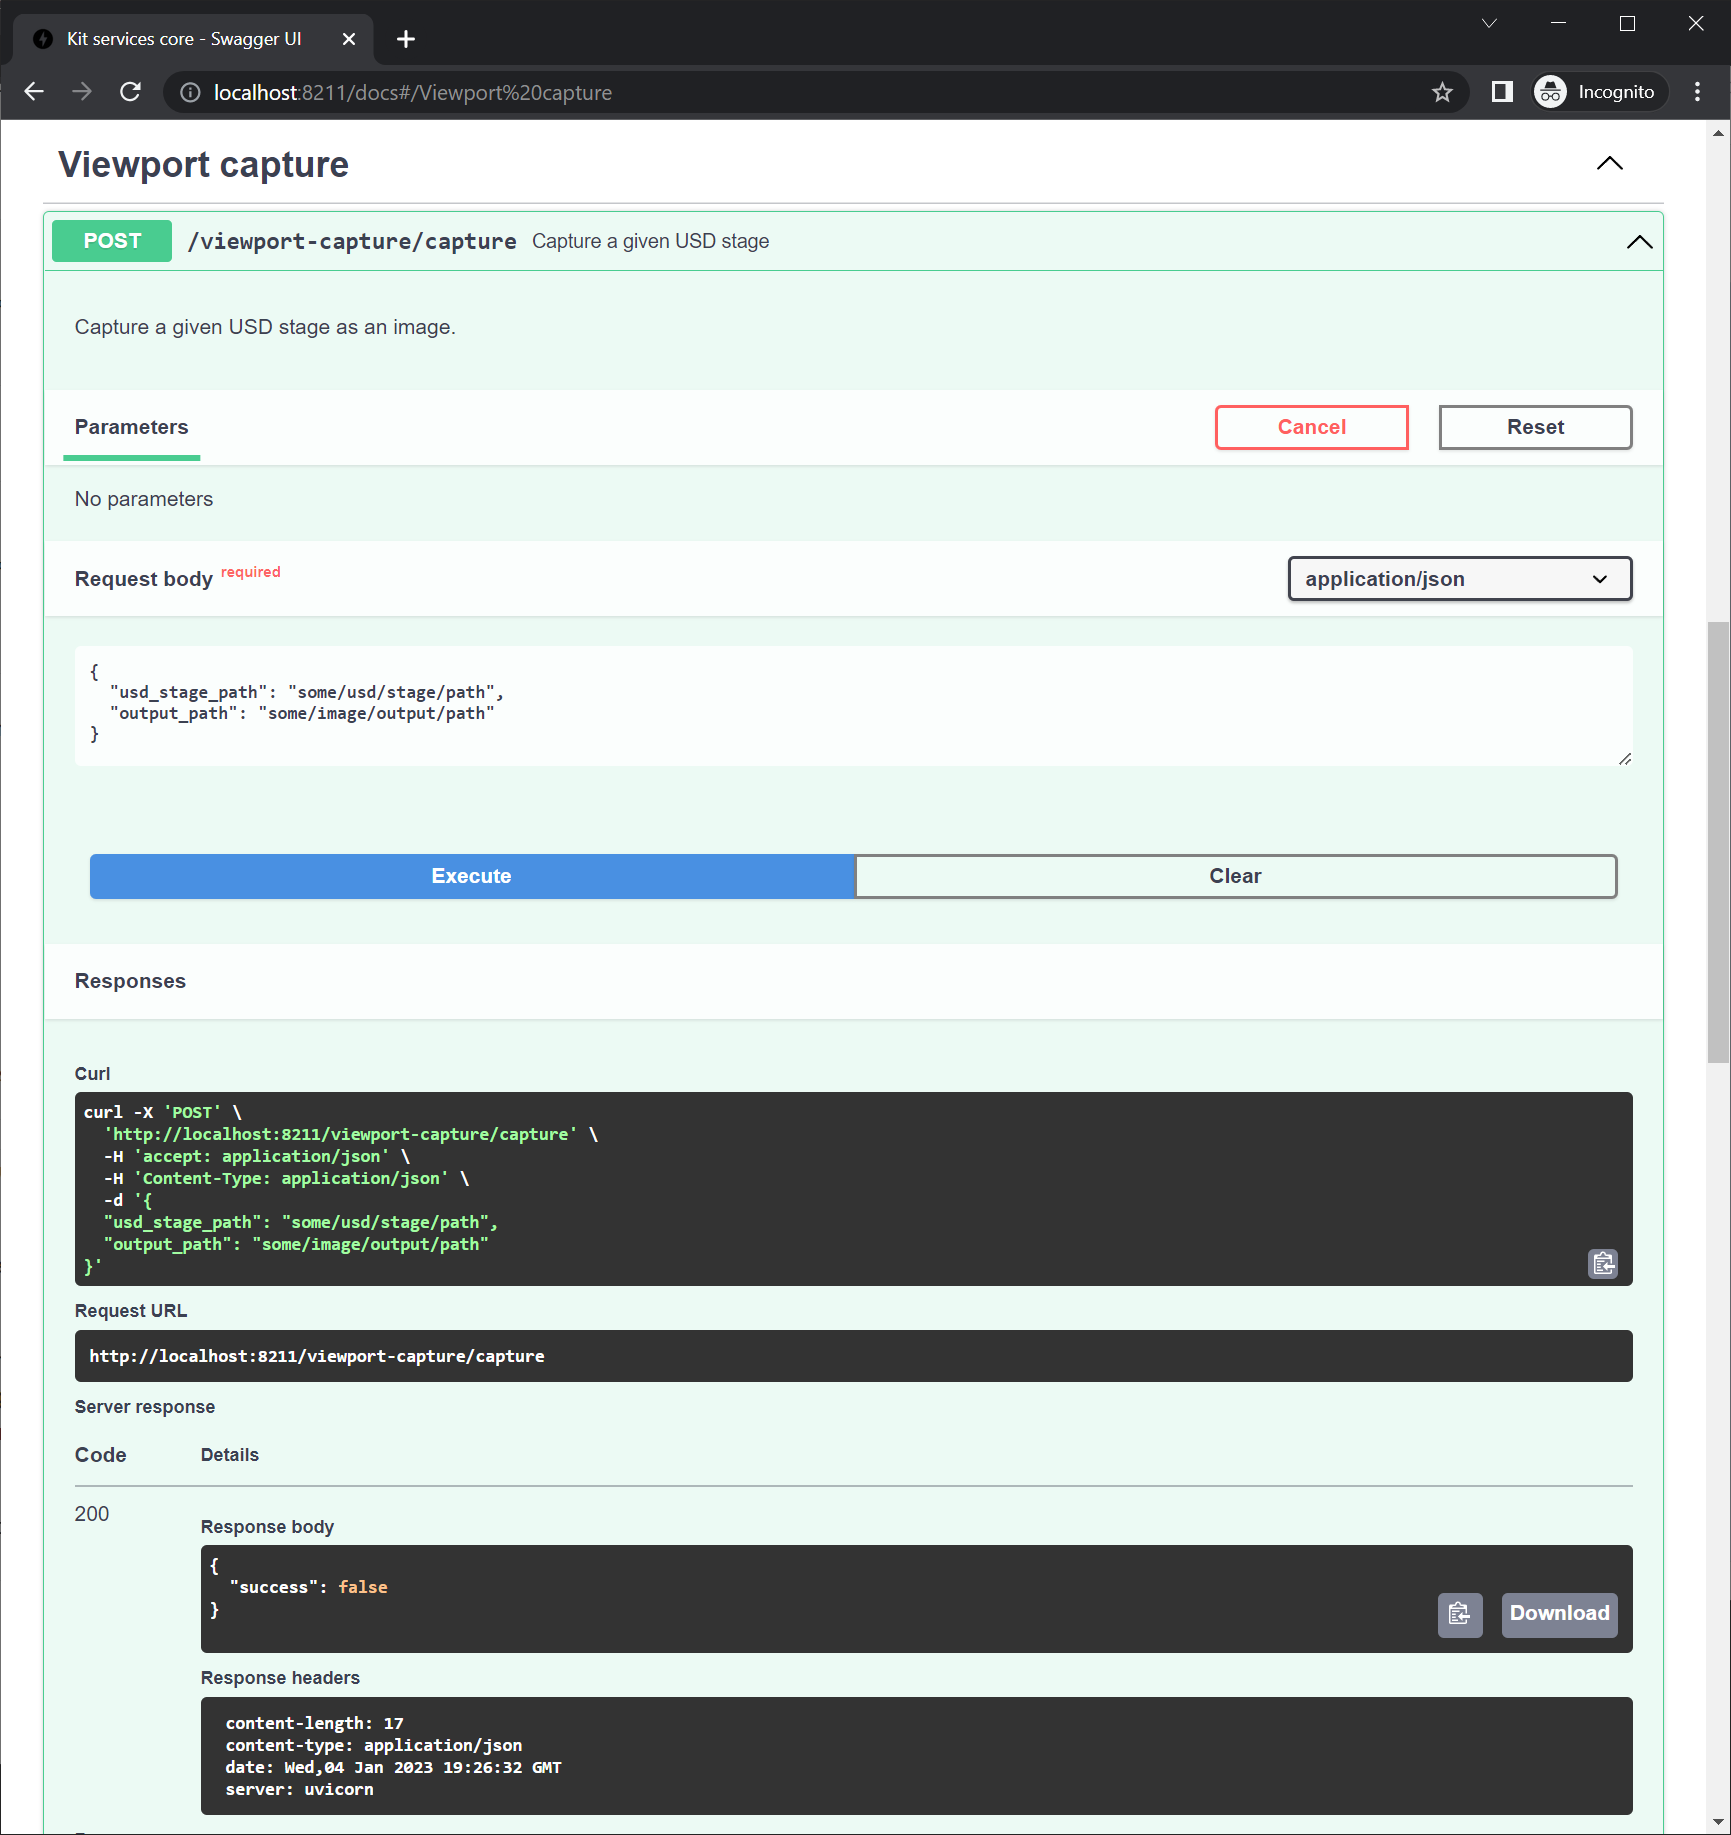
Providing some placeholder data before clicking the Execute button should print an entry in the console with the value received as the path to the USD stage that we will open to capture an image in the next step. In addition to this information being available in both the terminal’s output stream and the Omniverse application’s log file, you should additionally be able to observe that a JSON-encoded response was provided about the success of our operation, based on the placeholder value we provided earlier:
Note
Another useful feature that may be worth highlighting is the curl command sample provided by the OpenAPI documentation, which features the JSON-encoded input data we manually provided as sample placeholder.
This can prove particularly helpful when submitting test data during the implementation phase of a service, but also to assist with the formatting of content in order to perform automated or scripted tasks. Formatting curl queries this way makes it easier for external systems to submit work to our central system, and facilitates the creation of batch and distributed workflows.
In a future step, we will cover in greater detail the configuration and deployment options of systems using containerisation solutions, so the Services we develop can be exposed to a greater number of Users.
Now that we confirmed that all the components we provided earlier are connected, let’s take a moment to implement the actual capture of our scene.
| « Previous section: Implementing the service | Next section: Capturing screenshots » |