Using Nucleus Workstation
Nucleus Service Sharing
By default, users and applications on separate computers cannot access the Nucleus service but Nucleus Workstation does support sharing to an additional user.
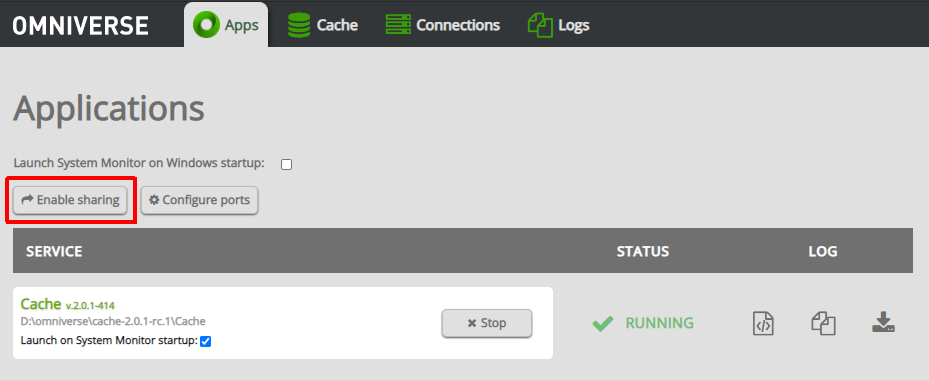
To grant access, click Enable Sharing in the System Monitor at
http://localhost:3080(Windows may display a dialog window to adjust your firewall settings.)
Obtain the IP Address of your computer that is running the Nucleus service (i.e.,
192.168.0.4). It’s recommended for this computer to have a static IP.Using Nucleus Navigator, add additional user accounts to the Nucleus Workstation service and generate share links using the invite button for other users on your network to log in with.
Important
Nucleus Workstation runs on a network interface and it’s IP Address or hostname must be accessible by all intended Clients (e.g., USD Composer), including Nucleus itself. Running Nucleus Workstation behind a firewall or using a Cloud Service Provider (CSP) and port forwarding traffic inbound is not supported.
Caution
Before sharing the Nucleus service, ensure all accounts with ‘Admin’ user rights use strong passwords. The default ‘Admin’ account uses the password of “admin” and should be changed to a strong and unique password. Refer to the Reset Password documentation for additional information.
System Monitor
System Monitor is the utility for monitoring Omniverse services on a Nucleus Workstation:
Click the menu next to Local Nucleus Collaboration Service and click Settings to load System Monitor in a browser. Verify that all services are listed as ‘Running’.
Open
http://localhost:3080in a web browser.
Useful features include:
Starting and stopping individual services
Managing cache
Managing service connections
Accessing diagnostic and troubleshooting logs
Detailed usage info is covered in the System Monitor documentation.
Port Configuration
See Networking and TCP/IP Ports for a comprehensive list of the ports used by Omniverse.
Data Management
The data directory is chosen during installation of Nucleus Workstation. All data saved to Nucleus Workstation will be stored in that directory.
To back up your data, close all running Omniverse services, then create a copy of the data directory.
To restore your data, ensure that the data path points to the same path as your backup directory. There are two ways to do this:
Change DATA PATH in Launcher to point to the backup directory:
During installation: set ‘DATA PATH’ to your backup location
After installation: click Profile > Settings, set ‘DATA PATH’ to your backup location
Open the config file named:
.nvidia-omniverse/config/omniverse.tomlManually set the
data_rootparameter to your backup location. For example using Windows:
data_root = "c:\\ProgramData\\NVIDIA Corporation\\Omniverse"
Authentication
User authentication is detailed within the Authentication and User Management documentation.