Backups and Data Restoration
Overview
As with any file server or data storage system, it is important to ensure that proper Nucleus Server backups are performed regularly to safeguard against system failure, data corruption, or accidental user mistakes.
There are several methods to protect your data which are covered in detail below.
When choosing your Enterprise Nucleus Server backup strategy, it is important to consider backups for both disaster recovery and data recovery as these scenarios can be different.
Note
The information below is exclusively for the Enterprise Nucleus Server. These tools and methods are not compatible with Nucleus Workstation. Click here for additional information on Nucleus Tools.
Nucleus Disaster Recovery Backups
Running an Enterprise Nucleus Server within a hypervisor such as VMware ESXi or Microsoft Hyper-V provides the ability to use snapshot-based backup software such as Veeam Backup and Recovery, Rubrik, or Zerto. This also applies to running an Enterprise Nucleus Server within the Cloud Service Provider (CSP) of your choice.
This type of backup is ideal when you need to recover the entire server. There are two things to keep in mind when using this type of backup:
Perform this type of backup only during periods of low Nucleus usage. (i.e., overnight or after typical business hours.)
Ensure that prior to the backup being performed, the data on the virtual machine is in a consistent state through quiescing. You may also choose to stop the Docker containers for your Nucleus Server during the backup ensuring this consistency and restarting the containers when the backup has successfully completed.
An alternative way to back up your Enterprise Nucleus Server is to use a
Linux data synchronization tool such as rsync. Using rsync, you can copy
your Nucleus data from the server to a secondary file system (i.e., NAS,
a secondary virtual machine, etc.)
When choosing to rsync, there are two sets of files that you will need
to consider, namely the Nucleus data itself, and the configuration
files/secret keys.
If you are using the recommended default installation locations, the two locations that need to sync to a secondary location are:
/opt/ove(Configuration files are stored within this directory.)/var/lib/omni(Nucleus data is stored within this directory.)
Note
This process can be scripted and added as a server cronjob to run on schedule as defined by your IT or data policy.
Nucleus Granular Data Backups
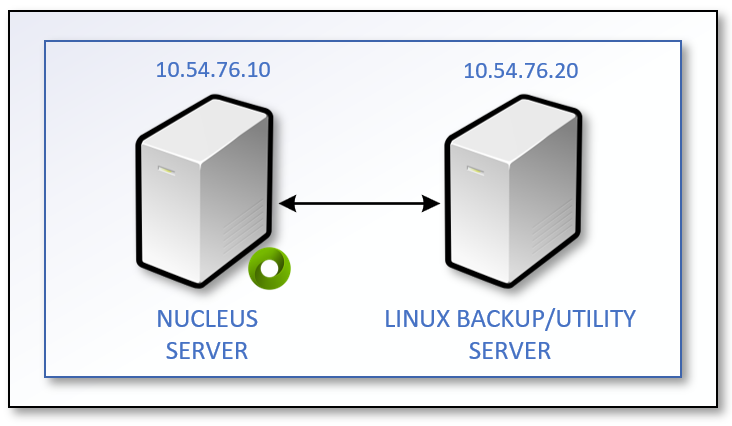
To back up Nucleus data in a granular way allowing for individual directories to be restored, Nucleus Tools is a set of utilities that offer this functionality. The example below explains how to use Nucleus Tools to back up an Enterprise Nucleus Server to another Linux server and perform a granular data restore.
During the backup and restore process, the containers on your Enterprise Nucleus Server must be up and running.
Warning
A granular backup is not intended to protect your Enterprise Nucleus Server in the case of a server failure. It is strongly recommended to additionally use one of the DR-style backup methods above.
Enabling Granular Backups
By default, the granular backup ports for Nucleus are disabled. Additionally, the backup process requires additional containers that are not part of the base Nucleus install. (These containers will be downloaded as part of this process.)
To enable these ports, follow these steps:
Stop all the Nucleus containers as we will need to edit the configuration files. The example below assumes Nucleus is installed into the recommended location and is using SSL. As installations may differ, modify the command below to reflect your environment:
sudo docker compose --env-file
/opt/ove/base_stack/nucleus-stack.env -f
/opt/ove/base_stack/nucleus-stack-ssl.yml down
Edit the
.ymlfile you are using to run the Nucleus base stack. (As mentioned above, the SSL enabled configuration is assumed.)Warning
When editing .yml files, proper spacing and indentation is important. When removing the comment markers, ensure that no additional spacing is changed. As a best practice, make a copy of the file before editing.
Locate the following two lines and remove the comment pound/hash marks:
# - published: ${SERVICE_API_PORT}
#   target: 3006
Additionally, locate the following lines and remove the comment pound/hash marks:
#  nucleus-meta-dumper:
#        image: ${REGISTRY}/nucleus-meta-dumper:${CORE_VERSION}
#        restart: always
#
#          environment:
#               ACCEPT_EULA: "${ACCEPT_EULA:?ACCEPT_EULA must be set to 1}"
#
#               OMNI_SERVER: nucleus-api
#
#                OMNI_SERVICE_PORT: 3006
#
#                OMNI_META_DUMPER_AUTH_ENABLED: basic
#                OMNI_META_DUMPER_USER: omniverse
#                OMNI_META_DUMPER_PASSWORD: ${MASTER_PASSWORD}
#
#           volumes:
#                - ${DATA_ROOT}/scratch/meta-dump:/omni/scratch-meta-dump
#
#             ports:
#                   - published: ${META_DUMP_PORT}
#                      target: 5000
Once the changes are complete, save the file and exit.
Start the containers to bring Nucleus back online:
sudo docker compose --env-file
/opt/ove/base_stack/nucleus-stack.env -f
/opt/ove/base_stack/nucleus-stack-ssl.yml up -d
If there are no errors and Nucleus starts successfully, continue to the next step. If Nucleus does not start, please review your configuration.
Note
As the metadumper container was not installed during the initial Enterprise Nucleus Server setup, it will use the MASTER PASSWORD as defined in the base-stack.env file. Please keep this in mind if the password was changed post-install using the Nucleus Navigator interface.
Setting up the Backup
On the backup/utility server, first ensure that the server has enough disk space to accommodate the data from the Enterprise Nucleus Server, then create a backup directory on the server where the Nucleus data will be stored. In this example, /NucleusBackup is used. Be sure to properly set the permissions to this directory as well.
cd /
sudo mkdir /NucleusBackup
sudo chmod 777 -R /NucleusBackup
Run the following command on the backup/utility server to set the environment variable for Nucleus Tools:
# export NUC_TOOL=[PATH_TO_CONTAINER]
Running the Backup
Run the following command to start the backup:
sudo docker run --rm -v  /NucleusBackup:/out -e "ACCEPT_EULA=Y"
$NUC_TOOL dump_backup [$IP_OF_NUCLEUS] /Projects /out  -p
'[$MASTER_PW]' -u omniverse
$IP_OF_NUCLEUSis the IP Address of your Enterprise Nucleus Server/Projectsis the top directory where the backups will be taken from. (Change this as per your requirements.)$MASTER_PWis the master password of your Enterprise Nucleus Server which uses the username ofomniverse.
Note
If the Nucleus Tools container has never been downloaded, it will be automatically downloaded in this step with the backup starting immediately following.
As noted above with the rsync process, this can be also scripted to run
on a defined schedule.
Restoring Data from the Backup
Run the following command on the backup/utility server to set the environment variable for Nucleus Tools:
# export NUC_TOOL=[PATH_TO_CONTAINER]
Then run the following command to start the restore:
sudo docker run --rm -v /NucleusBackup:/backup -e
"ACCEPT_EULA=Y" $NUC_TOOL upload /backup/tree/default -d
/backup/data [$IP_OF_NUCLEUS] /[$RESTORE_DIR] -p '[$MASTER_PW]'
-u omniverse
$IP_OF_NUCLEUSis the IP Address of your Enterprise Nucleus Server$RESTORE_DIRis the directory of files that you want to restore. (For example, if you specify /Projects/XYZ, XYZ is the only directory that will be restored.)$MASTER_PWis the master password of your Enterprise Nucleus Server which uses the username of omniverse.
Once complete, the data will be restored to your Nucleus server.