Particle Editor
The Particles Editor allows you to create particle systems by creating a graph of nodes.
Getting started
To open the Particles Editor. Go to Window -> Particles and click Editor.

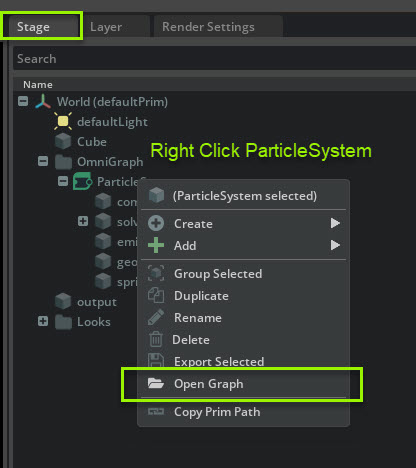
If you have a Particle System made you can Right click the Stage -> OmniGraph -> ParticleSystem and select Open Graph in the menu.
The Particles Editor will appear in the same frame as the Content window in a Tab.
Editor UI
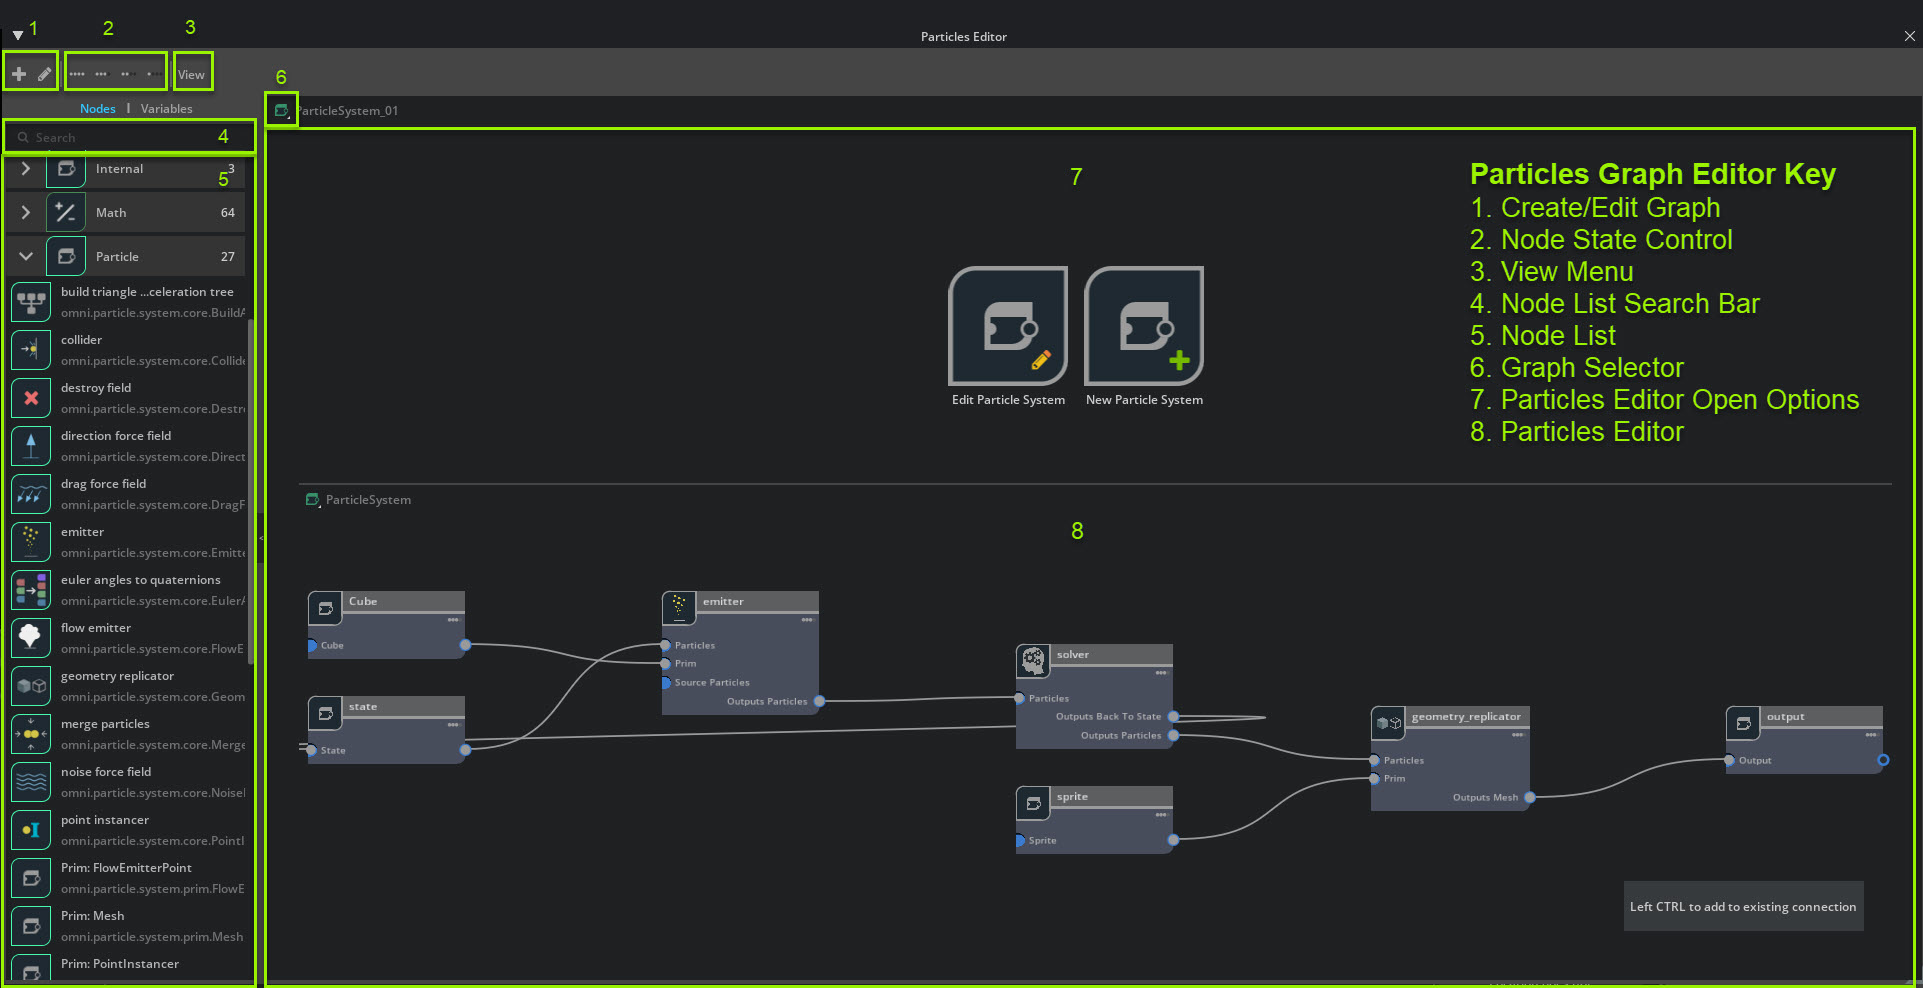
Create Edit Graph
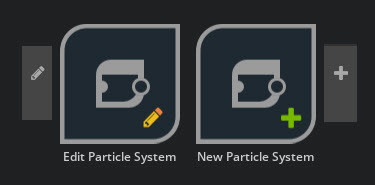
Create Particle Graph (plus) button allows you to create a new Particle System Graph.
Edit Particle Graph (pencil) button allows you to edit an existing Particle System Graph.
Note
to edit a particle system using the pencil button you must have the particle system selected in the Stage.
Node State Control
The Node State Control buttons allow you to expose more connections in nodes.
..note :: If you have no nodes selected the Node State Control will affect all nodes.
Node State Control |
Description |
|---|---|
‘….’ |
Expand node(s) to their maximum level.
|
‘…’ |
Expand node(s) to the preferred level.
Default level when node is drag dropped from the node menu.
|
‘..’ |
Minimize node(s).
|
‘.’ |
Close node(s).
|
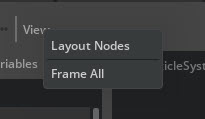
View Menu
The View menu allows you to automatically frame or layout your node graph.
View Menu |
Description |
|---|---|
Layout Nodes |
Automatically arranges all nodes in the node graph.
|
Frame All |
Focuses selected nodes to the Graph Window frame.
If no nodes are selected, focus applies to all nodes.
|
Node List Search Bar
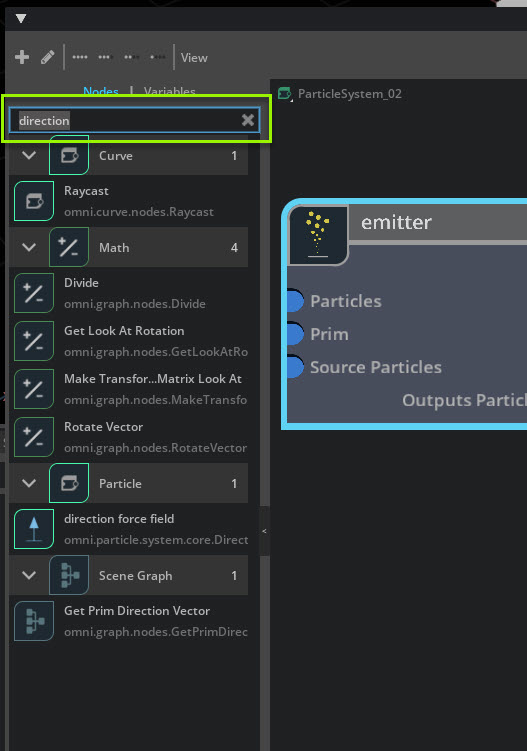
The Node List Search Bar allows you to filter your search for nodes in the node menu.
Node List
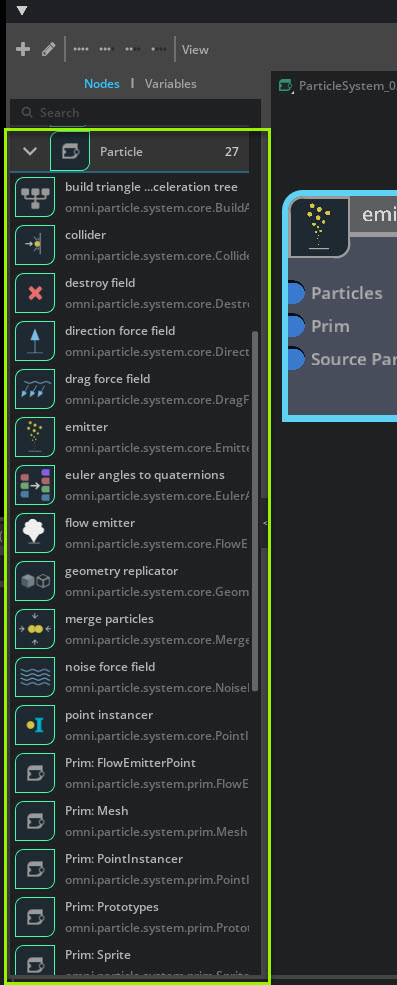
The Node List has all of the node options available to the particle editor.
You can Left click drag and drop nodes from the node menu into the Particles Editor Node window.
Graph Selector
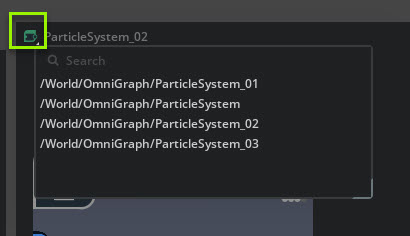
The Graph Selector button allows you to select any particle system you have created in your stage to edit.
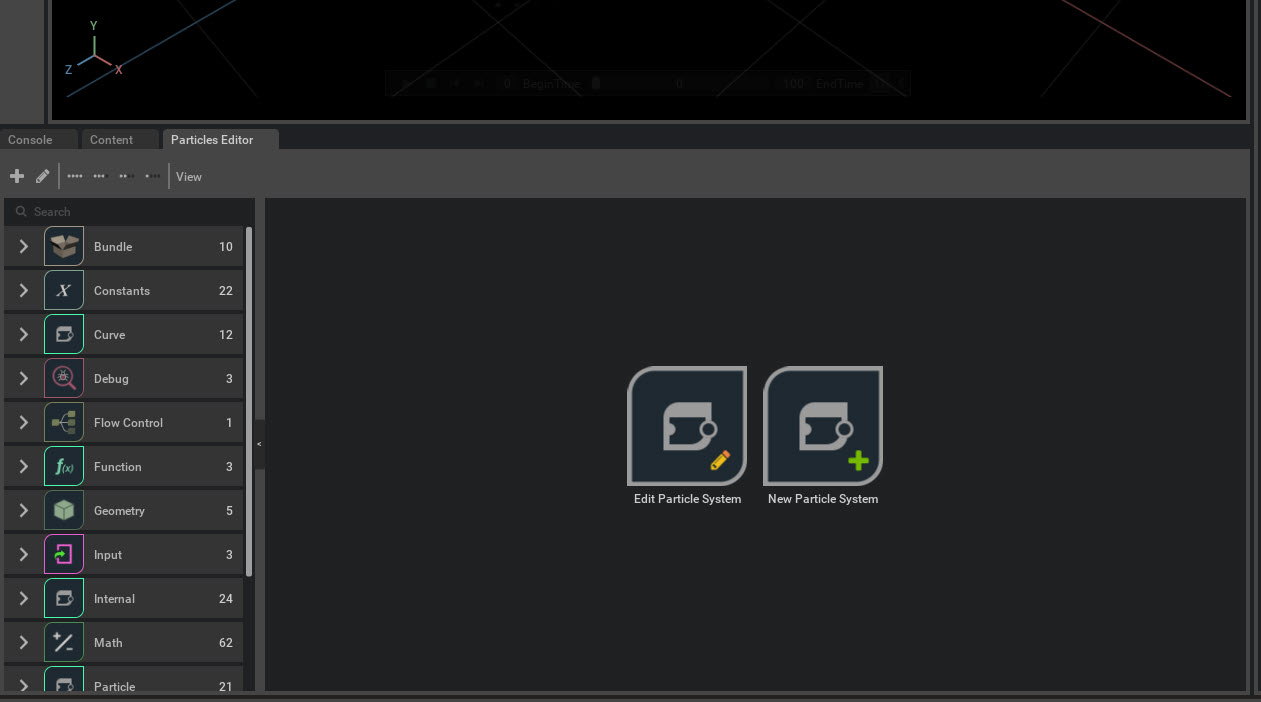
Particles Editor Open Options
Upon opening the Particles Editor, a pair of options will appear.
From here you can edit or open a particle system using the buttons provided.
Particles Editor
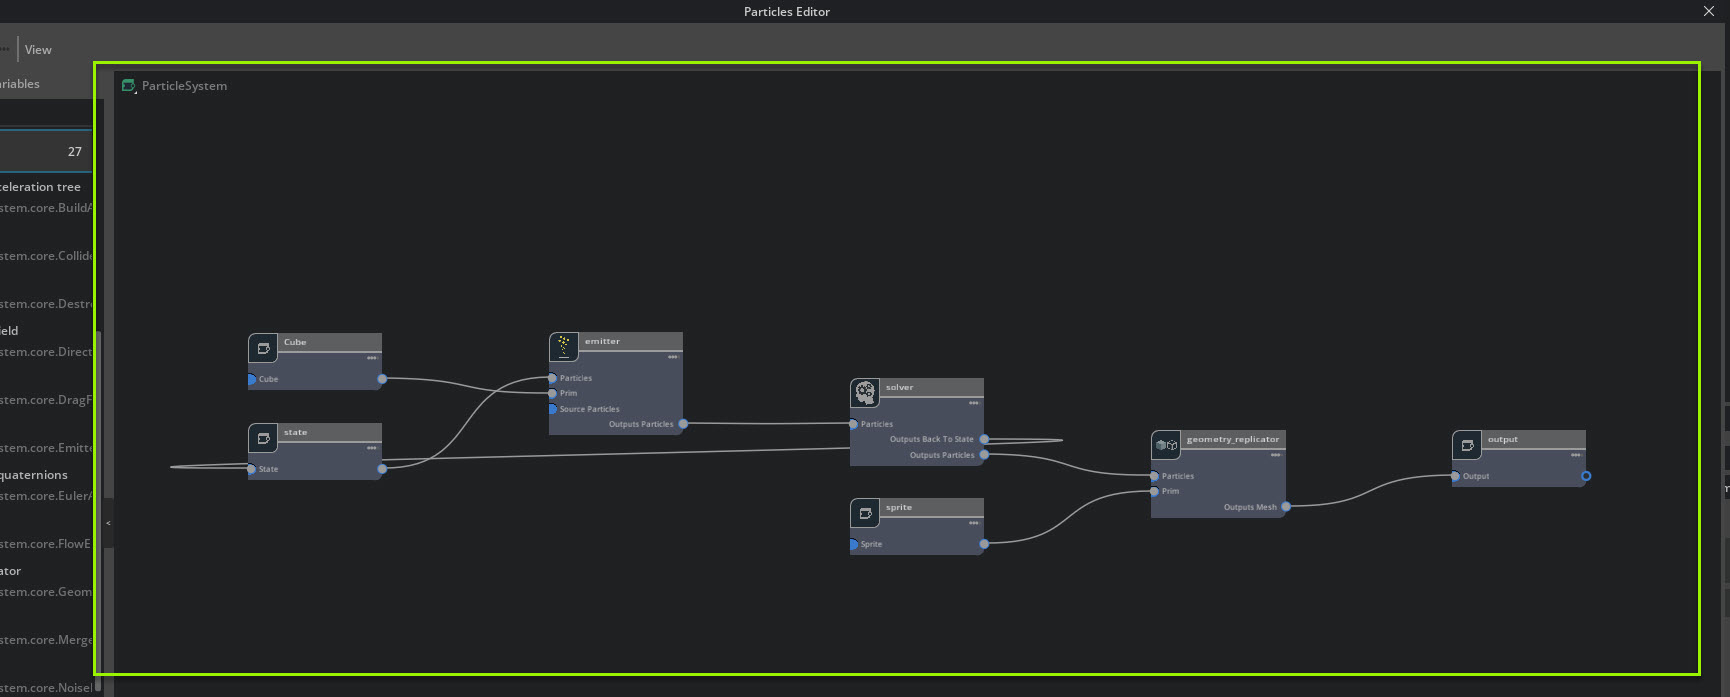
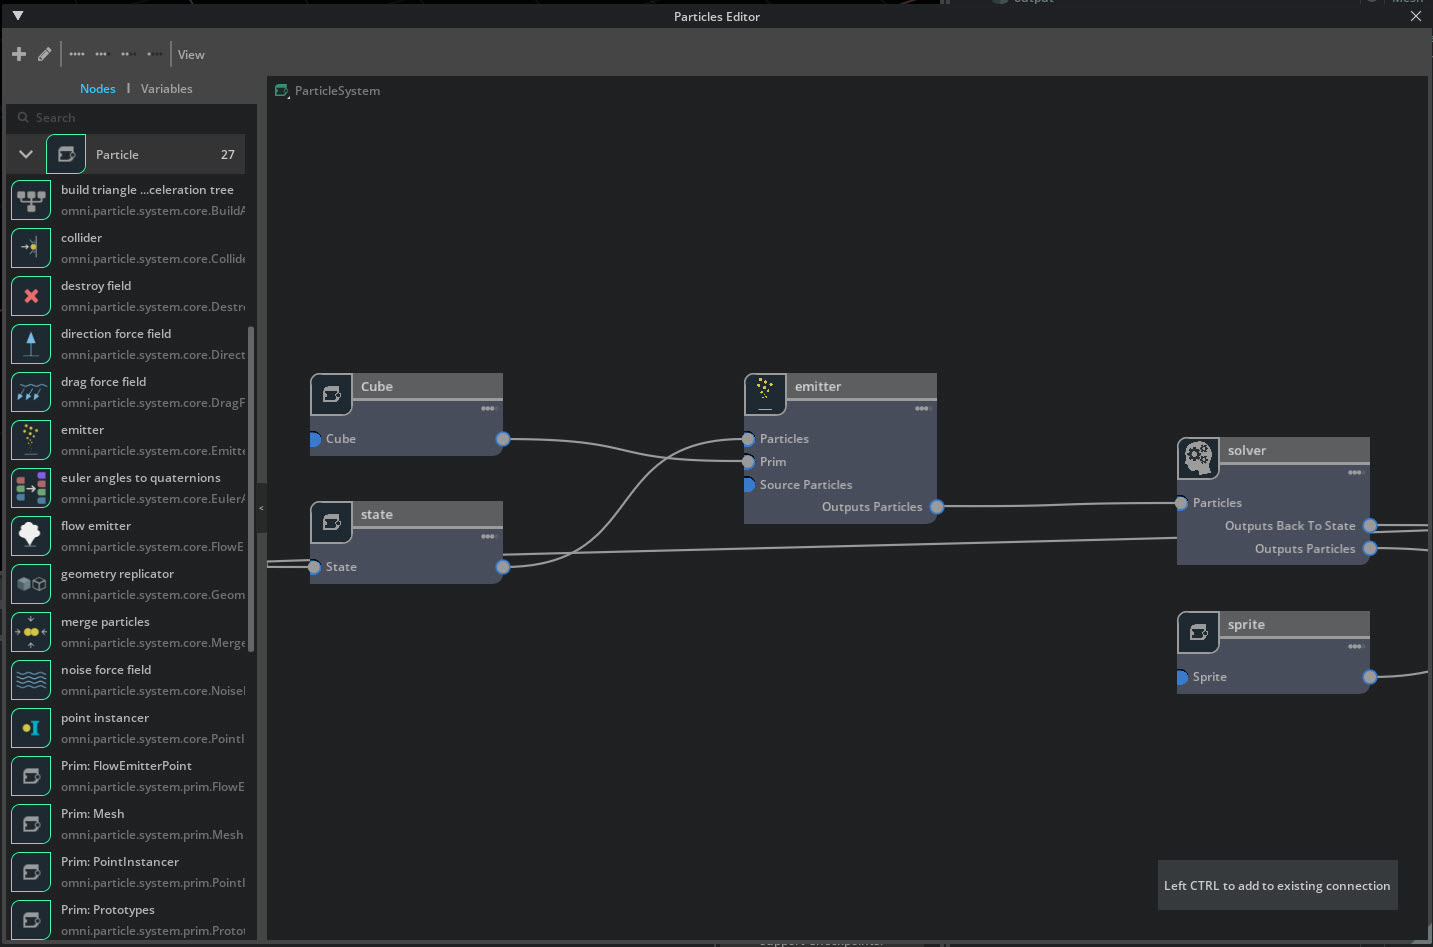
The Particles Editor is the surface where you’ll add and connect nodes to create a particle system.
Particles Editor Navigation

Editor Node Window Navigation |
Description |
|---|---|
Left Click |
Select Node.
|
Left Click Drag Marquis |
Select Multiple Node.
|
Left Click Drag Pin |
Connect Nodes: Drag connector from pin to pin.
|
Left Click select Node |
Drag to move Node.
|
Middle Mouse Hold |
Pan Particles Node editor Frame.
|
Middle Mouse Wheelscroll |
Zoom Particles Node Editor Frame.
|
Right Mouse Pin |
Disconnect a selected pin
|
Adding Nodes
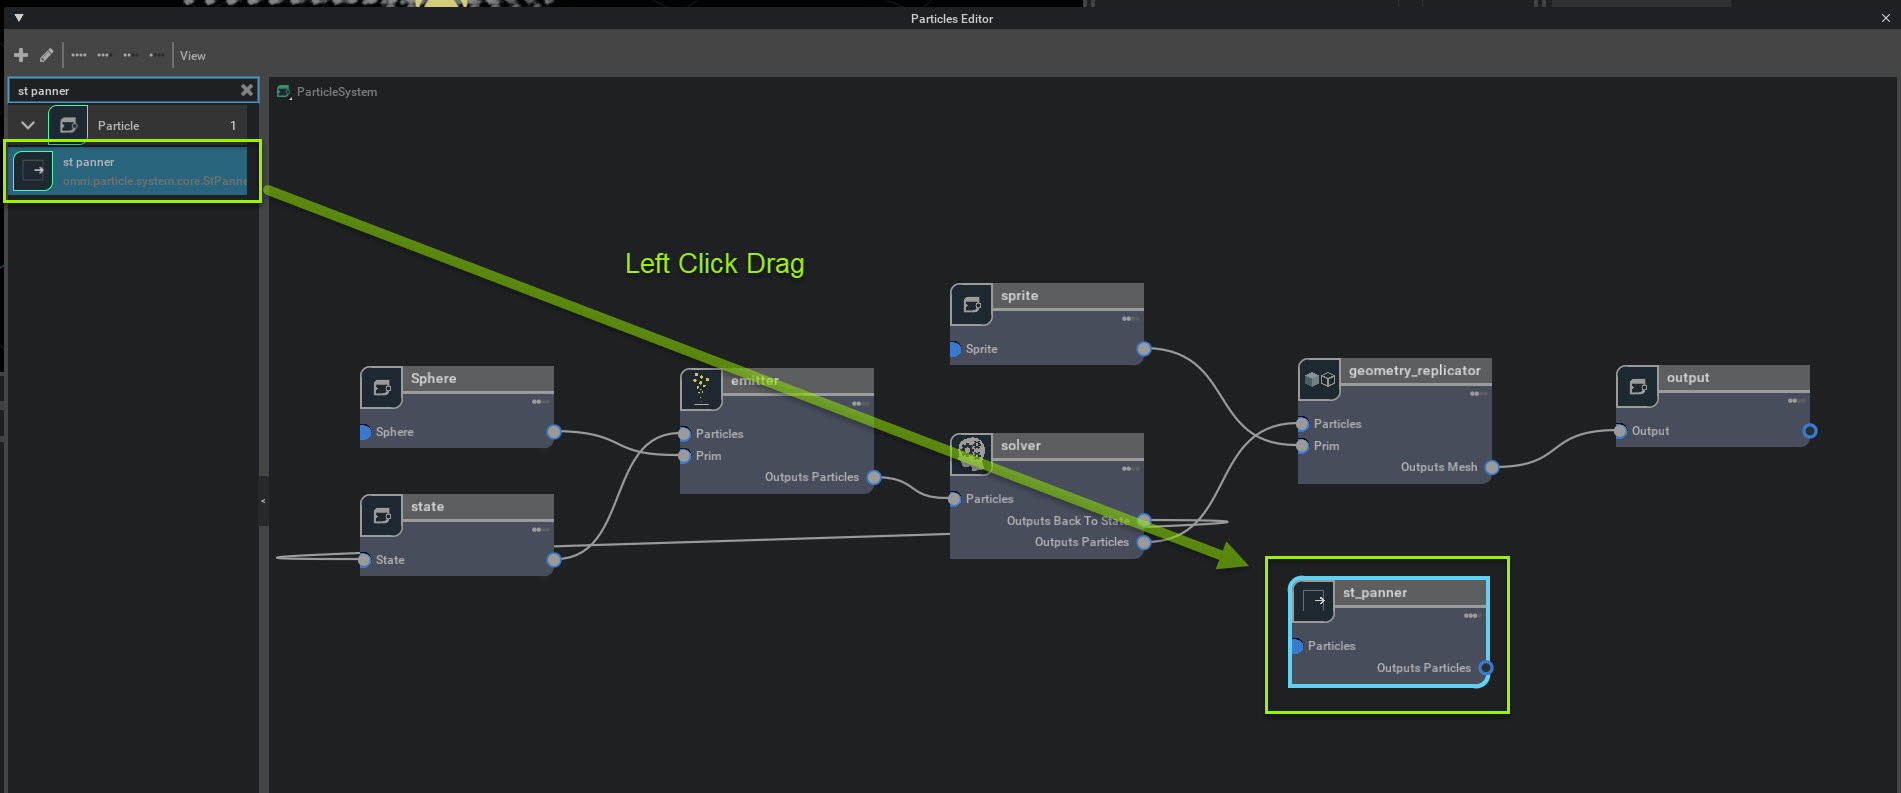
To add a Node, search for a node in the Node List and left click drag the node into the Particles Editor.
Select a Node
Editor Node Window Navigation |
Description |
|---|---|
Left Click |
Select Node.
|
Left Click Drag Marquis |
Select Multiple Node.
|
Left Click Hold Node |
Drag to move Node.
If multiple nodes are selected, all nodes will move
|
Connecting and Disconnecting Nodes
Node Pin Connectors Navigation |
Description |
|---|---|
Left Click Drag Pin |
Connect Nodes: Drag connector from pin to pin.
|
Right Click Connected Pin |
Disconnect window appears. Select Disconnect to disconnect a connected pin.
|
Connecting Multiple Nodes to the same pin
Connecting Multiple Nodes |
Description |
|---|---|
Control Left Click Pin |
Allows to connect multiple nodes to a single input pin.
|
Adding Prims from the Stage
In this example we’ll be adding Sphere_01 prim to the Particles Editor.
1. Go to Stage -> World and Left click select and hold Sphere_01
2. Drag and drop Sphere_01 into the Particle Editor as shown below.
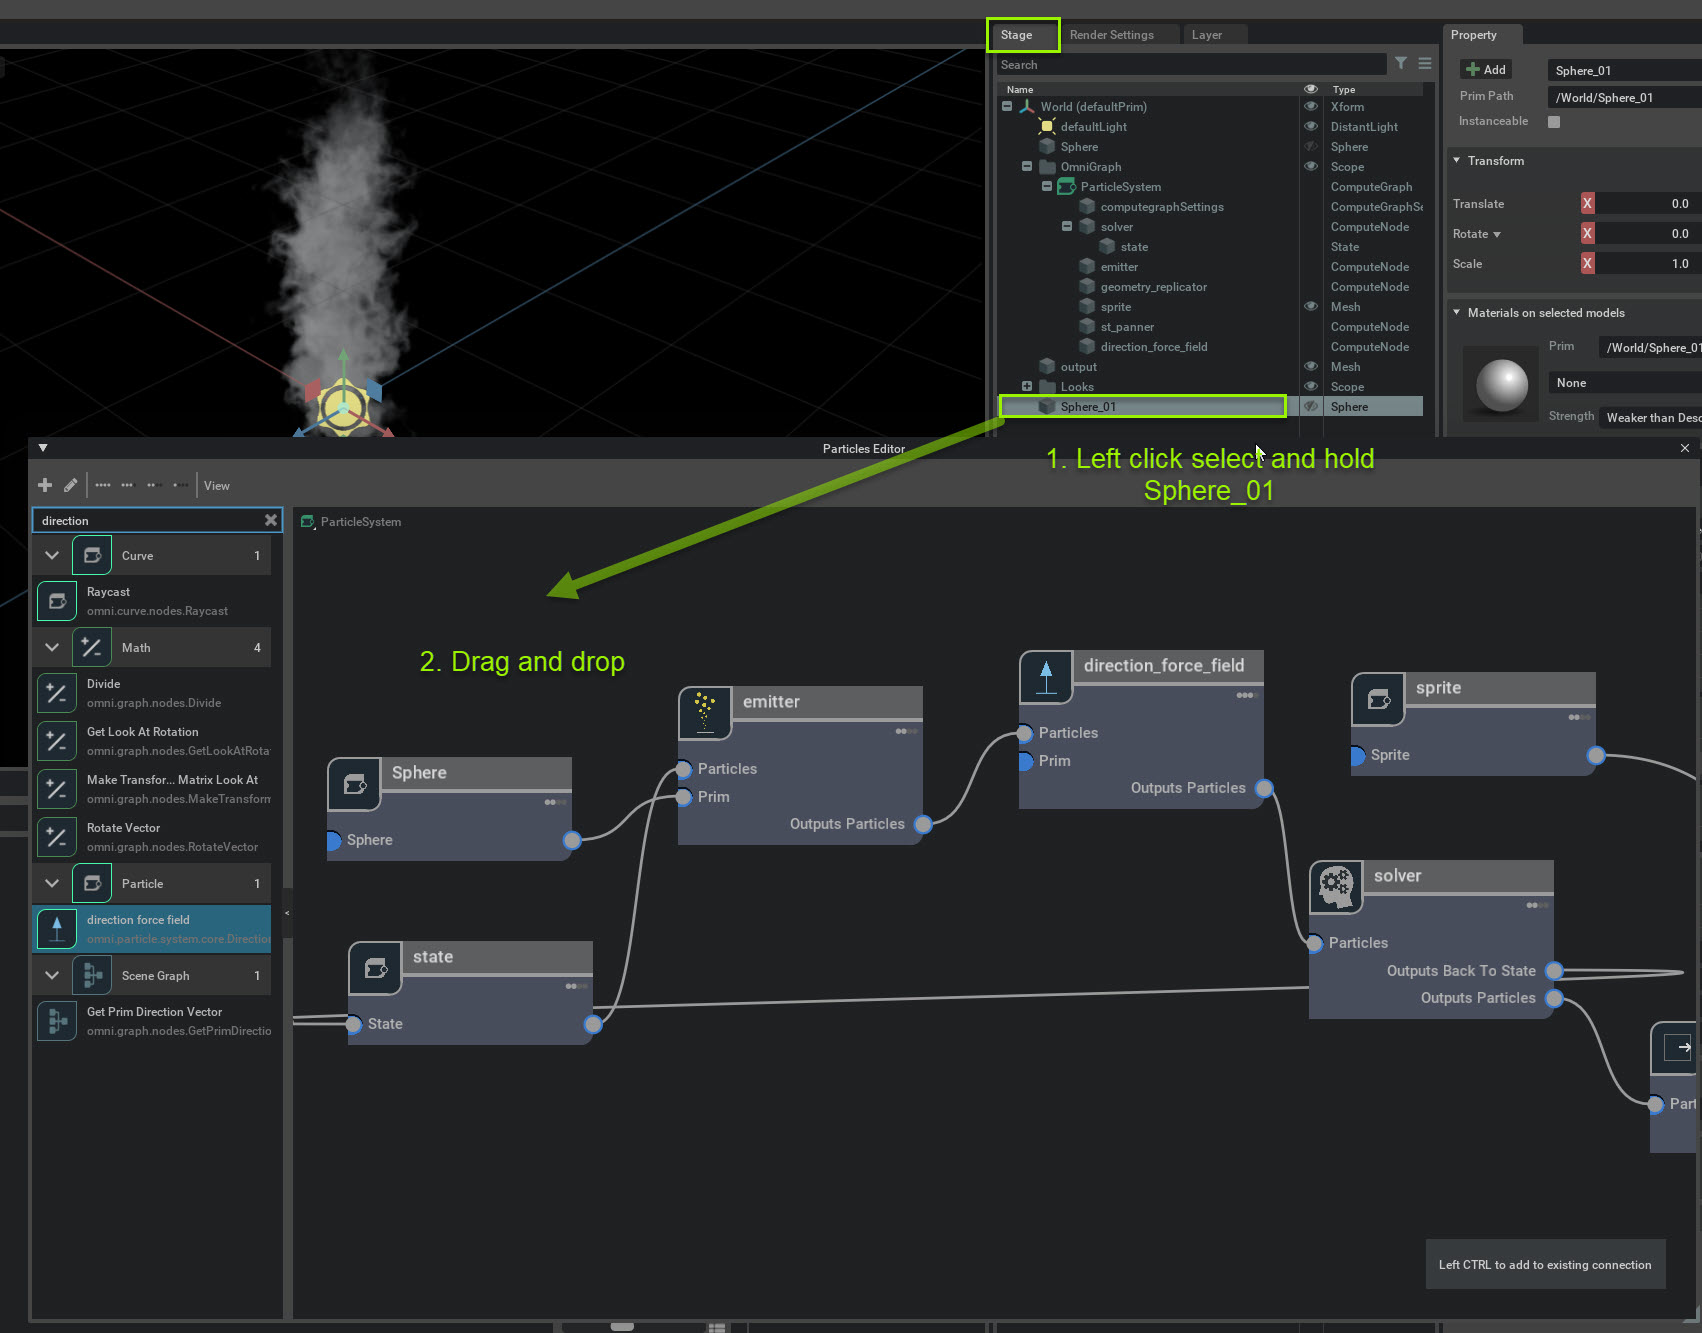
3. A Create Node for Prim window will appear. Left Click on OG prim Node. A sphere_01 prim node will appear in the Particle Editor.
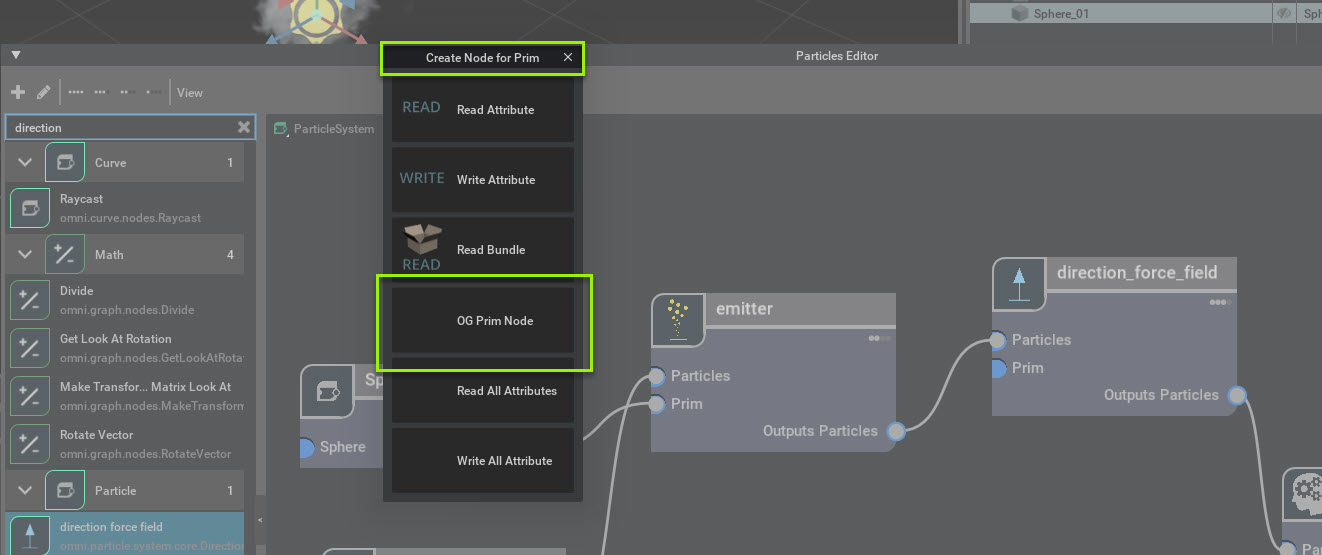
Note
For the Particles Editor you’ll generally use the OG Prim Node option.