Part Three: Create Your Own Nodes
In Part Three of this tutorial, you create a custom node to implement logic that’s similar to what you used in your Push Graph.
OmniGraph offers a framework for creating nodes called OmniGraph Nodes (OGN). This framework takes a high-level description of the node and generates most of its implementation. The implementation can be in Python, as you’ll see in this tutorial, or C++. Furthermore, it can even generate documentation and tests for the node.
In this tutorial, you create two nodes:
Negate Double
Add Double
Together, these replace the functionality of the Subtract Double node you used in Part Two.
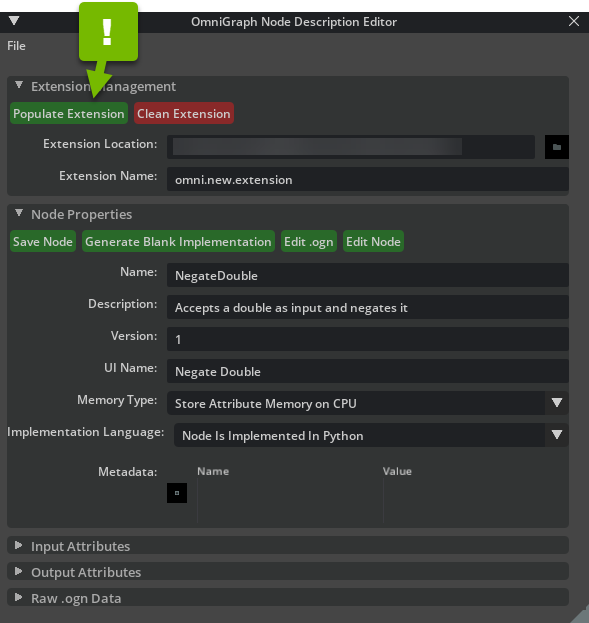
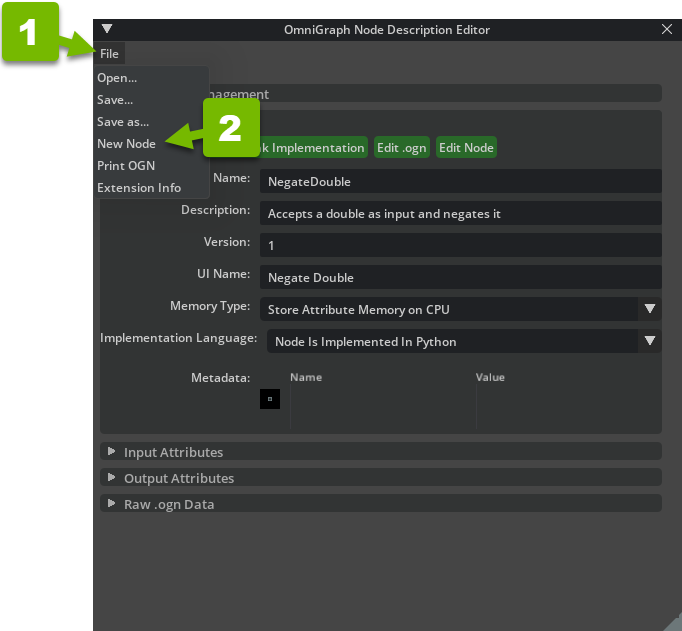
Open the Node Description Editor
In the Window menu, click Visual Scripting > Node Description Editor:
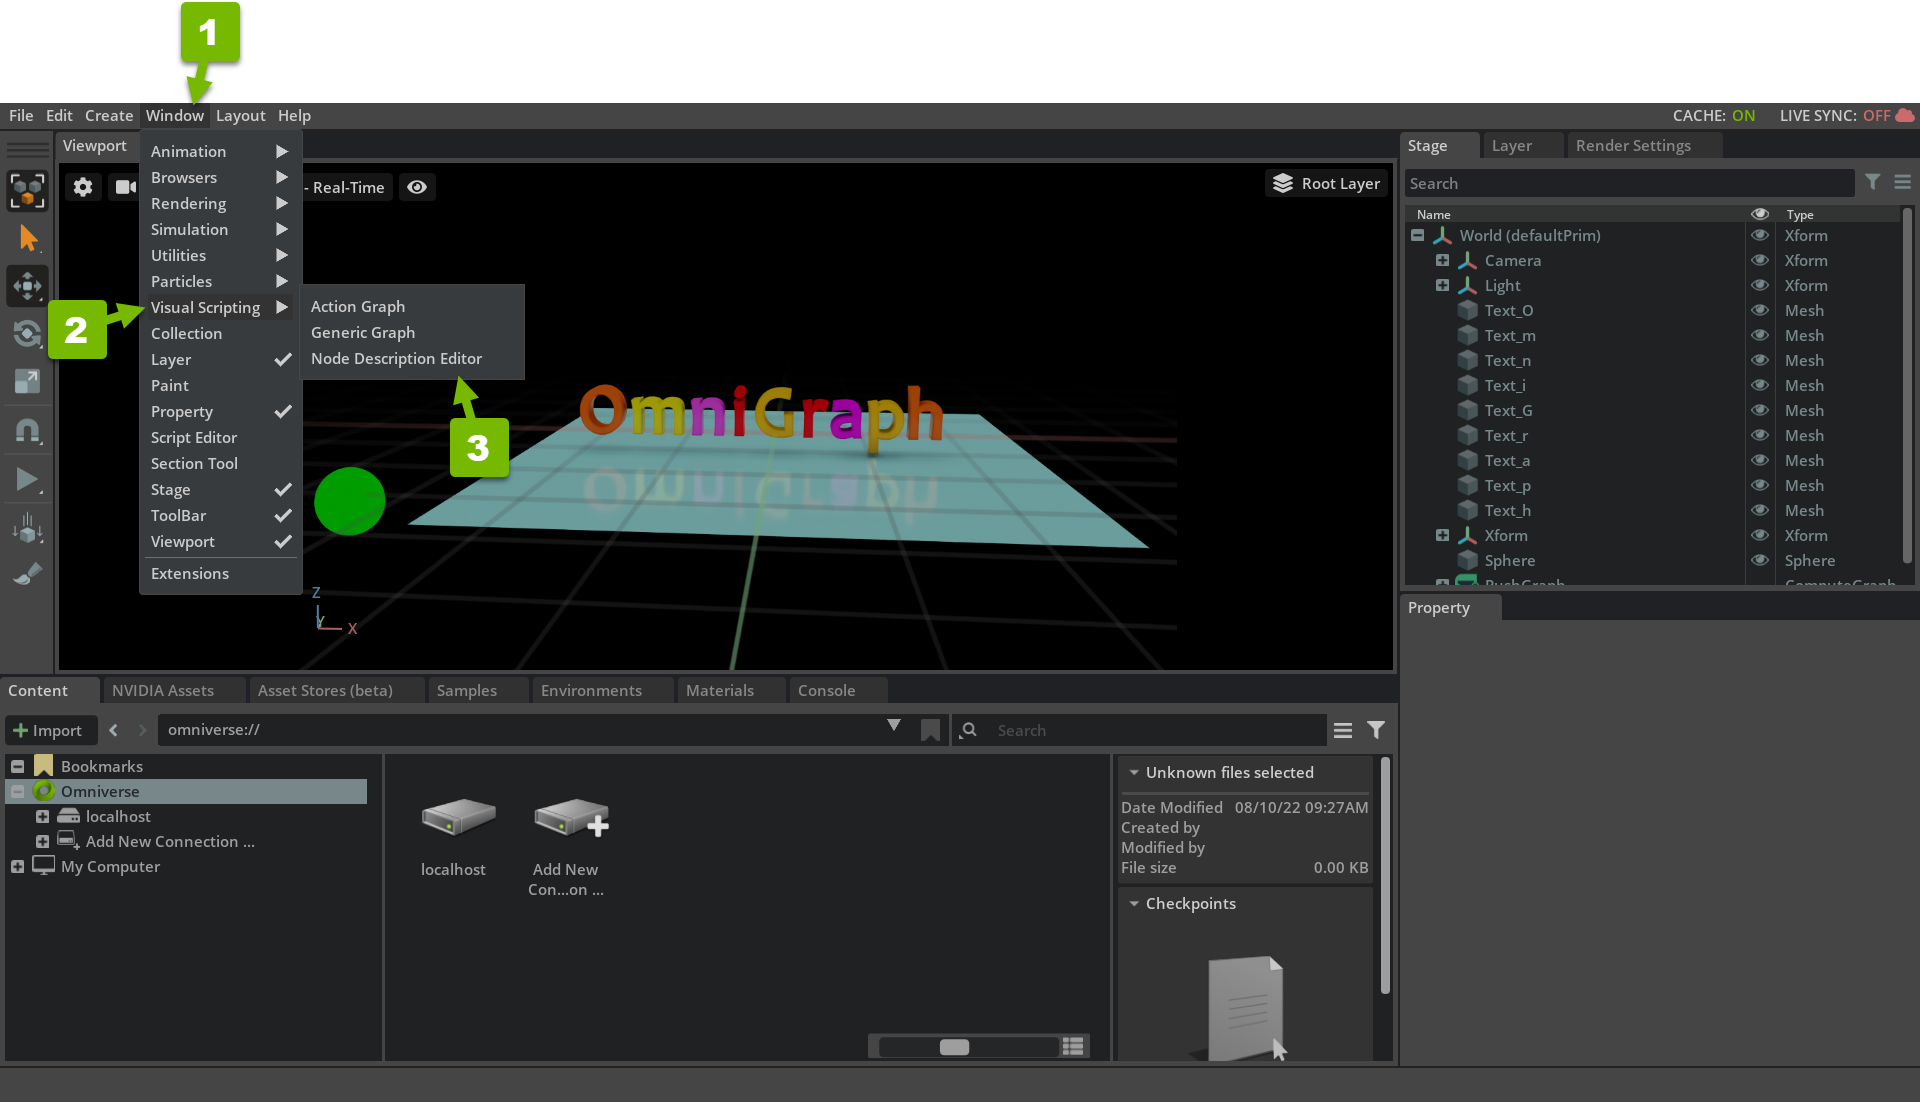
This opens the OmniGraph Node Description Editor panel:
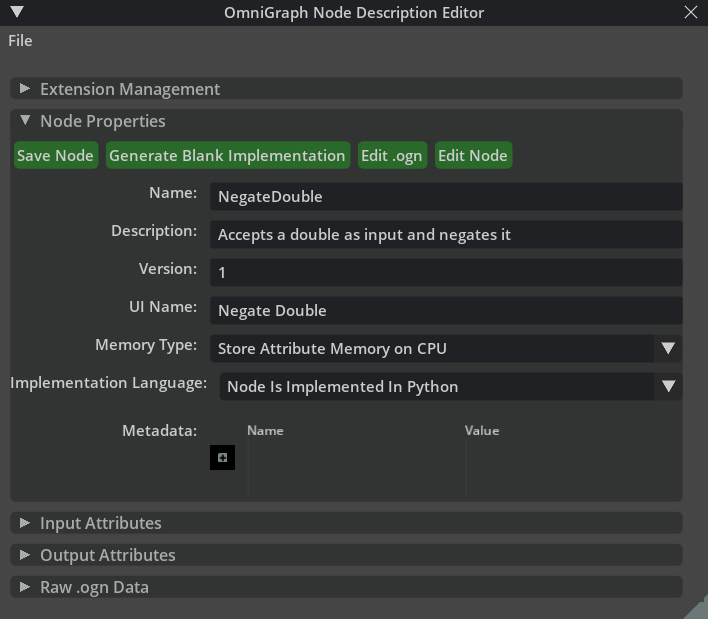
Create a Negate Double Node
The first that node you create in this tutorial is Negate Double.
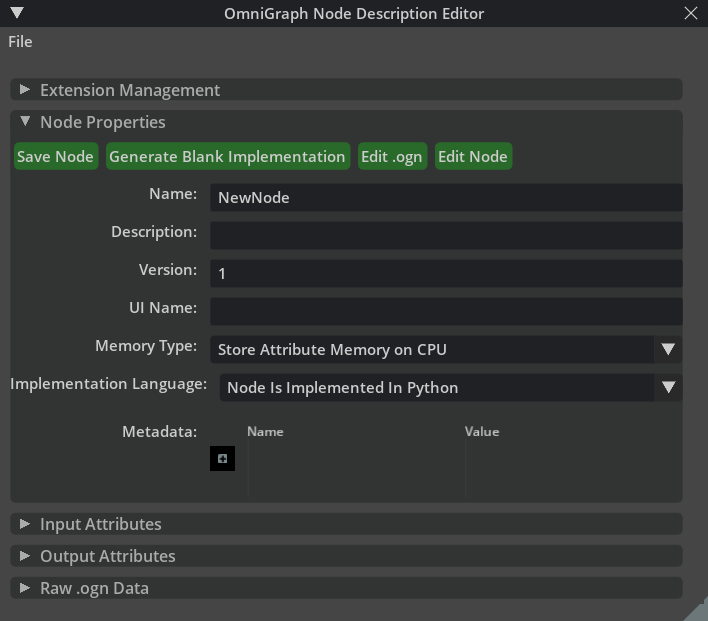
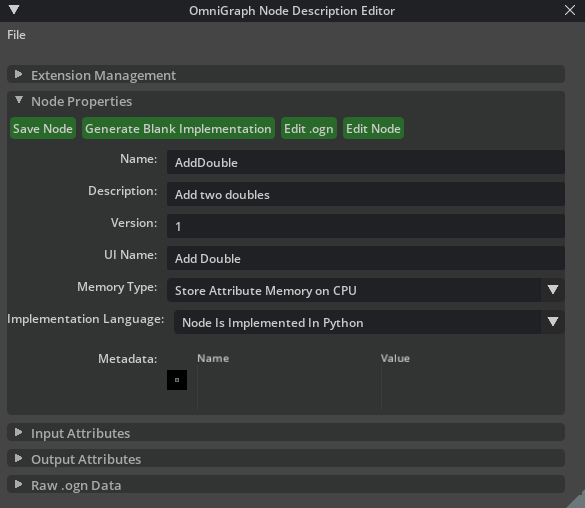
Assign the Node Properties
In the Node Properties section of the Node Description Editor panel, set the following properties:
Property |
Description |
Value |
|---|---|---|
Name |
The name of the node as it appears in the graph. |
|
Description |
A description of the node’s compute algorithm. |
|
UI Name |
The name of the node as it appears in user interface (UI) elements. |
|
Leave the other values as their defaults:
Caution
In case you poke around other parts of the editor, don’t change the Extension Location field from its default value. Omniverse USD Composer, or whatever App you use, only looks for Extensions in a fixed number of locations. The default Extension Location is included in this list.
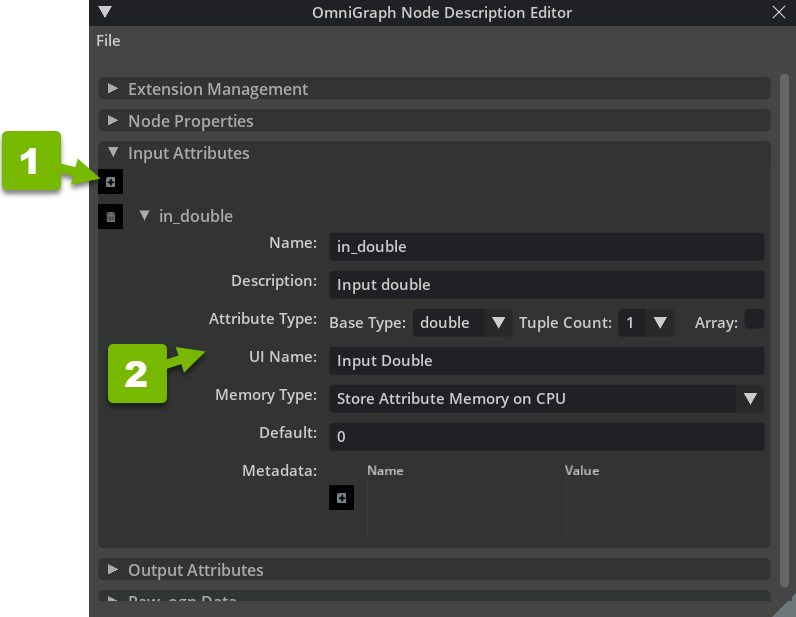
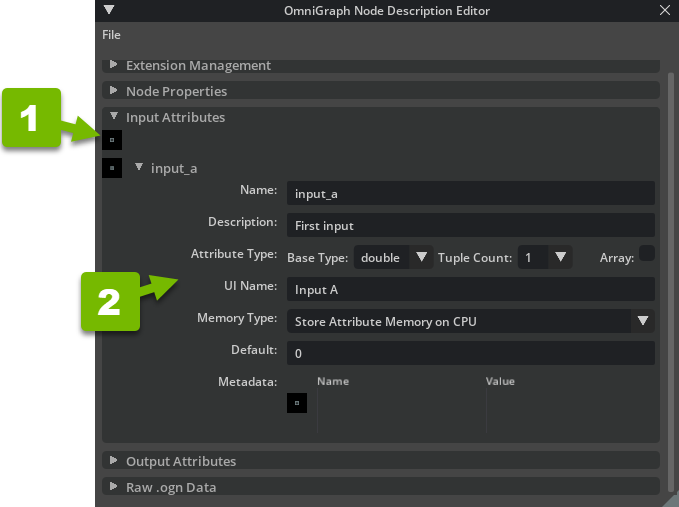
Add a Node Input
In the Input Attributes section, click the Add new attribute button, and set the following attribute properties:
Property |
Description |
Value |
|---|---|---|
Name |
The name of the attribute. |
|
Description |
A description of the information that the attribute holds. |
|
Attribute Type |
The data type that the attribute manages. |
Properties:
|
UI Name |
The name of the attribute as it appears in UI elements. |
|
Leave the other values as their defaults:
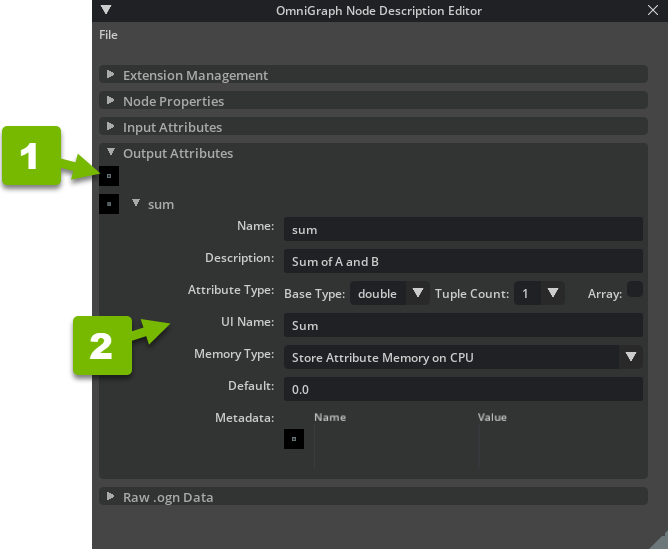
Add a Node Output
In the Output Attributes section, click the Add new attribute button, and set the following attribute properties:
Property |
Description |
Value |
|---|---|---|
Name |
The name of the attribute. |
|
Description |
A description of the information that the attribute holds. |
|
Attribute Type |
The data type that the attribute manages. |
Properties:
|
UI Name |
The name of the attribute as it appears in UI elements. |
|
Leave the other values as their defaults:

Review the Raw OGN Data
Read the raw data in the Raw .ogn Data section:

This data describes what the node looks like from a high level. In the next steps, you’ll store this data in an .ogn file and instruct OGN to parse it and generate Python template code, documentation, and tests.
Populate Your Extension
In the Extension Management section, click Populate Extension:
This establishes your extension within the OGN framework.
Note
Notice the red Clean Extension button next to Populate Extension. This ensures that the generated files in the OGN directory match the expected files for the Extension. It removes extra files that might have accumulated over time, throughout changes to your Extension. It’s a good idea to click it if things aren’t working as you expect, but make sure you verify that your nodes look correct, first!
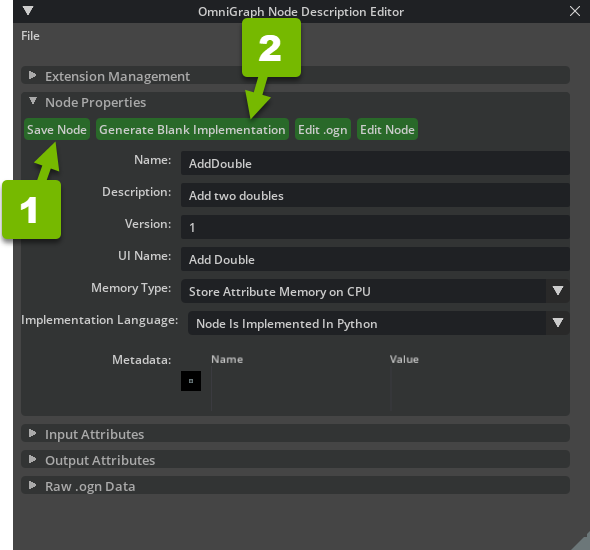
Generate an OGN File
In the Node Properties section, click Save Node:

This generates the .ogn file within the Extension.
Generate an Empty Implementation
In the Node Properties section, click Generate Blank Implementation:
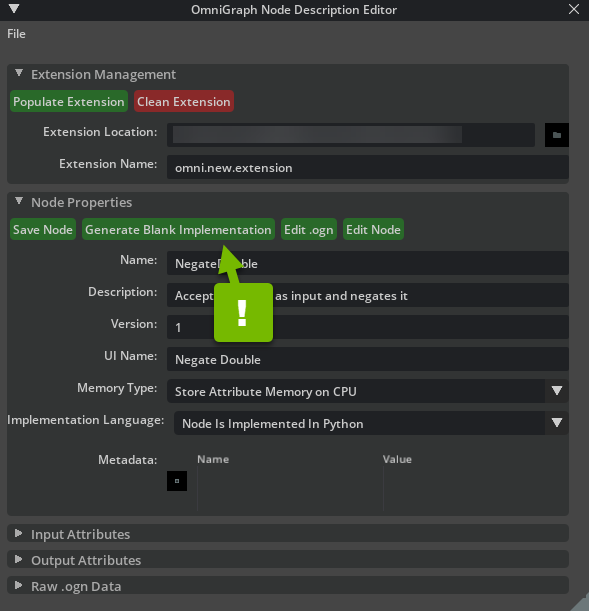
This generates a template for implementing your node’s algorithm.
Review Your Node Implementation Template
In the Node Properties section, click Edit Node:
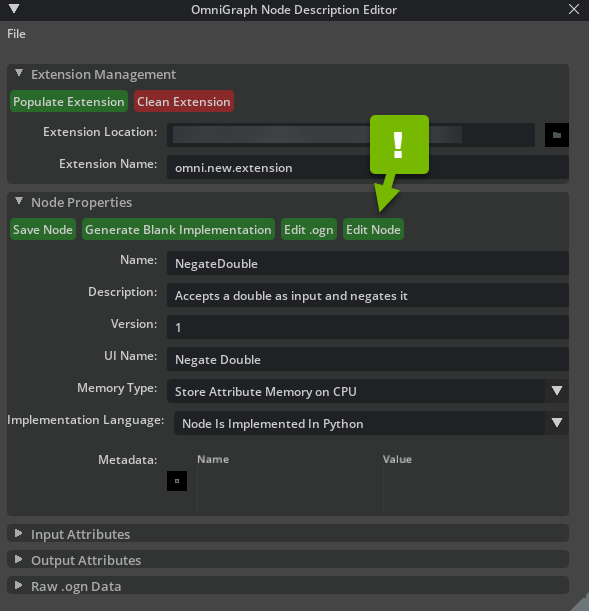
This opens the template node file that you generated in the last step:
"""
This is the implementation of the OGN node defined in OgnNewNode.ogn
"""

# Array or tuple values are accessed as numpy arrays so you probably need this import
import numpy


class OgnNewNode:
    """
        Accepts a double as input and negates it
    """
    @staticmethod
    def compute(db) -> bool:
        """Compute the outputs from the current input"""

        try:
            # By putting the compute in a try block you can fail the compute by raising an exception
            pass
        except Exception as error:
            # If anything causes your compute to fail report the error and return False
            db.log_error(str(error))
            return False

        # Even if inputs were edge cases like empty arrays, correct outputs mean success
        return True
Here is the template for your node. In the next step, you implement its behavior.
Tip
If you accidentally close the Node Description Editor, you can find the file by reopening the Node Description Editor and clicking File > Open…. the file is named OgnNewNode.ogn
Warning
The directory that contains this code is considered a build directory, not source code. So, don’t check it in to your source code’s version control system.
Implement Your Node Logic
Update compute() to negate in_double and save it in out_double:
"""
This is the implementation of the OGN node defined in OgnNewNode.ogn
"""

# Array or tuple values are accessed as numpy arrays so you probably need this import
import numpy


class OgnNewNode:
    """
        Accepts a double as input and negates it
    """
    @staticmethod
    def compute(db) -> bool:
        db.outputs.out_double = - db.inputs.in_double
        return True
If you save your code while your node is in a graph, it should work immediately without you restarting or refreshing the App. This “hot reloading” works in most versions of Omniverse Kit. When it doesn’t, delete your node and undo the delete. This should resolve any problems with the App not registering changes.
Use Your Negate Double Node
Search for the Negate Double node, drag it into the editor, and wire it up to the output of Abs Double:
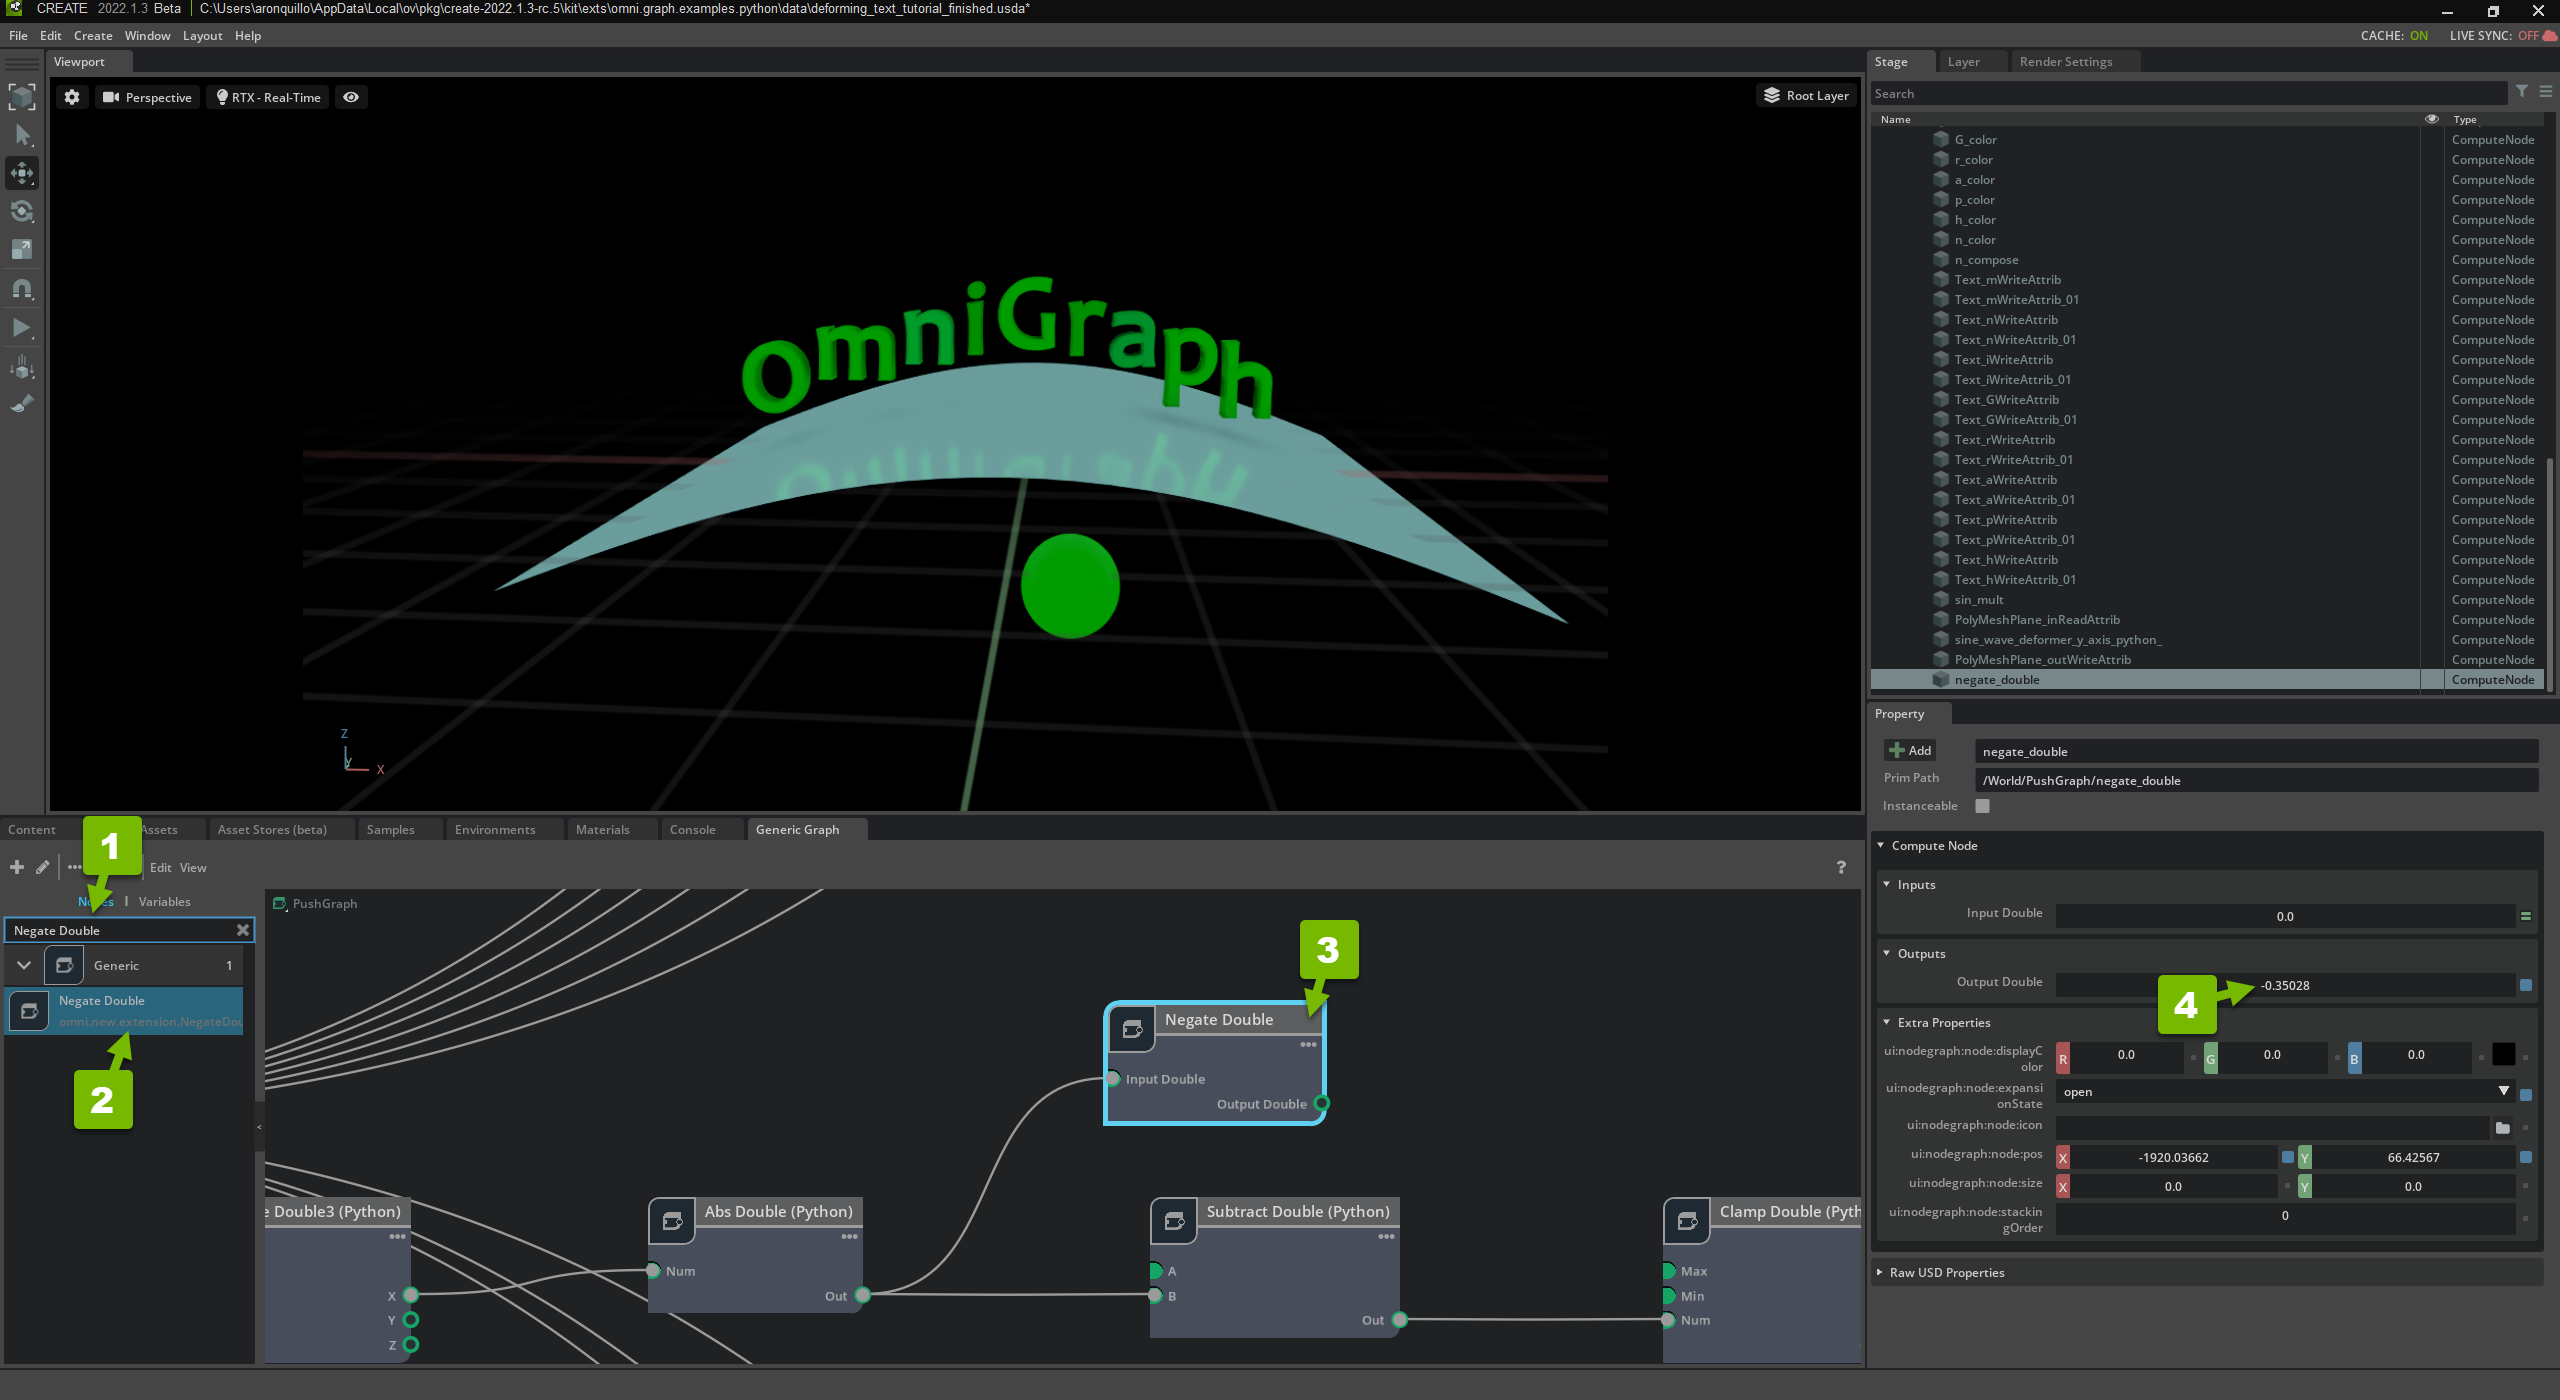
Here, you pass the output of Abs Double, the absolute value of the x position of the sphere, to Negate Double. In the Property panel, the Output Double field shows the negated value.
Create an Add Double Node
In this tutorial, you’re creating two nodes:
Negate Double
Add Double
Together, these will replace the Subtract Double node that you currently have in your Push Graph. Now that Negate Double is working, create your next node, Add Double.
Create a New Node
From the Node Description Editor, click File > New Node:
Assign the Node Properties
In the Node Properties section of the Node Description Editor panel, set the following properties:
Property |
Description |
Value |
|---|---|---|
Name |
The name of the node as it appears in the graph. |
|
Description |
A description of the node’s compute algorithm. |
|
UI Name |
The name of the node as it appears in user interface (UI) elements. |
|
Leave the other values as their defaults:
Add Two Node Inputs
In the Input Attributes section, click the Add new attribute button, and set the following attribute properties:
Property |
Description |
Value |
|---|---|---|
Name |
The name of the attribute. |
|
Description |
A description of the information that the attribute holds. |
|
Attribute Type |
The data type that the attribute manages. |
Properties:
|
UI Name |
The name of the attribute as it appears in UI elements. |
|
Leave the other values as their defaults:
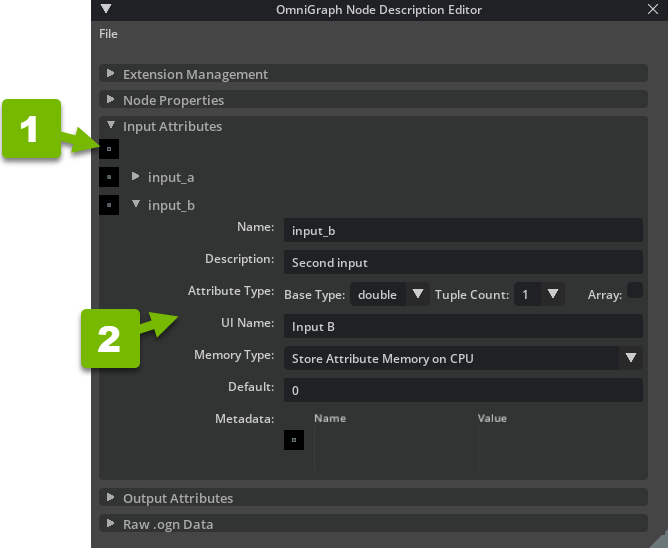
Then, add another input attribute with the following properties:
Property |
Description |
Value |
|---|---|---|
Name |
The name of the attribute. |
|
Description |
A description of the information that the attribute holds. |
|
Attribute Type |
The data type that the attribute manages. |
Properties:
|
UI Name |
The name of the attribute as it appears in UI elements. |
|
Leave the other values as their defaults:
Add a Node Output
In the Output Attributes section, click the Add new attribute button, and set the following attribute properties:
Property |
Description |
Value |
|---|---|---|
Name |
The name of the attribute. |
|
Description |
A description of the information that the attribute holds. |
|
Attribute Type |
The data type that the attribute manages. |
Properties:
|
UI Name |
The name of the attribute as it appears in UI elements. |
|
Leave the other values as their defaults:
Generate an OGN File and Template
In the Node Properties section, click Save Node, name the file “OgnAddDoubleNode.ogn”, and click Generate Blank Implementation:
For Negate Double, you also clicked Populate Extension, but you don’t here. One Extension can include multiple nodes. This is the case with the OmniGraph Python Examples Extension that you used in Part Two. This is also the case for the two nodes that you’ve created here. Because you created an Extension while building Negate Double, you don’t need to populate another one for Add Double. Just give the nodes distinct names so they can coexist in the Extension directory.
Implement Your Node Logic
In the Node Properties section, click Edit Node. Then, update compute() to add input_a and input_b and save it in sum:
"""
This is the implementation of the OGN node defined in OgnAddDoubleNode.ogn
"""

# Array or tuple values are accessed as numpy arrays so you probably need this import
import numpy


class OgnAddDoubleNode:
    """
        Add two doubles
    """
    @staticmethod
    def compute(db) -> bool:
        """Compute the outputs from the current input"""
        db.outputs.sum = db.inputs.input_a + db.inputs.input_b
        return True
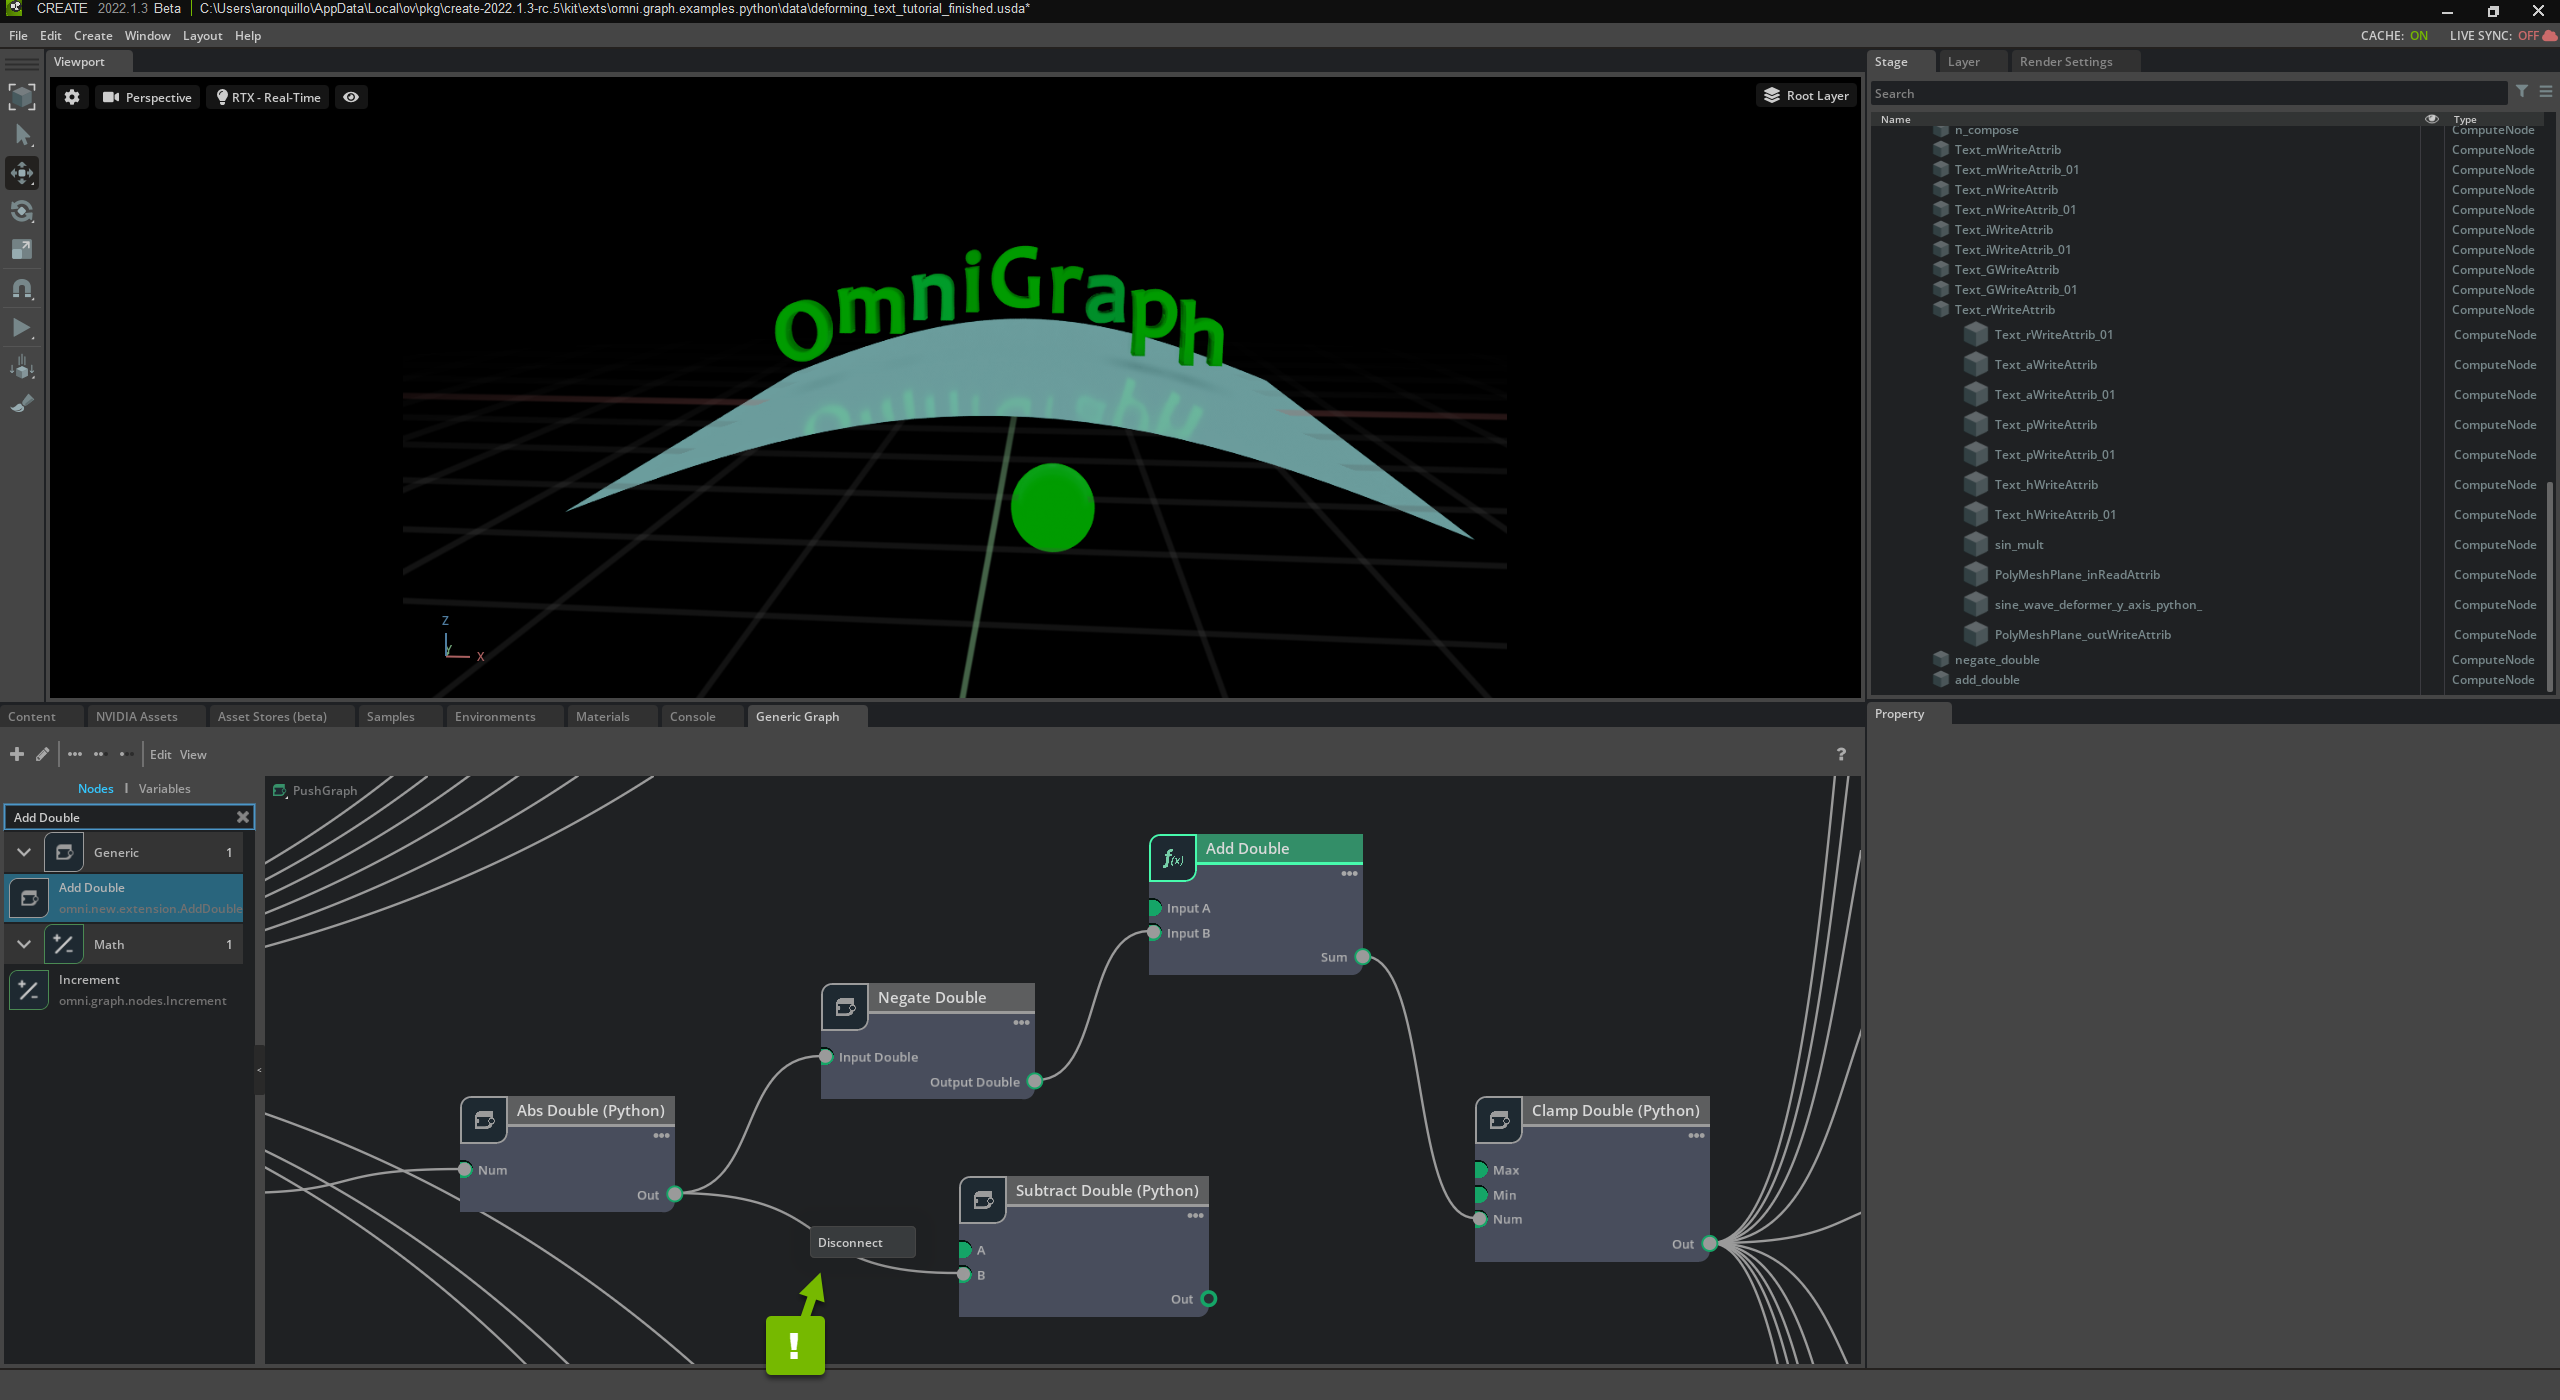
Use Your Add Double Node
Search for the Add Double node, drag it into the editor:
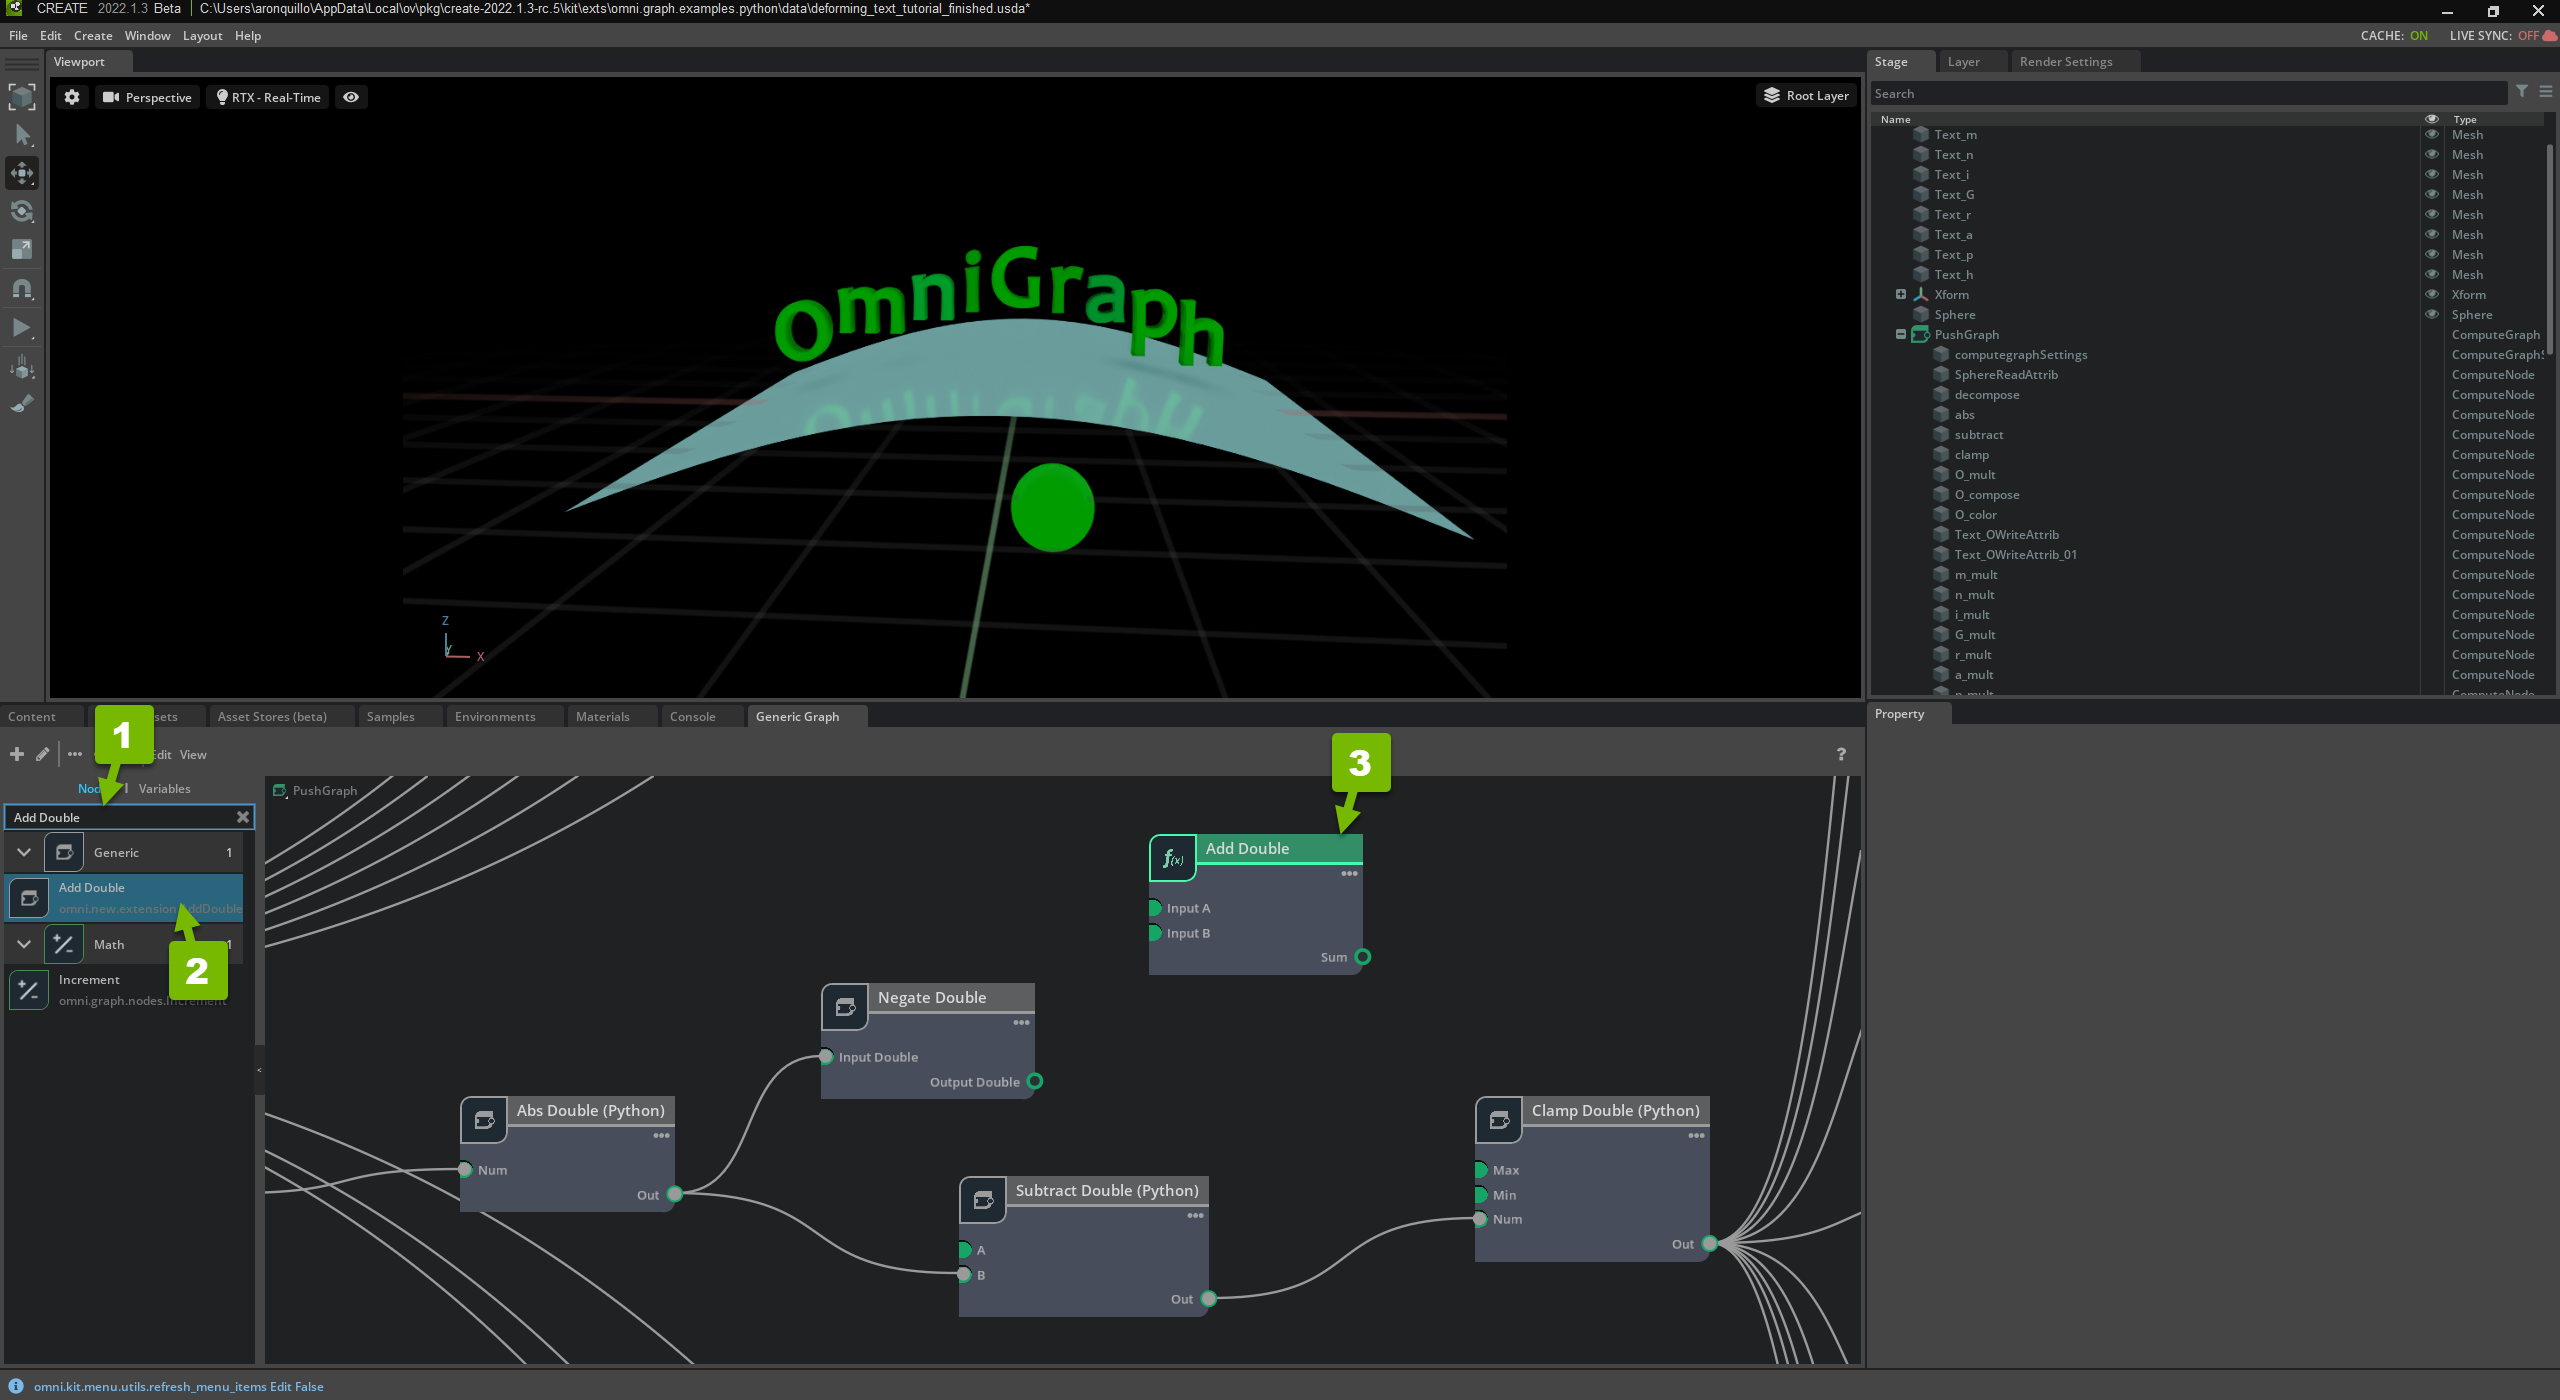
Wire up the Negate Double node’s Output Double pin to the Add Double node’s Input B pin and the Add Double node’s Sum pin to the Clamp Double node’s Num pin:
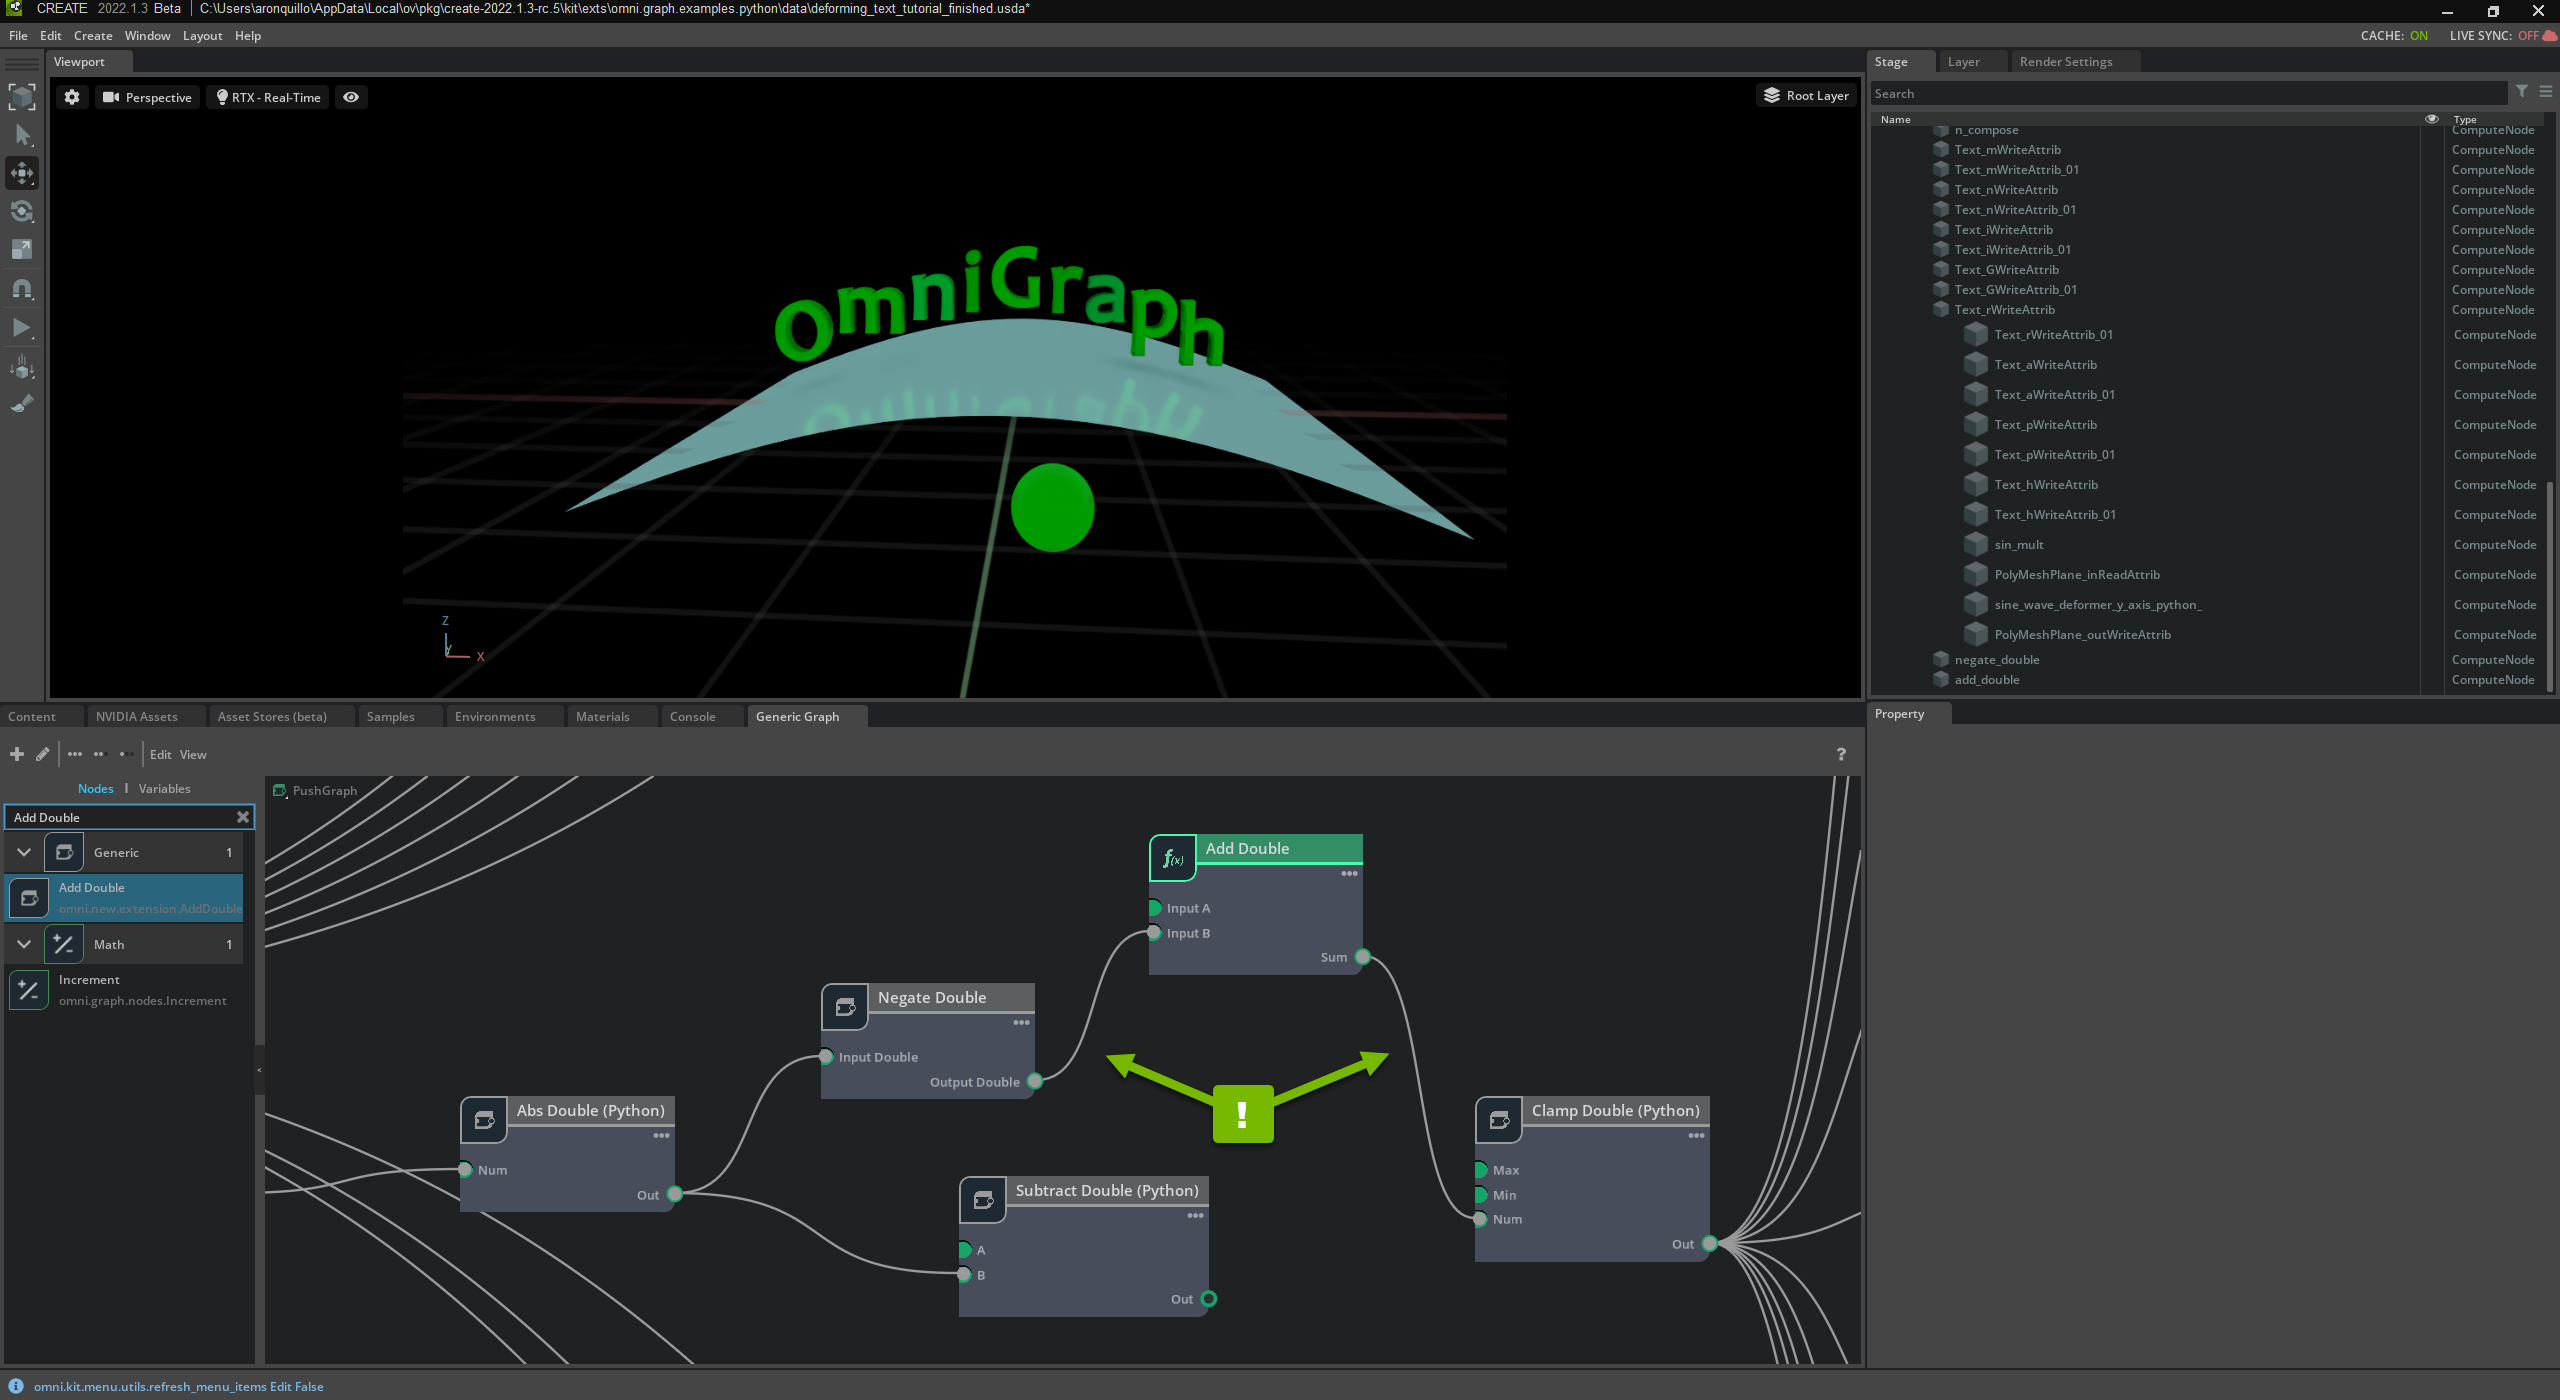
Right click and disconnect the Subtract Double node from the Abs Double node:
Tip
Consider deleting the dangling Subtract Double node if you’re not going to use it any more.
In the Property panel for Add Double, set Input A to 3:
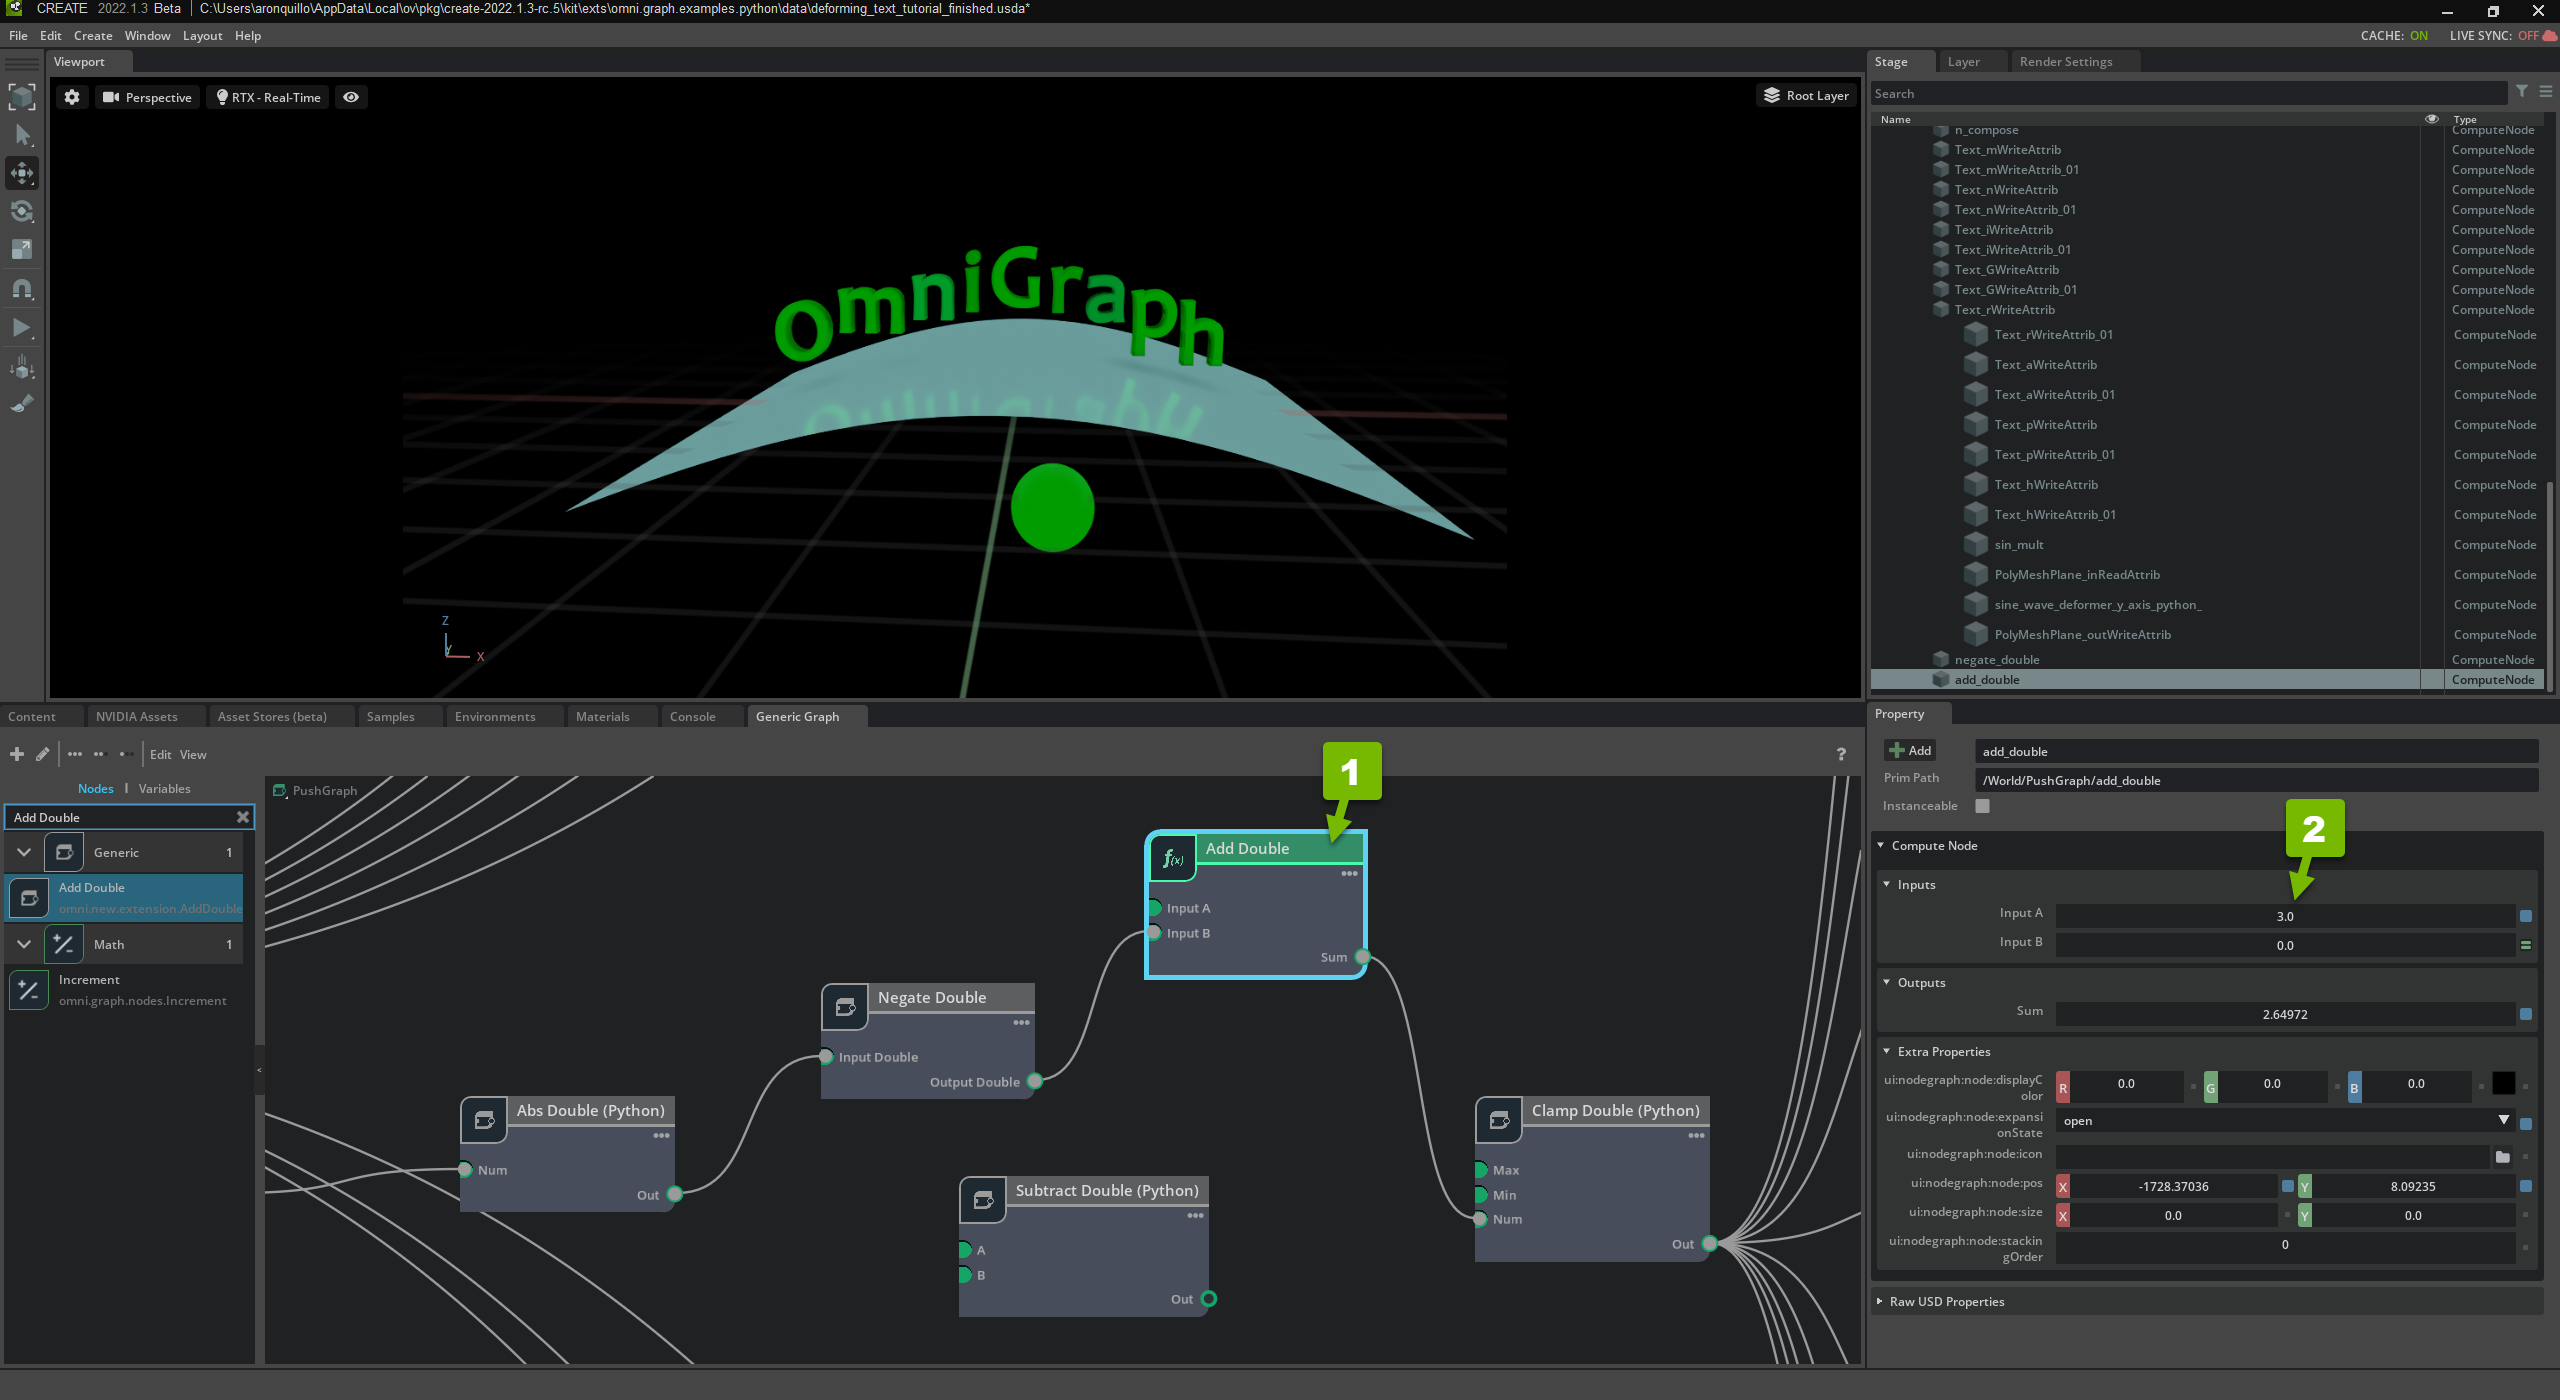
This is the same a value that you used in Subtract Double.
Review Your Extension
In the Extension Manager, look up your new Extension, ensure it’s enabled, and enable autoload:
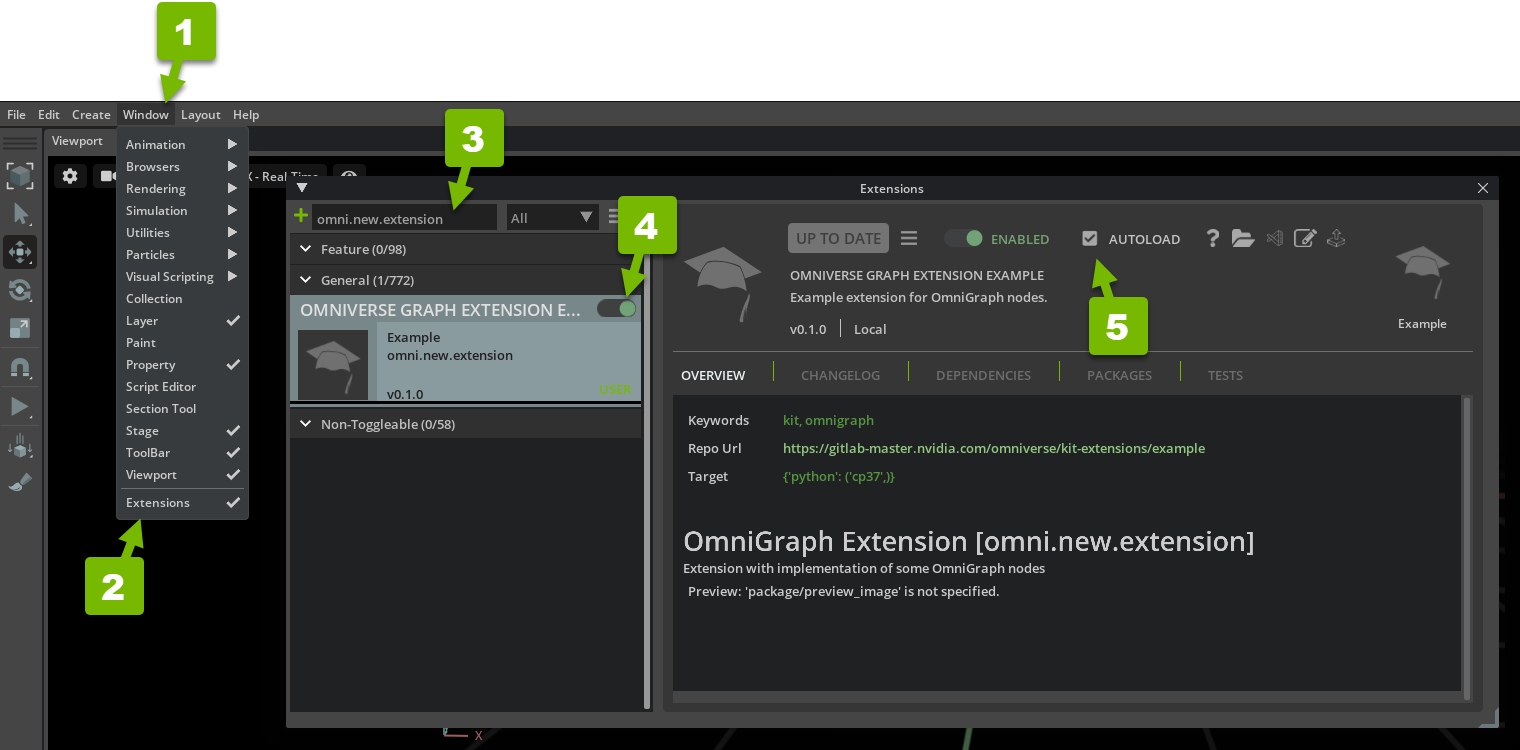
Enabling the Extension ensures that the nodes are active. Autoload ensures that the Extension will be enabled in future sessions.
That’s it! Try moving the sphere around, the graph functions as it did before.