Usage
Warning
The Maya Legacy Connector is no longer supported. All users should move to Maya Native.
Connect USD
If for any reason a Maya file becomes “detached” with its USD counterpart, it can be very convenient to simply reconnect your local Maya file to its Omniverse USD counterpart and begin live editing. This is where the Connect USD button comes in handy. Avoiding the need to re-Export, this can be very useful for large and imposing datasets however it requires BOTH the Local Maya file AND the Omniverse USD to be in parity.
Using the Connect USD tool in Maya (Video)
USD Variants in Maya
Maya variants allow for users to create and store variations for a given asset. This can be a very useful tool just in the context of Maya, but when brought to the omniverse can be leveraged in Apps such as View, Create and others.
Creating Variants in Maya
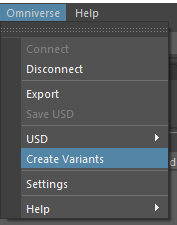
Open the Omniverse Panel or Omniverse Shelf to reveal Create Variants button.
Next, Select a name for the variant.
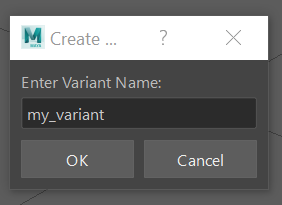
Note
Variant names should not contain spaces or special characters.
Once accepted, the variant container is created and its properties can be found in the properties panel. Notice the variants list is empty.
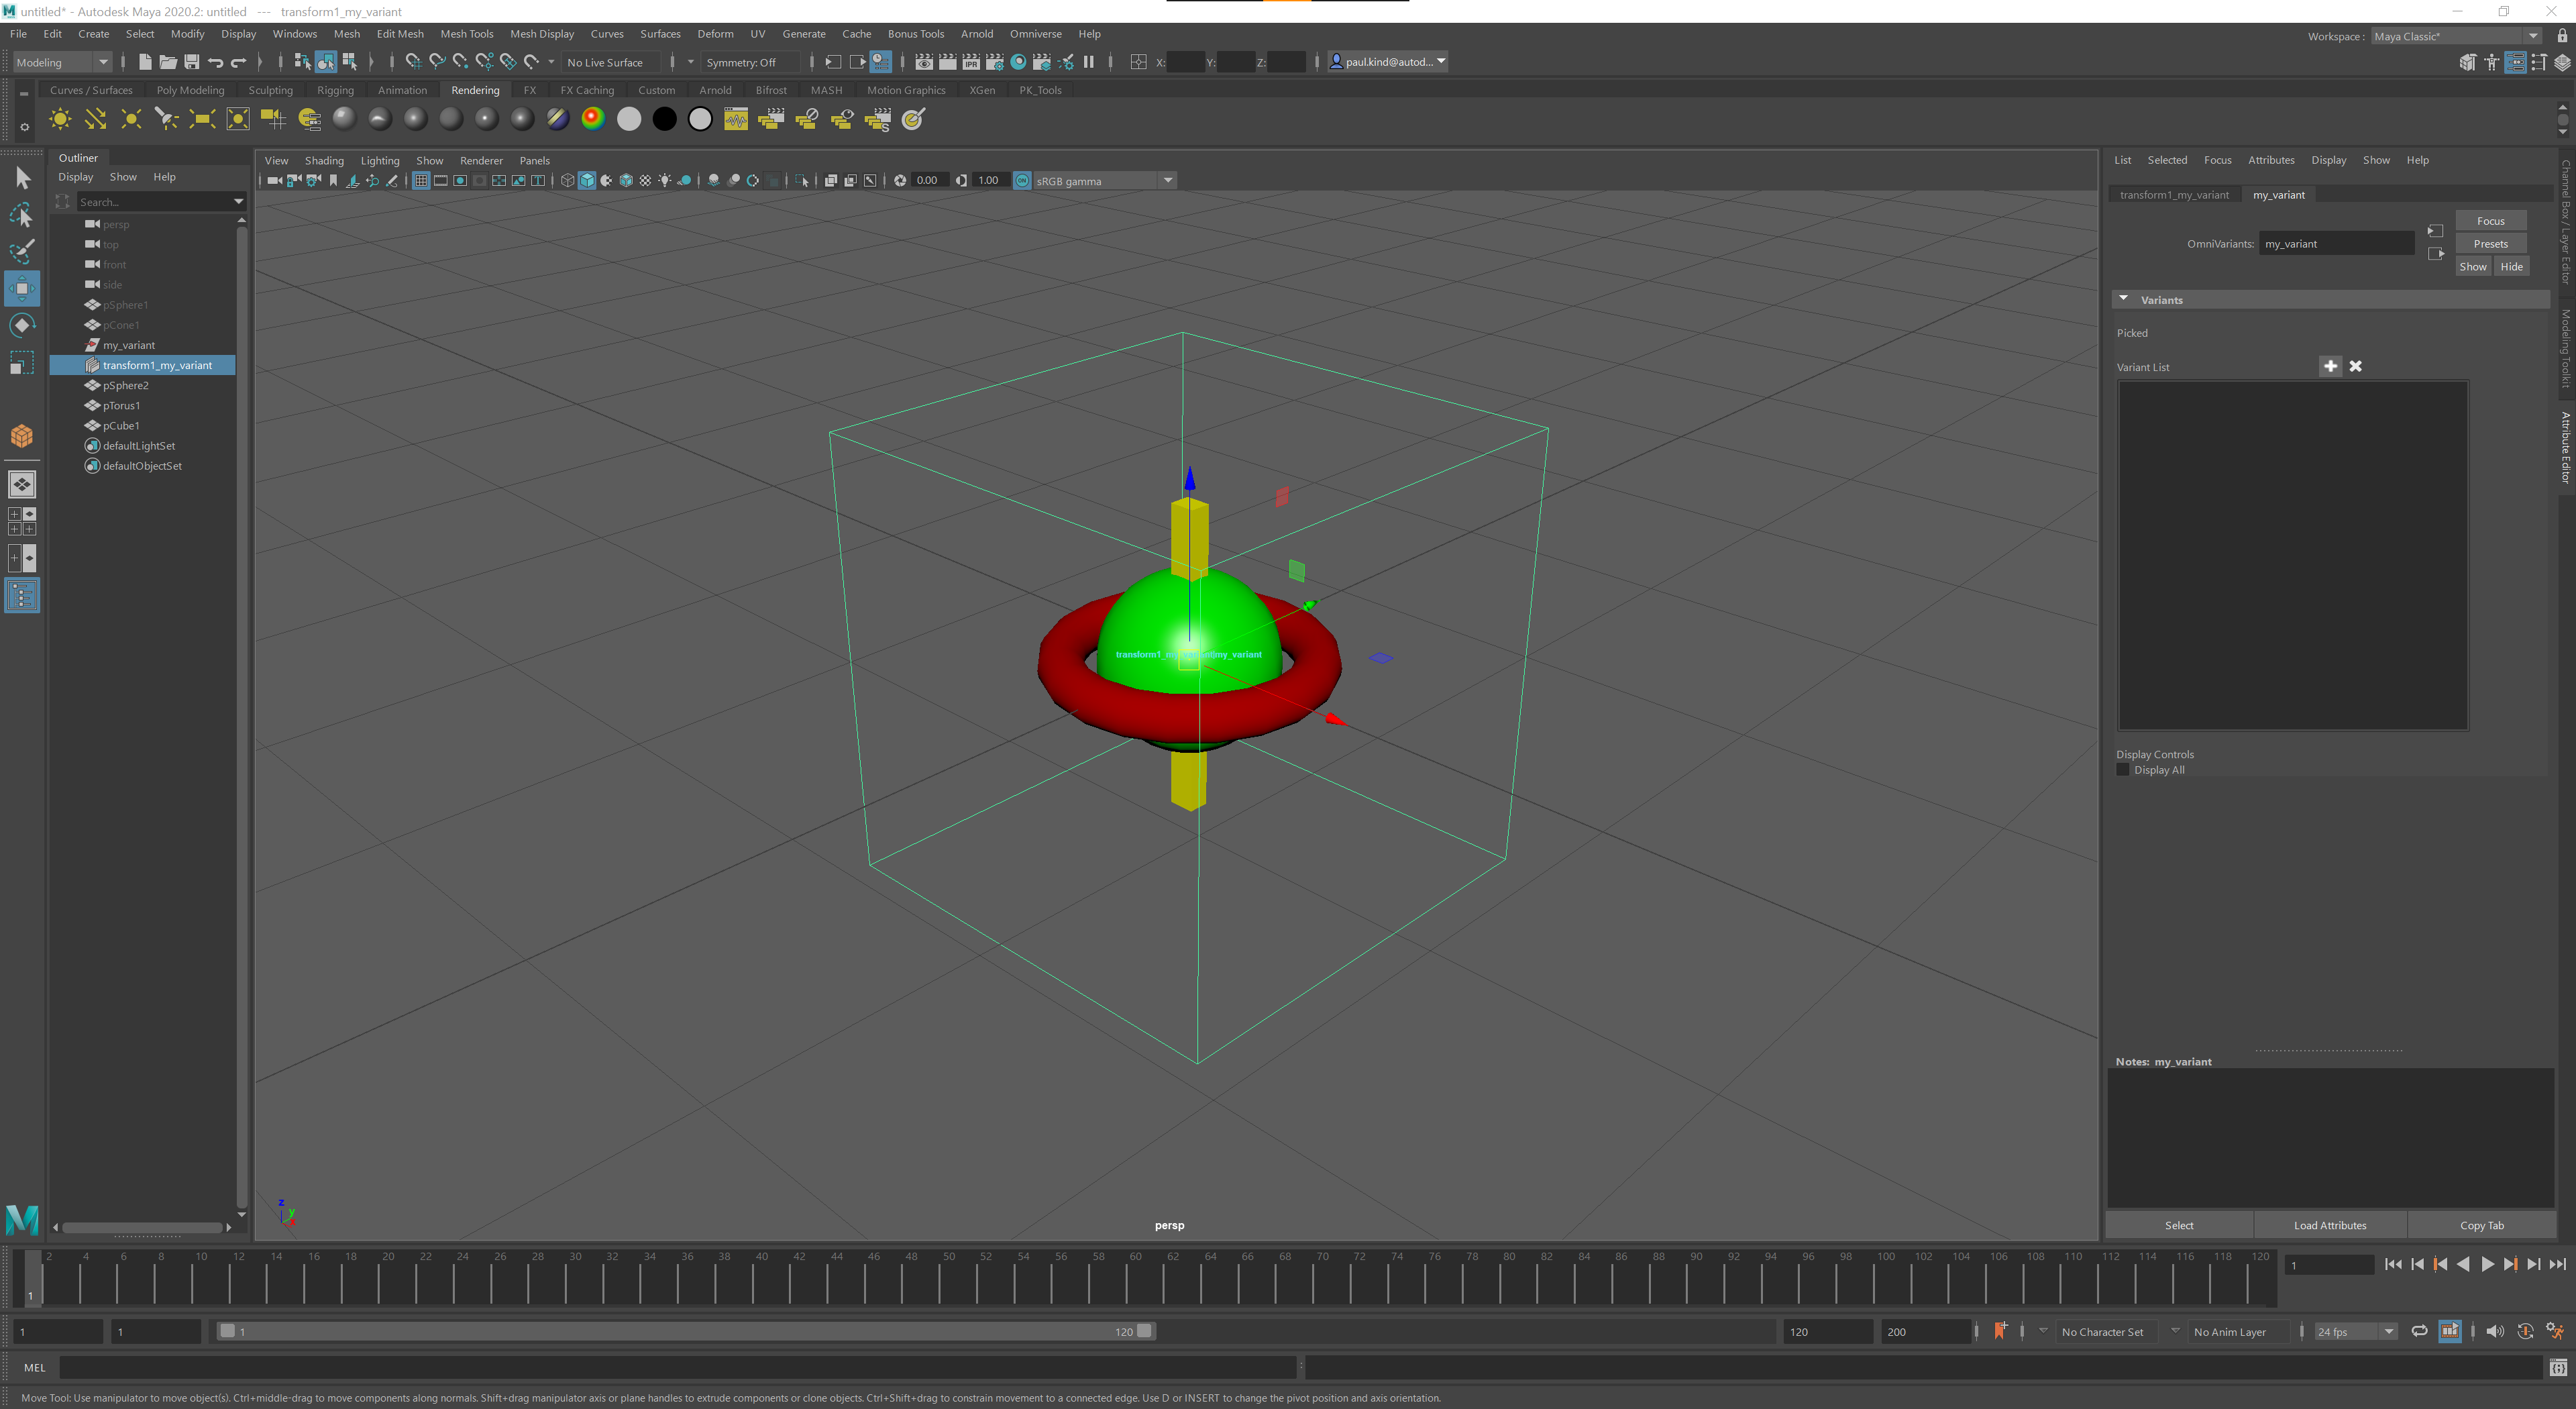
Now use the + icon above the variants list and select any objects or object hierarchies you want to be included as variants. If you make a mistake or wish to remove an object, use the X button remove a selection from the list.
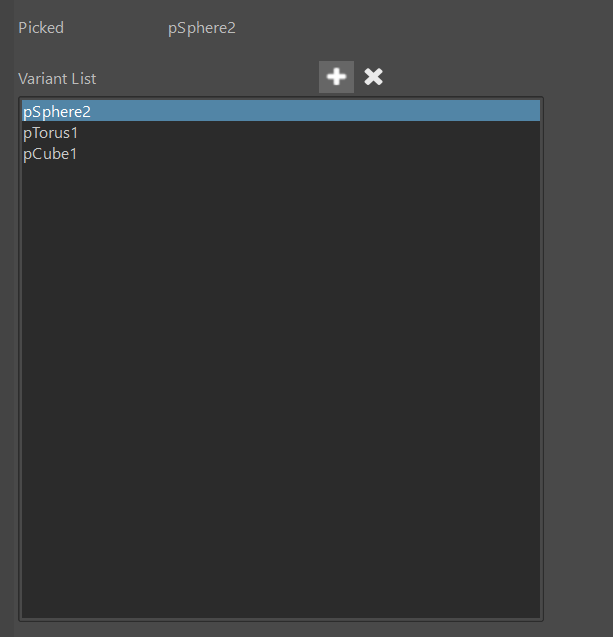
Once complete, simply select a variant on the list to auto-hide non-selected variants on your list.

Exporting Variants
Once created, USD variants are part of the USD schema and are automatically included when exported to the Omniverse. See instructions within the Omniverse App you are using for instructions on how to exploit variants within the Omniverse.
Materials
Understanding MDLs
When working with the Omniverse, MDL’s are our shader descriptions. Several come pre-installed with your server and will auto-populate upon connecting however there are some specific things to understand about how Maya and MDL interact.
The object format for Omniverse is Pixar’s USD format. For more information on USD, see documentation here: Introduction to USD
MDLs cannot be directly edited in Maya (but can be created, added to your server and made available in Maya)
MDL materials have basic distilling for rendering into the Maya viewport however for true material feedback and rendering, view the asset in Omniverse USD Composer.
MDL Settings in Maya
Working with MDLs is an important part of working on the Omniverse as MDL is the language used to describe shaders to Nucleus, Create and all Omniverse Connect tools. Luckily many/most users will not need to adjust the settings as they will typically find the BASE MDLs that come pre-installed with Omniverse are robust enough to handle 95% of all materials in the real word. However if you have special workflows, are interested in creating specialized shaders or have pre-configured collections you wish to use, the settings panel allows you the ability to adjust some of the ways we can find, use and implement MDL technology.
For more information and access to these settings, please see USD Variants in Maya
Templates and Collections
The distinction between a template and a collection is purely semantic. There is no technical difference as they are both a location where MDLs are stored. The distinction is only meant for organization in the Hypershade panel. You should try to adhere to this distinction however because it does in fact offer a bit of convenience to users.
Templates: These are BASE MDLs (Omniverse Shaders) that are either custom or are pre-installed on your Omniverse server. For example, Omni-PBR is a BASE MDL or Template. This BASE MDL can then be used to create a variety of materials like Red Metal, Black Plastic, Copper, Steel, etc.
Collections: Collections are generally created from BASE MDLs and are explicit variants or a BASE MDL. For example a user may wish to have a collection of pre-configured MDLs based on Omni-PBR like Red Metal, Black Plastic, Copper or Steel. The explicit variants can then be stored in a directory and are then considered a “Collection”.
Connecting MDL Templates and MDL Collections
MDL templates and collection search paths are simply locations where MDLs are stored on your Omniverse server. If you have access to or have created MDL templates/collections you can specify their paths to grant access to them in the Maya Hypershade Panel. You can designate these paths in Maya under Omniverse > Settings. You can add the paths by selecting the + button next to their respective headings and locating the directories on your Omniverse Nucleus.
Loading External MDL Templates and Collections (Video)
MDLs and The Hypershade
The Maya Hypershade Panel will be updated with MDL Materials installed with the Connector. From here you can choose from a variety of MDL material types to assign to you objects.
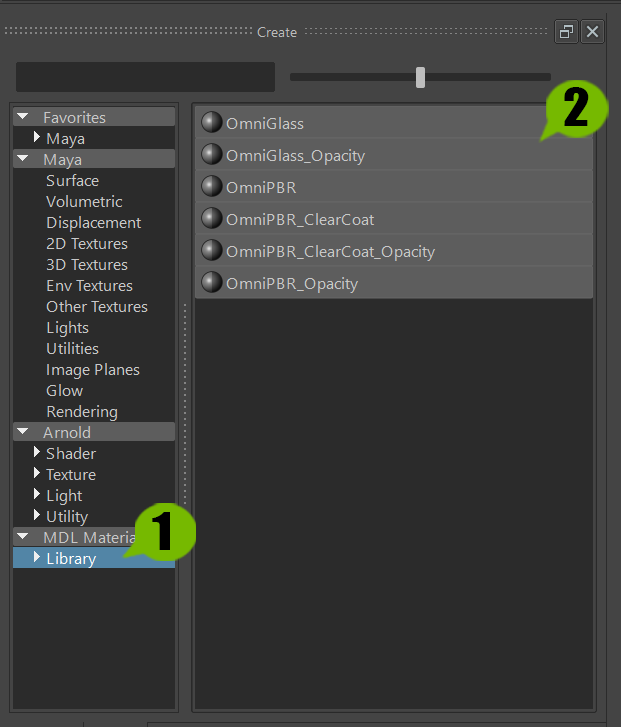
MDL Material Tab
MDL Material List
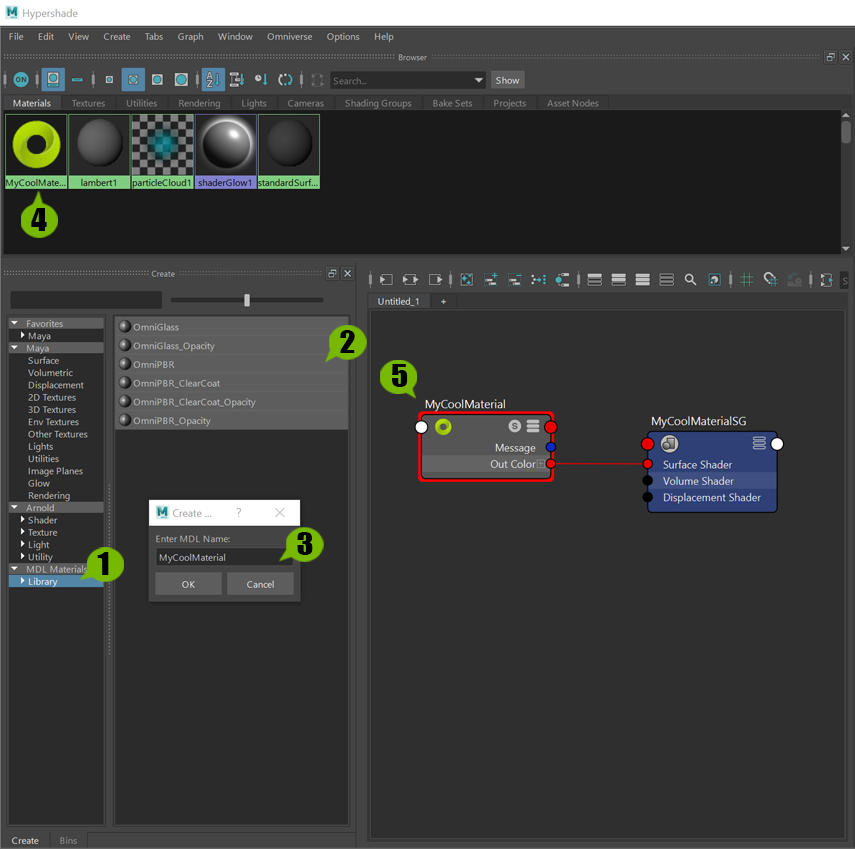
Select the MDL Tab to Reveal the MDL Material List.
Select the MDL Material Template.
Assign a Name for the Material
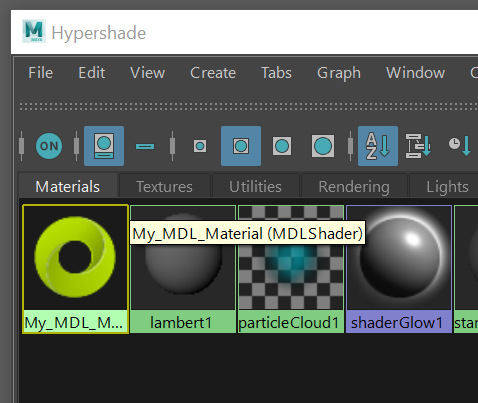
Once Created, the material will be displayed in the Scene Material List.
Graph will show the Material and properties can be edited as a normal material in Maya.
Selecting an MDL Material will allow you to edit the properties in the properties Panel like any other material in Maya.
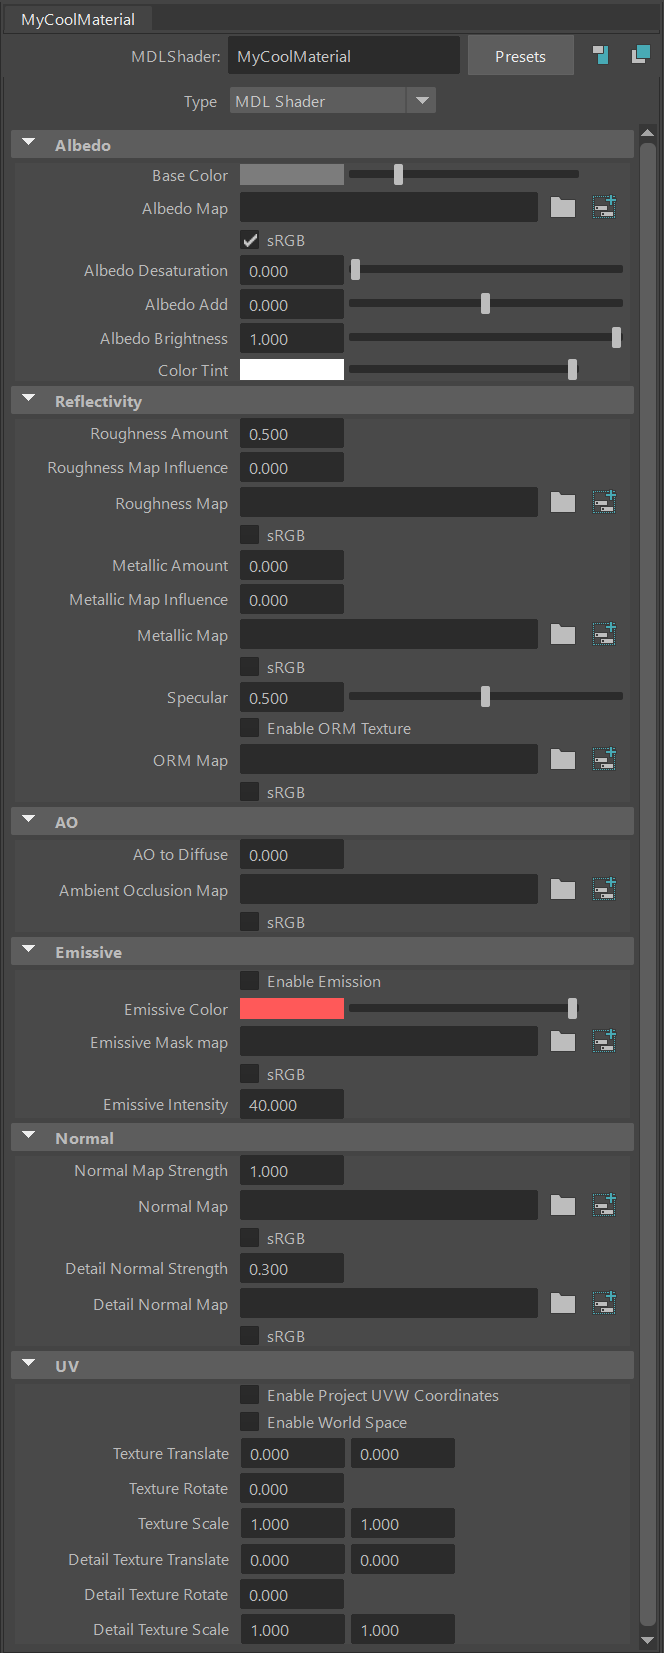
Note
The structure of MDL materials can not be edited in Maya. They can however be created in Substance Designer or Hand Coded and added to your Omniverse Nucleus where they will populate your Maya Hypershade Panel.
Exporting MDLs to the Omniverse
There are 2 methods available to export your MDLs to the Omniverse.
Include MDL’s when Sending Model Data
The most common way to send MDLs is with your model data. Any MDL attached to a mesh can be automatically exported when you export, enable “Include MDL Files” in the export/sync dialogue. Materials are always included with Live workflow or Save USD.
Send MDLs Without Model Data
Users can send their MDLs directly to the Omniverse without sending model data if they choose.
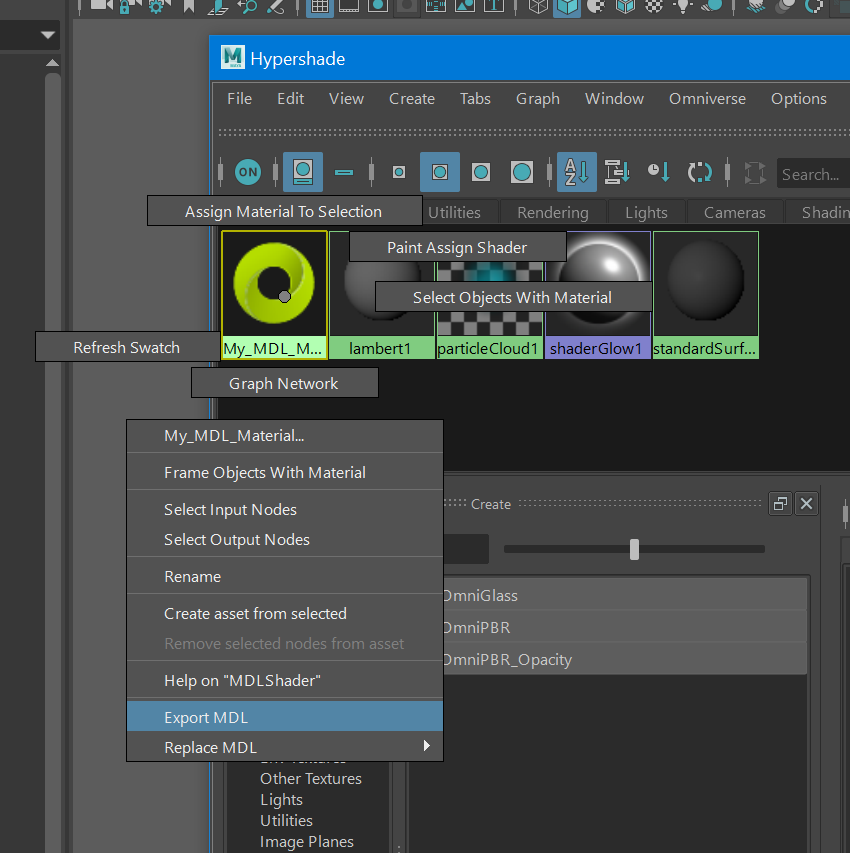
Open the Hypershade Panel and locate an Omniverse MDL material.
Right Click on Any Omniverse MDL Material. Choose “Export MDL”
In the resulting File Browser, choose where you would like your MDL to be stored.
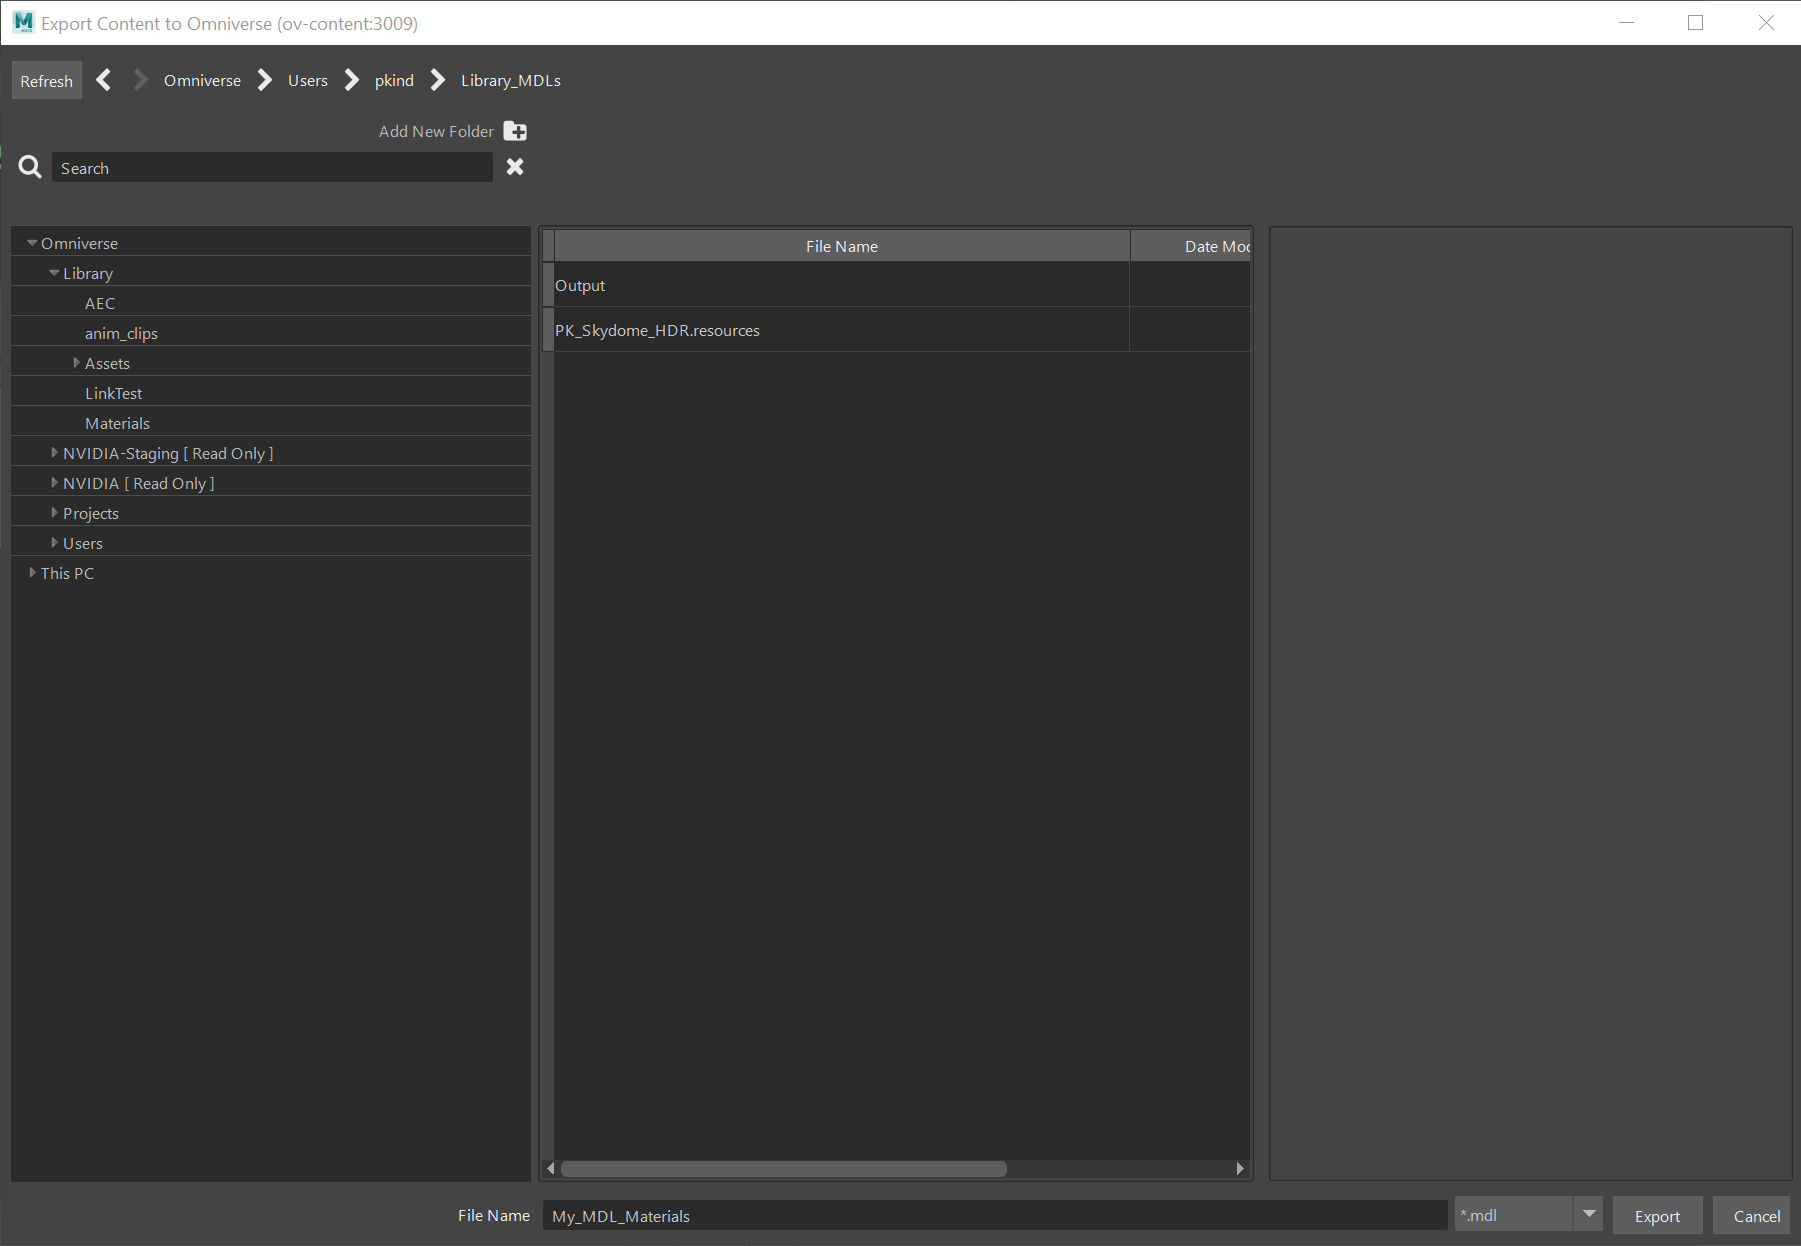
Once stored, this MDL can be applied in Omniverse USD Composer, Omniverse USD Presenter and other Omniverse Applications.
UDIM Materials
Added 2020.1 UDIM materials are supported through the use of a <UDIM> token in a standard UDIM material sequence name (ie: my_mat_name.0001.jpg)
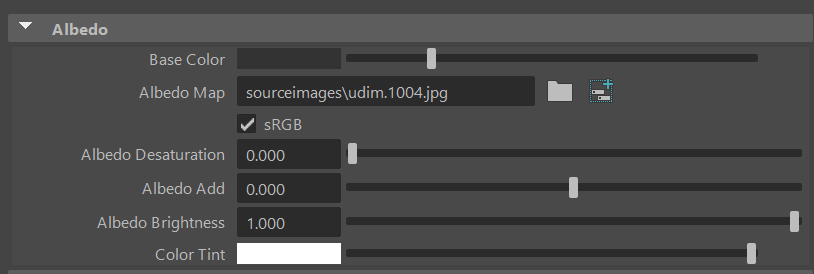
This sequence <UDIM> token can be put into any Omniverse Material Texture Input slot (ie: OmniPBR, OmniGlass etc.)
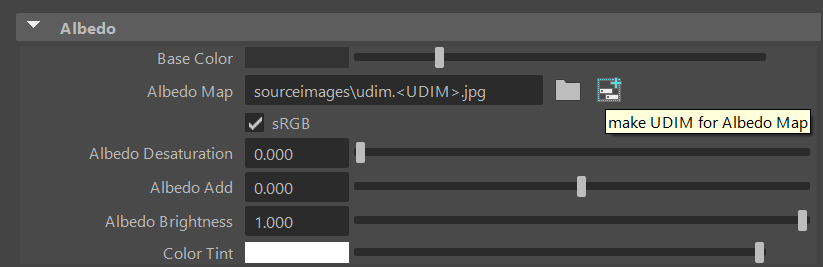
Simply replace the number with <UDIM>
Note
If you want to expedite this process, the small button to the right of the file input can be used on any UDIM formatted material and it will auto insert the <UDIM> tag into your sequence.
Live Workflow
Warning
The Maya Legacy Connector is no longer supported. All users should move to Maya Native.
Maya can live sync with Omniverse.
To live sync with Maya, turn on the Live toggle in on Omniverse shelf. When live sync session is enabled changed to the scene in Maya are sent to Omniverse as well as receives changes to the file from Omniverse.
When Live syncing a file, the most recent settings on the Export panel are honored. For example, if you had cameras and light toggled off and then then toggled on live sync with a USD file that has cameras and lights, then cameras and lights would not subscribe to live sync.
Note
For more information on Live Workflows visit. https://docs.omniverse.nvidia.com/prod_extensions/prod_extensions/ext_live.html
Note
Live is disabled if the target USD has animation or a different up axis than the Maya file. Duplicating a prim may not retain the prepend information, payload or reference , if used. This could result in incorrect or heavy mesh information in the USD stage.
Maya Live Sync with Skeletal Mesh
Omni Live Limitations
In some cases Materials will appear to not Live Sync, depending on when the viewport textures( checker ball icon ) are turned on. To reduce the issue, turn on viewport textures once you open the usd file, other wise materials loaded before this is turned on will not sync properly.
Lights
Lights are exported and converted to compatible USD Lights. When a USD file is opened, USD Lights are converted to Native Maya OR Arnold Lights. This is an option on the USD Open/Import dialogs.
Note
Not all parameters are mapped, only what is compatible with USDlux is converted.
Note
Intensity does not always convert accurately between Maya and USD
Here is the current list of support lights.
Light Group |
Light Type |
USD Light Type |
|---|---|---|
Standard Lights |
Directional
Area
Point Light
Spot Light
Ambient Light
Volume Light
|
- PxrDistantLight
- PxrRectLight
- PxrSphereLight
- PxrSphereLight
- PxrEnvDayLight
- PxrAovLight
|
Arnold Lights |
Skydome Light
Area Light
|
- PxrDomeLight
- PxrRectLight
|
Rendering
Arnold - Scenes from Omniverse can be rendered with the Arnold renderer in cpu mode.
Note
Known Limitation - Arnold rendering is not supported with Arnold in gpu mode.
Point Cache
Prop + Vertex Cache
It is now possible to export a point cache that matches a static prop asset. This allows the actual point cache to be smaller in size.
To do this:
Start with a Maya file that has animation on it.
Export as a file type Prop
Export again, but this time as type Point Cache. Set the option Vertex Only to On.
In Create, add the prop as a layer, and then the vertex cache export as the next layer

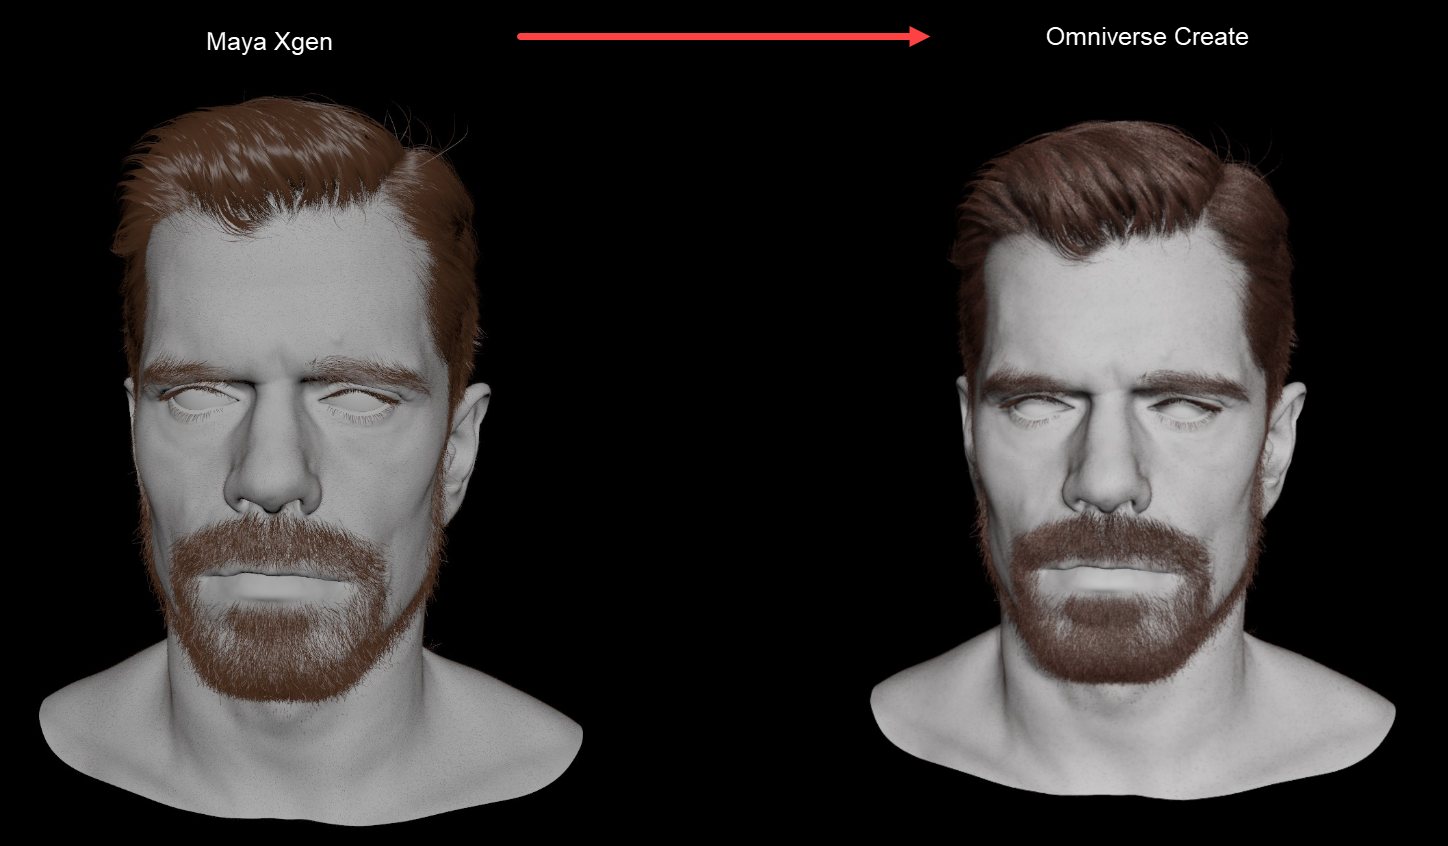
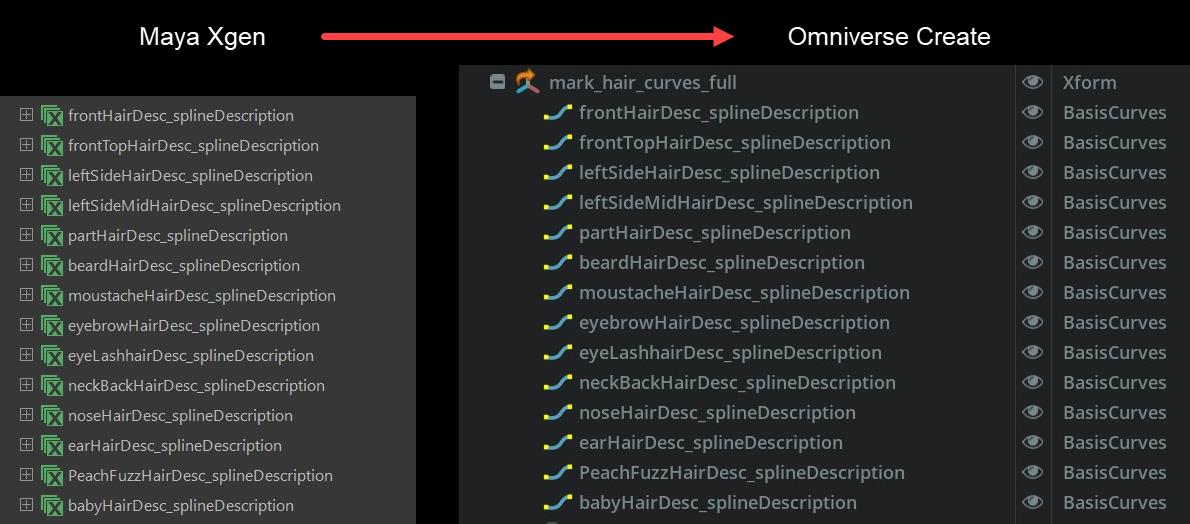
Maya Interactive Groom Export
Maya Interactive Grooms from Xgen can be exported directly to USD with the Omniverse Maya (Legacy) Connector.
Export Settings
Setting |
Options |
Description |
|---|---|---|
Wrap |
Non-periodic |
Wrap Non-periodic is a smooth open curve with two phantom points at the start/end of the curve extend from previous two points. 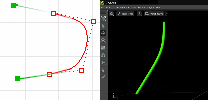
|
Wrap |
Periodic |
Wrap Periodic is a smooth closed curve. Periodic curves stay smooth when you edit them. 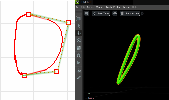
|
Wrap |
Pinned |
Wrap Pinned is a smooth open curve from linear curve points, final curve snap to start and end points without phantom points. This is a default mode for curve in Omniverse-Kit. 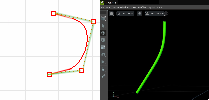
|
UV Interp Type |
Uniform |
UV interpolation Type Uniform is usd texture primvars setting that sets texture coordinate to texCoord2f[] primvars:st1 per curve strand from Root. Example - 1 hair strand consist with 4 vertex will have texCoord2f[] count of 1. 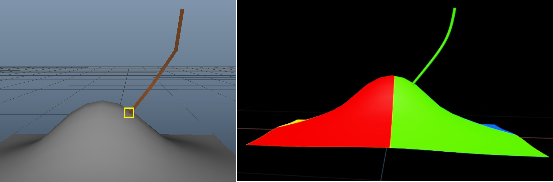
|
UV Interp Type |
Vertex |
USD texture primvars setting that sets texture coordinate to texCoord2f[] primvars:st1 per vertex inherited from Root. Example - 1 hair stand consist with 4 vertex will have texCoord2f[] count of 4. .. figure:: /images/connect_maya_hair_interp_vertex.png |
Note
Known Limitation - Hair Groom cannot be exported with Animation or as animation clip.
To export an xgen groom, first be sure there is an xgen groom in the maya scene.
Convert to an Interactive Groom
Upon Export Choose Prop and the settings as listed above.
Open usd file in Create
Set hair Material UV index to 1.
For additional grooms, use export selected.
Then reference additional groom to the USD stage.

Exporting
Batch Export
Maya allows user to batch export the Maya scene to multiple separate USD files. These are then composed into a main USD stage. See the below video for an example of how to use this.