8.1. Occupancy Map Generation
8.1.1. Learning Objectives
This tutorial demonstrates how to create an occupancy map Omniverse Isaac Sim. After this tutorial, you will know how to use the occupancy map generation extension to generate a 2d occupancy map for an environment.
5-10 Minute Tutorial
8.1.2. Getting Started
The occupancy map extension uses physics collision geometry in the stage to determine if a location is occupied or not. If you are generating an occupancy map for a custom environment, make sure that any geometry you want to appear in the final map has collision enabled. For the purposes of this tutorial, we will use the warehouse environment:
Open a new stage via File -> New
Create -> Isaac -> Environments -> Small Warehouse with Multiple Shelves to load the warehouse into this new empty stage.
8.1.3. Generating an Occupancy Map
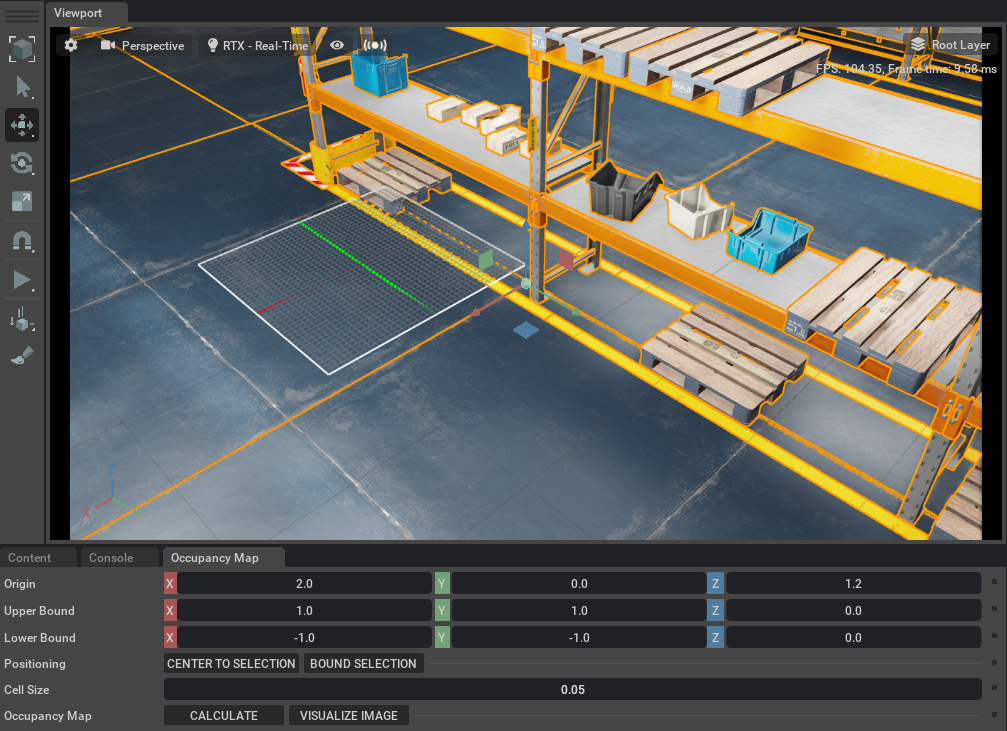
In the Occupancy Map Generator UI set the origin to an empty location in the stage
(2.00, 0, 1.20)You will see a wireframe rectangle appear in the stage showing the bounds of the area used to create the map
The center of this rectangle must be in an unoccupied space
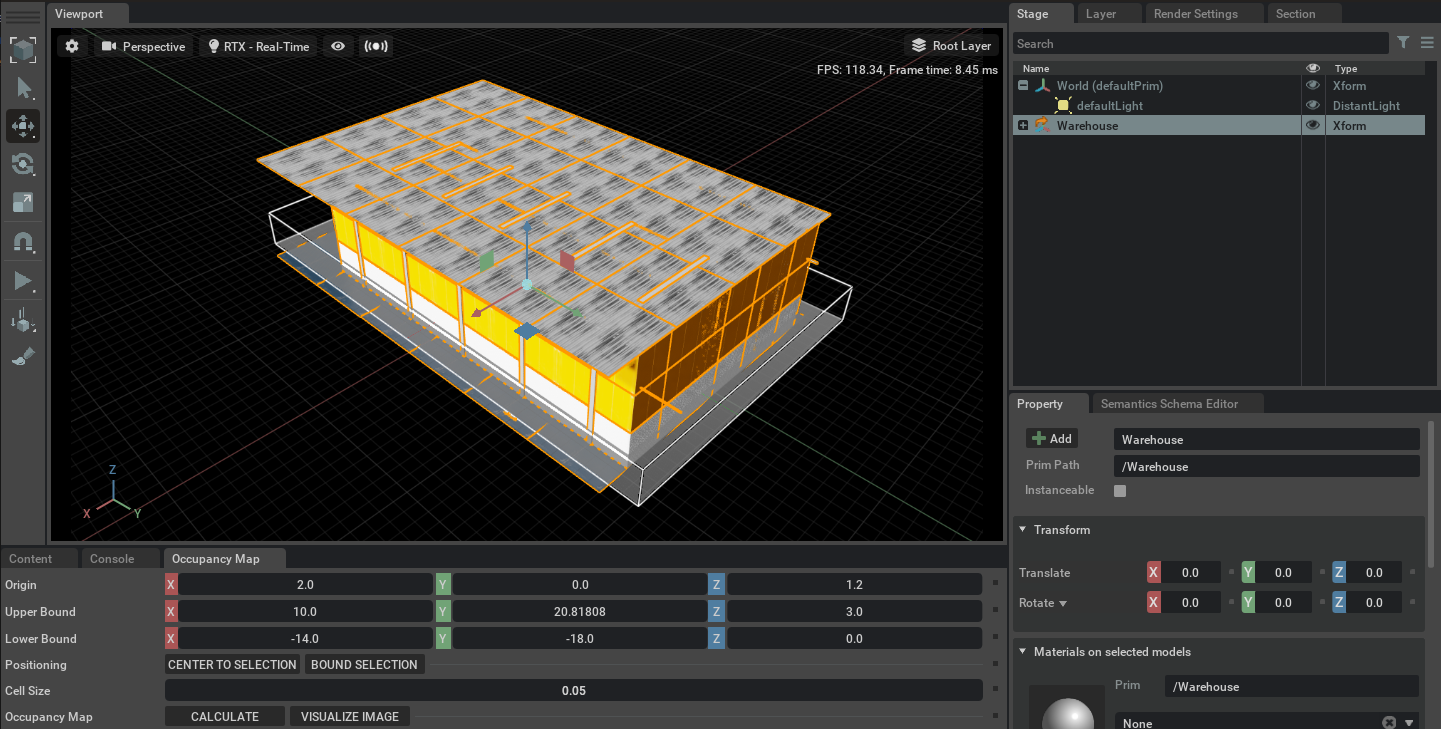
Select the Warehouse prim in the stage. In the Occupancy Map extension, click on BOUND SELECTION.
For the Upper Bound, set the Z height to 3.0
Press
CALCULATEfollowed byVISUALIZE IMAGE. A window showing the map will appearVisualization Window:
Occupied/Freespace/Unknown Colors: These colors are used in the final generated image
Rotation: Rotates the output image by the specified amount
Coordinate Type: Selects the type of configuration output for the generated occupancy map
Occupancy Map: Pressing RE-GENERATE IMAGE will create a new image and display the updated configuration output

Press the Save Image button and select the location where you wish to save the image
The final stored image will look like the following:

8.1.4. Using Physx Lidar vs RTX Lidar for Generating Occupancy Maps
In the Occupancy Map Generator UI, setting the Use PhysX Collision Geometry option to True will use the collision approximations for each mesh in the scene which the PhysX based lidar uses to generate the occupancy map. This is set to True by default as it is the fastest option.
On the other hand, setting the option to False will temporarily remove the collision approximations and the RTX Lidar will use the original triangle meshes to generate a more accurate occupancy map.
To compare the results for each option, open the example USD file containing some simple meshes with different collision approximations here: /Isaac/Samples/Examples/OccupancyMap/physx_vs_rtx_lidar_tutorial.usd.
- Ensure that Visualizing collision meshes are enabled:
Select: the eye icon in the upper left corner of the viewport.
Select: Show by type.
Select: Physics.
Select: Colliders.
Check: All.
Ensure the Occupancy Map extension is open and then select all the meshes in the stage.
Select
CENTER TO SELECTIONfollowed byBOUND SELECTION.Ensure
Use PhysX Collision Geometryis checked. PressCALCULATEfollowed byVISUALIZE IMAGE. A window showing the map will appear and resemble the following: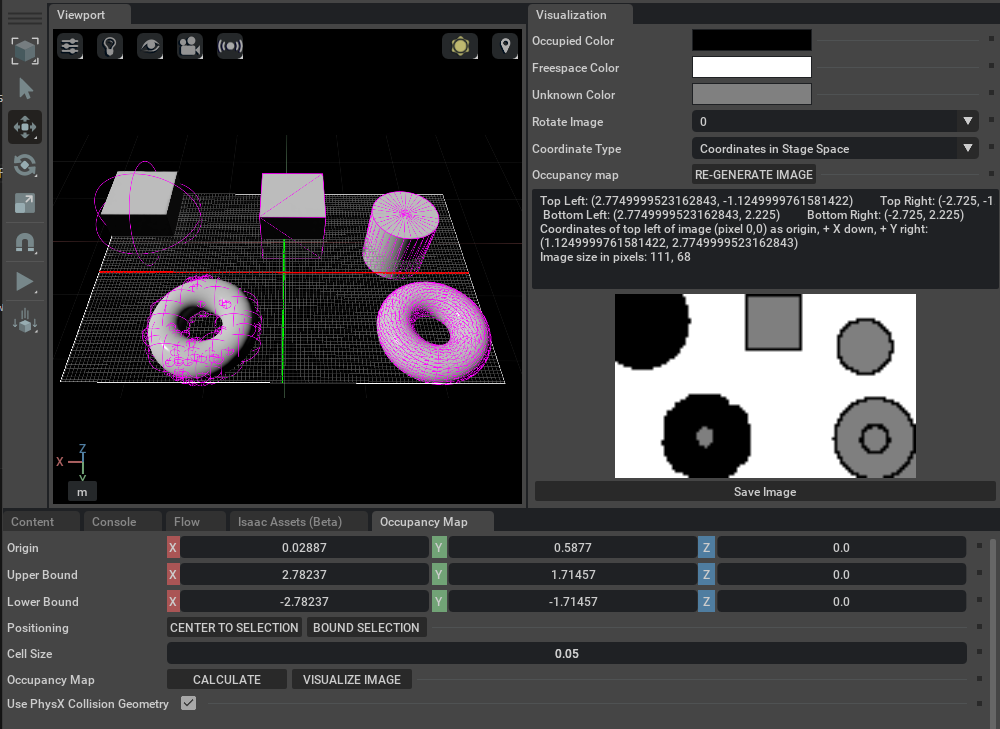
Next uncheck
Use PhysX Collision Geometry. PressCALCULATEfollowed byVISUALIZE IMAGE. A window showing a more accurate map will appear and resemble the following: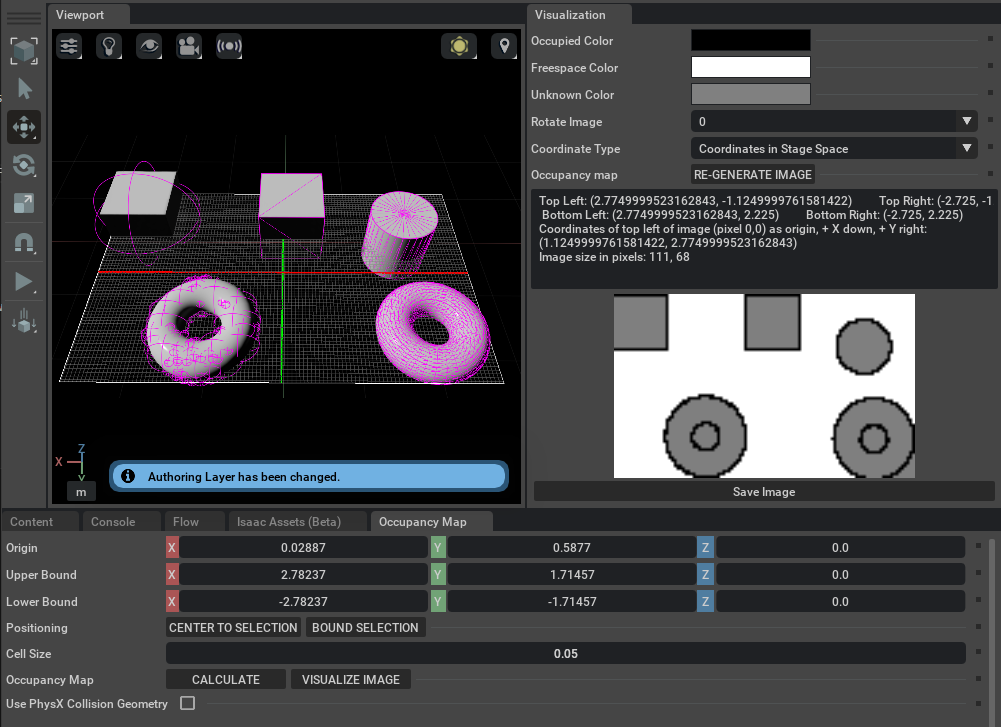
8.1.5. Summary
This tutorial covered the following topics:
Using the occupancy map generator extension
Generating a 2d occupancy map image for the warehouse environment
Comparing the differences in occupancy map generated using PhysX vs RTX Lidar
8.1.6. Further Learning
Refer to the Occupancy Map Generator extension manual for more information about the UI element and python bindings.
Explore the inner workings of RTX Lidar sensors by learning How They work, the RTX Lidar Nodes that use them, and how to get RTX Lidar Synthetic Data.