Action Graph Quickstart
In this tutorial, you use OmniGraph in Omniverse USD Composer to move a mesh in response to a key press.
Note
While you use Omniverse USD Composer in this tutorial, you can follow similar steps to achieve the same results in other Omniverse Apps.
Before You Begin
While this is an introductory-level tutorial on OmniGraph, we recommend you complete Introduction to OmniGraph first. That tutorial provides more detailed information about some of the same steps that you complete here.
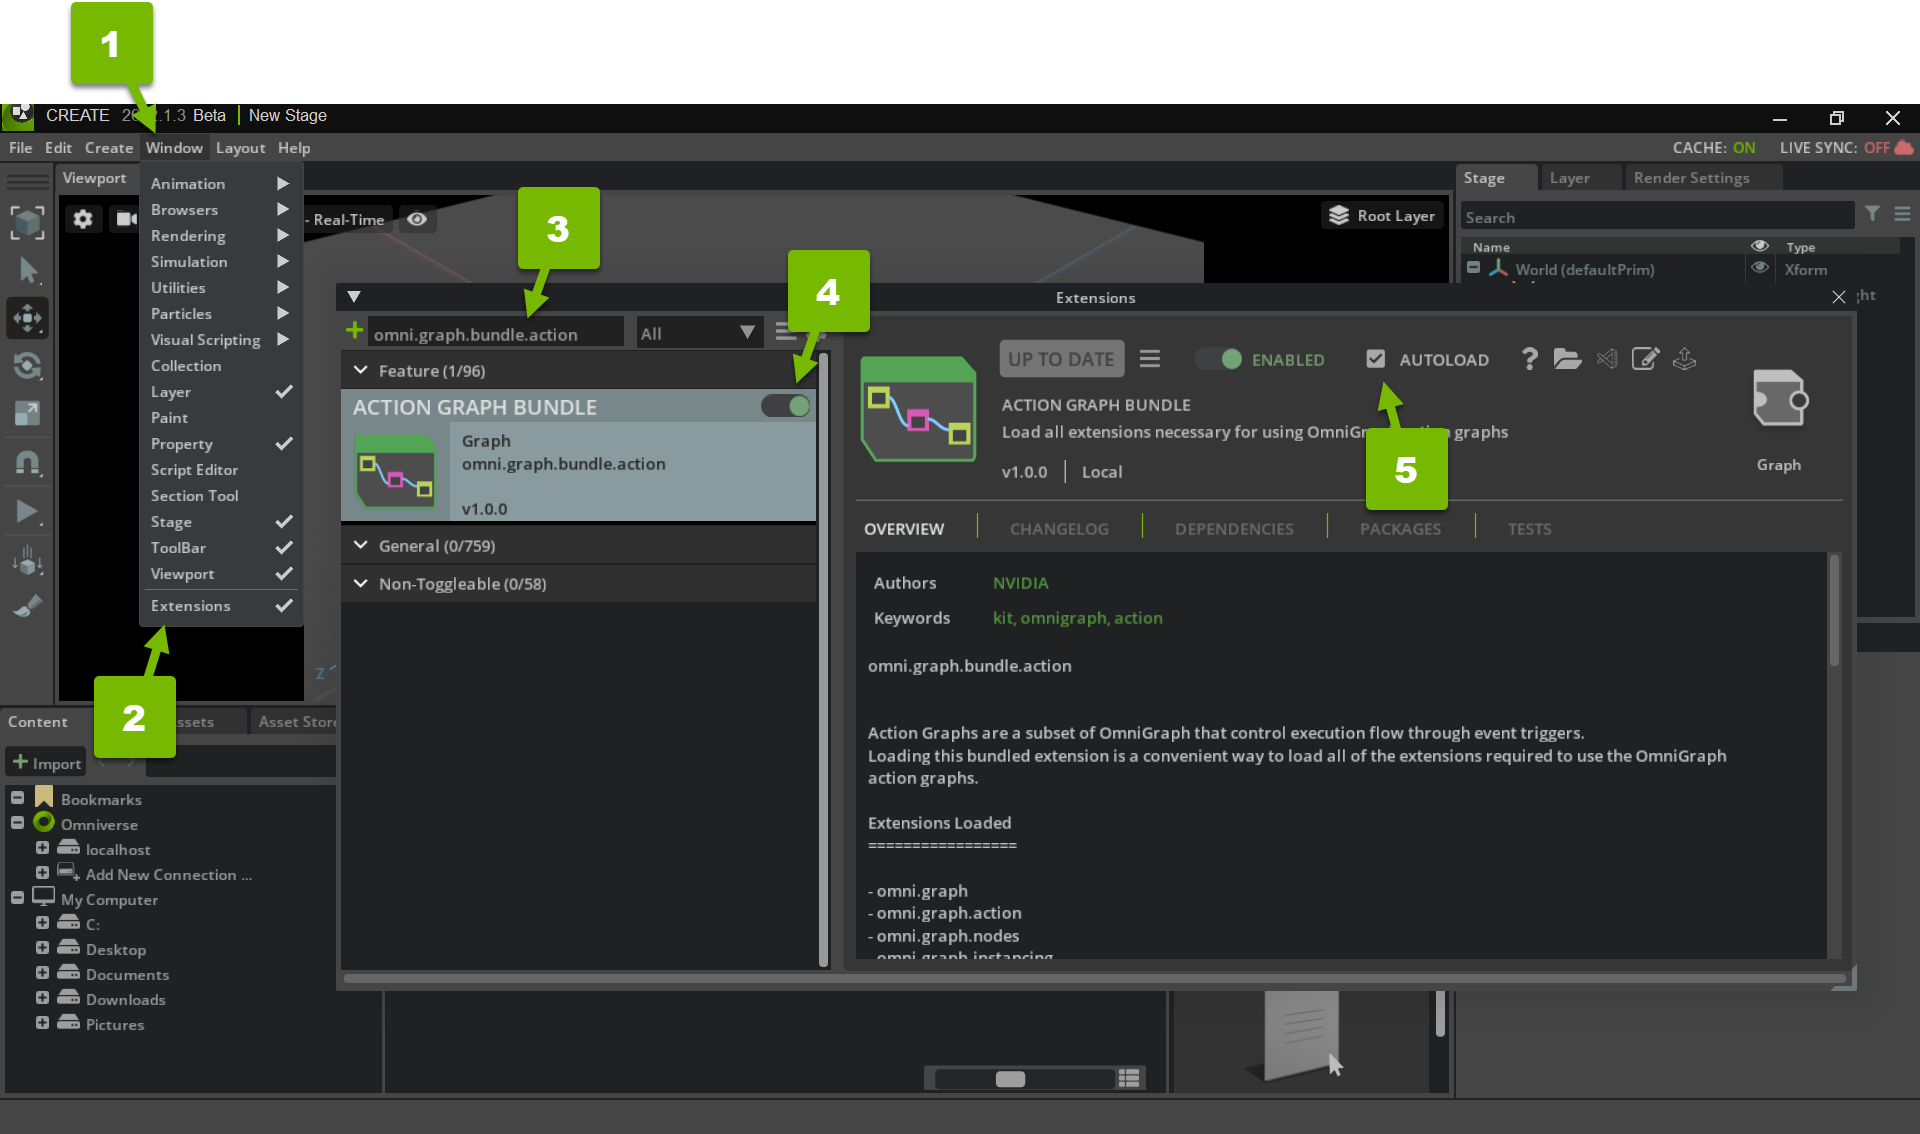
Load the OmniGraph Extensions
First, load the Action Graph Bundle extension into Omniverse USD Composer:
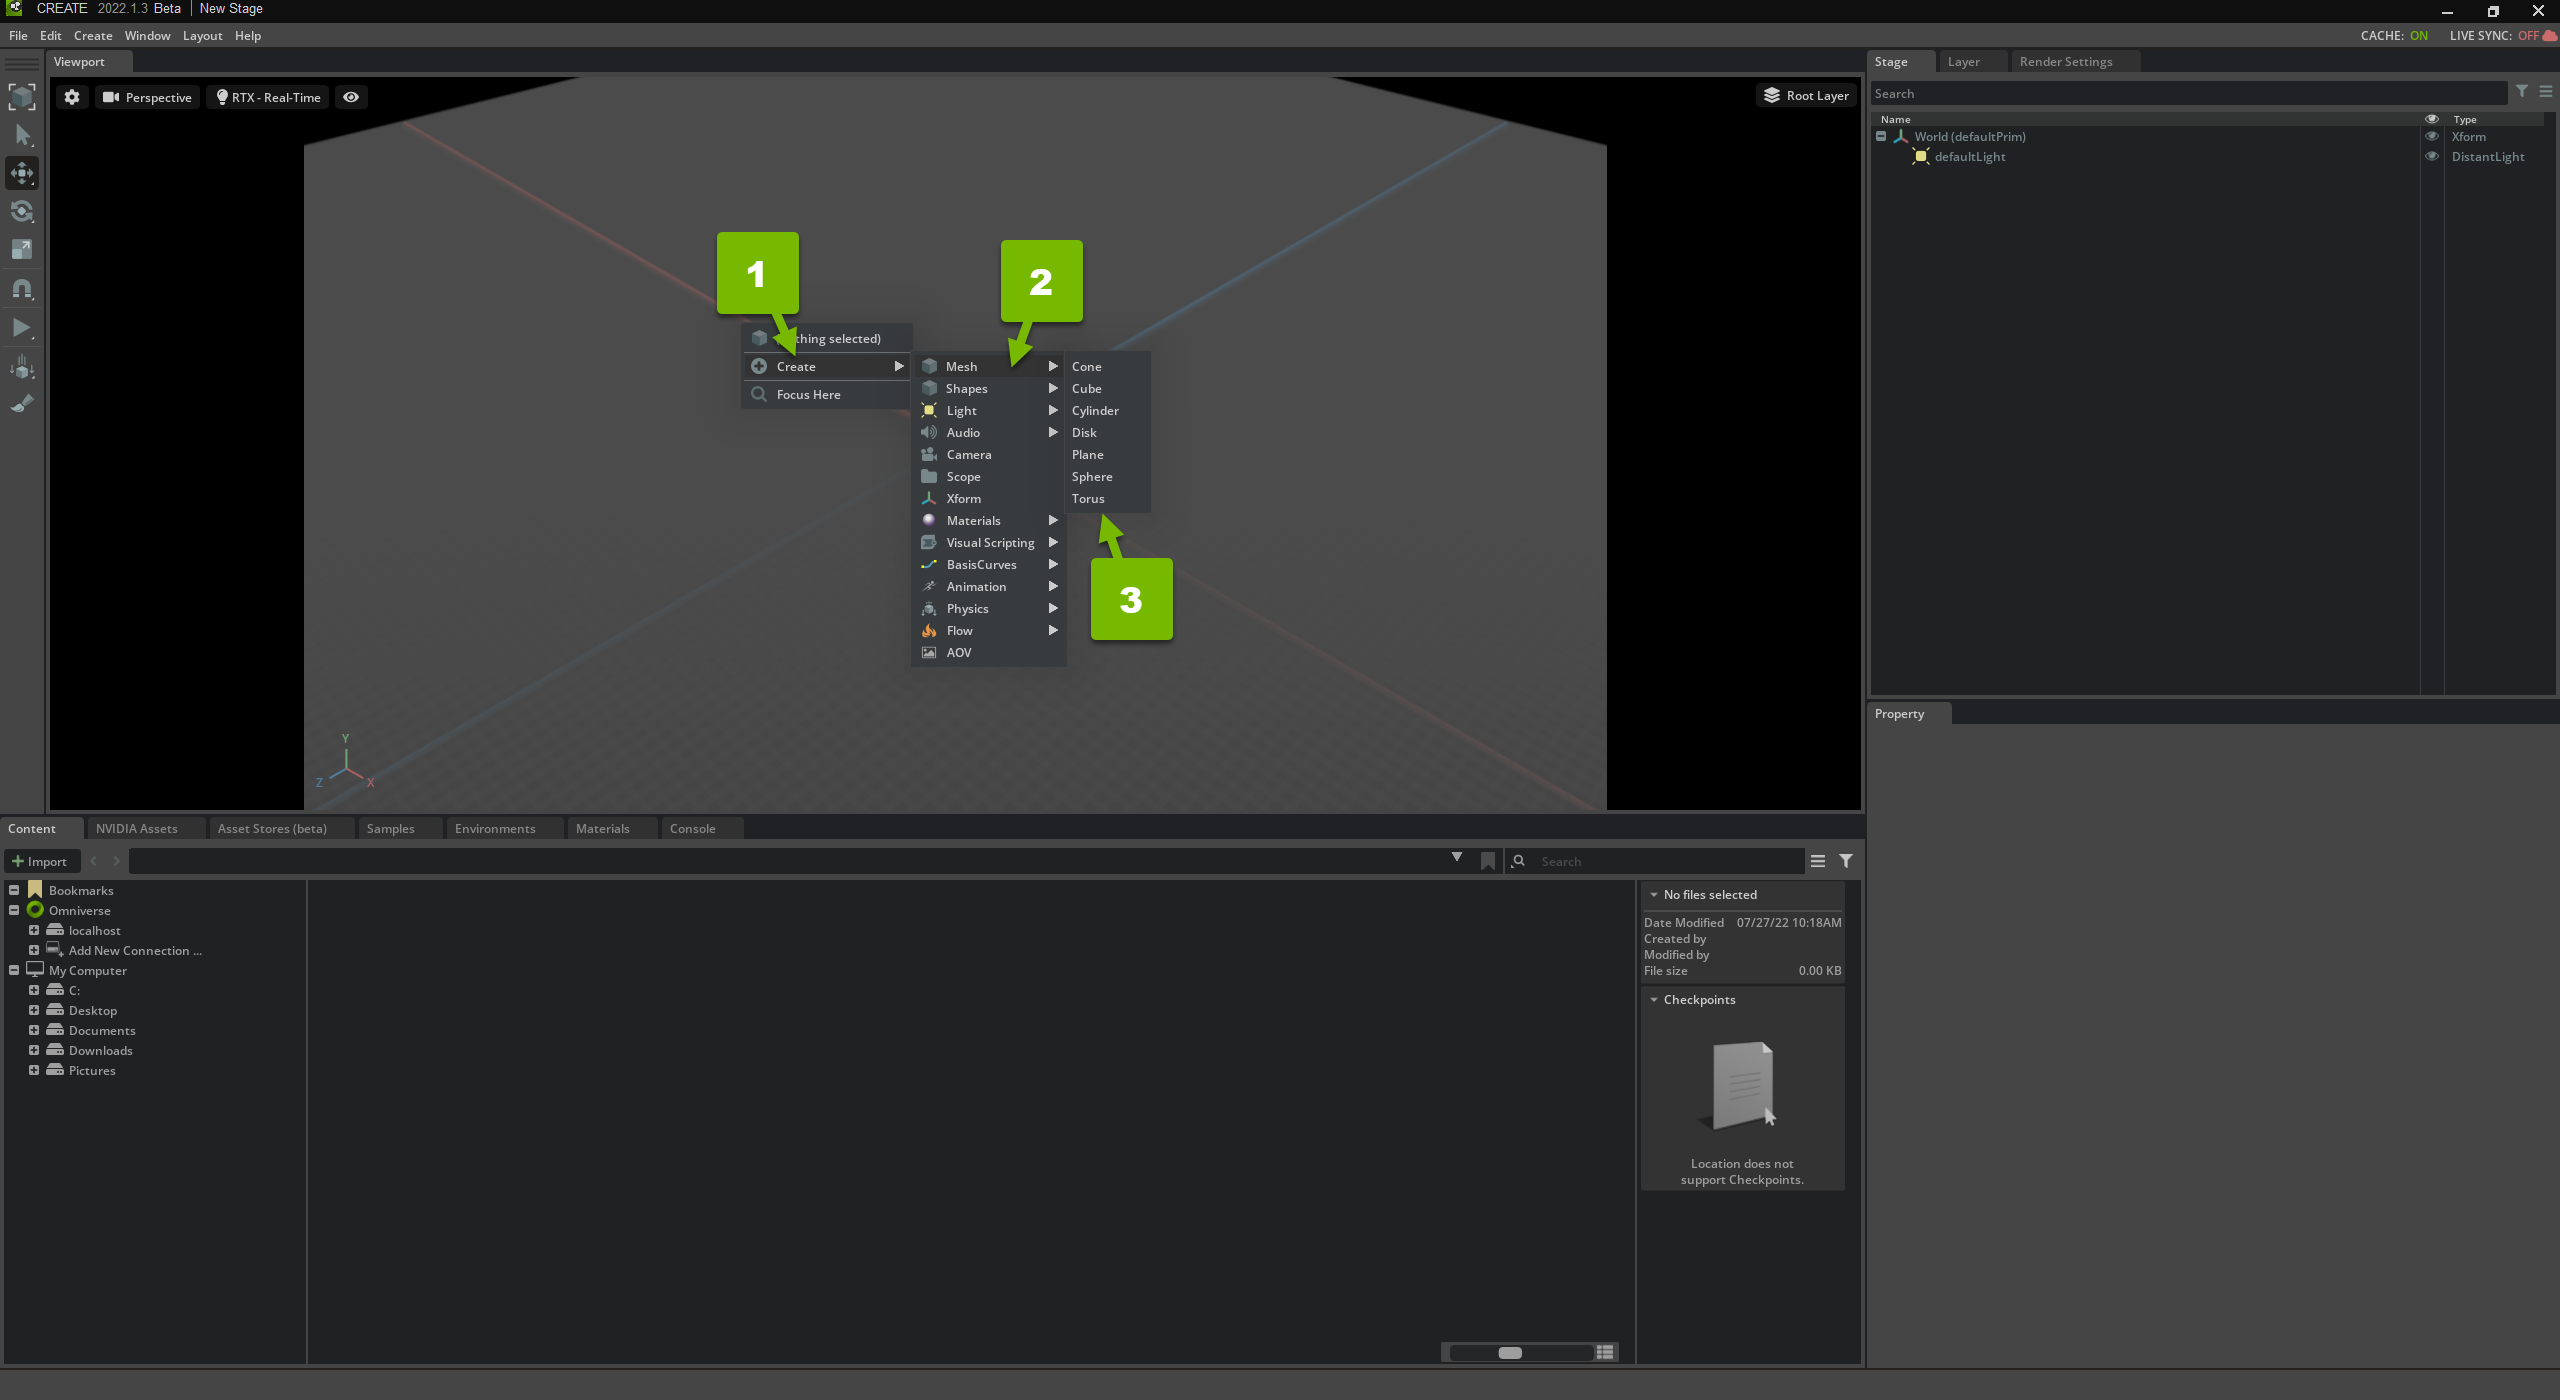
Prepare Your Scene
Next, prepare your empty scene by adding a torus:
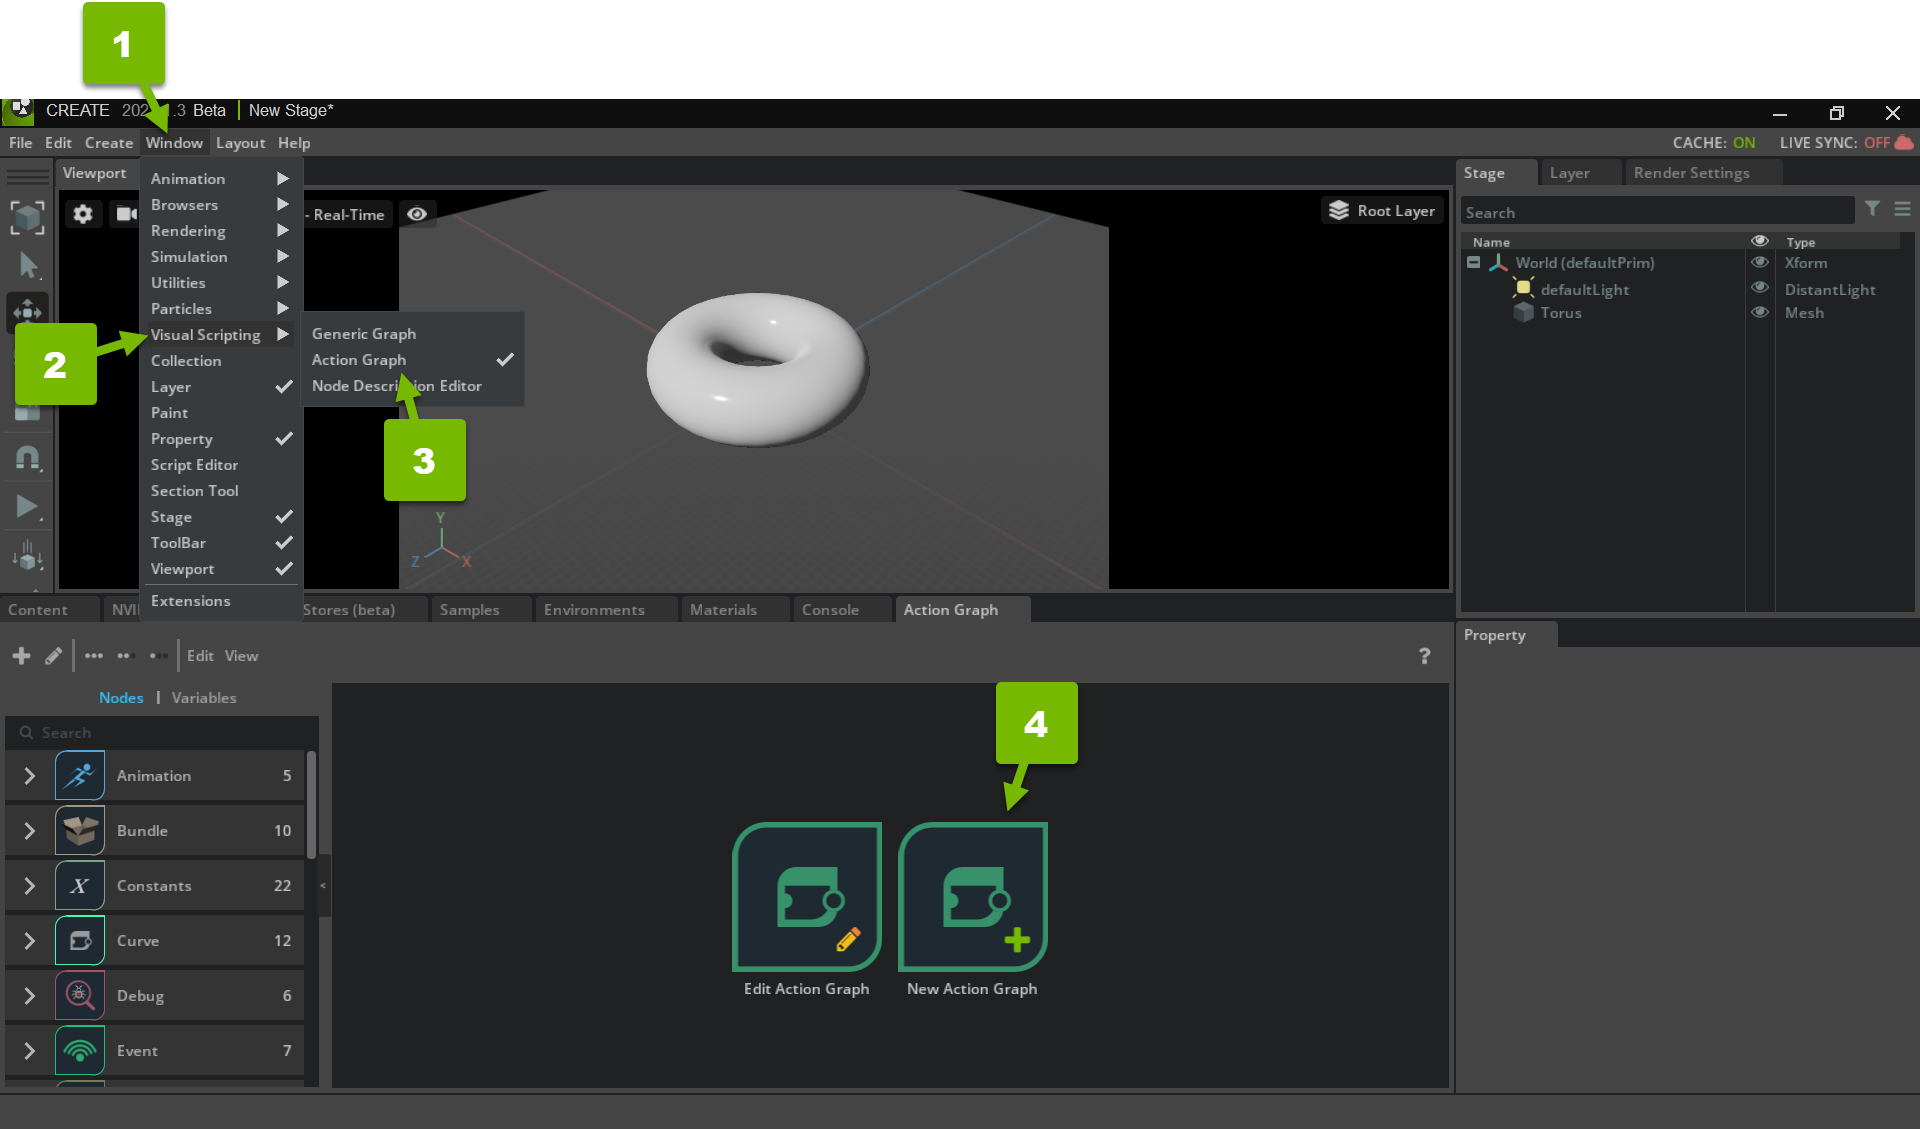
Create a New Action Graph
Create a new Action Graph so you can trigger action in response to a particular event:
Use an On Keyboard Input Node
Search for the On Keyboard Input node, drag it into the editor, and set its Key In to J:
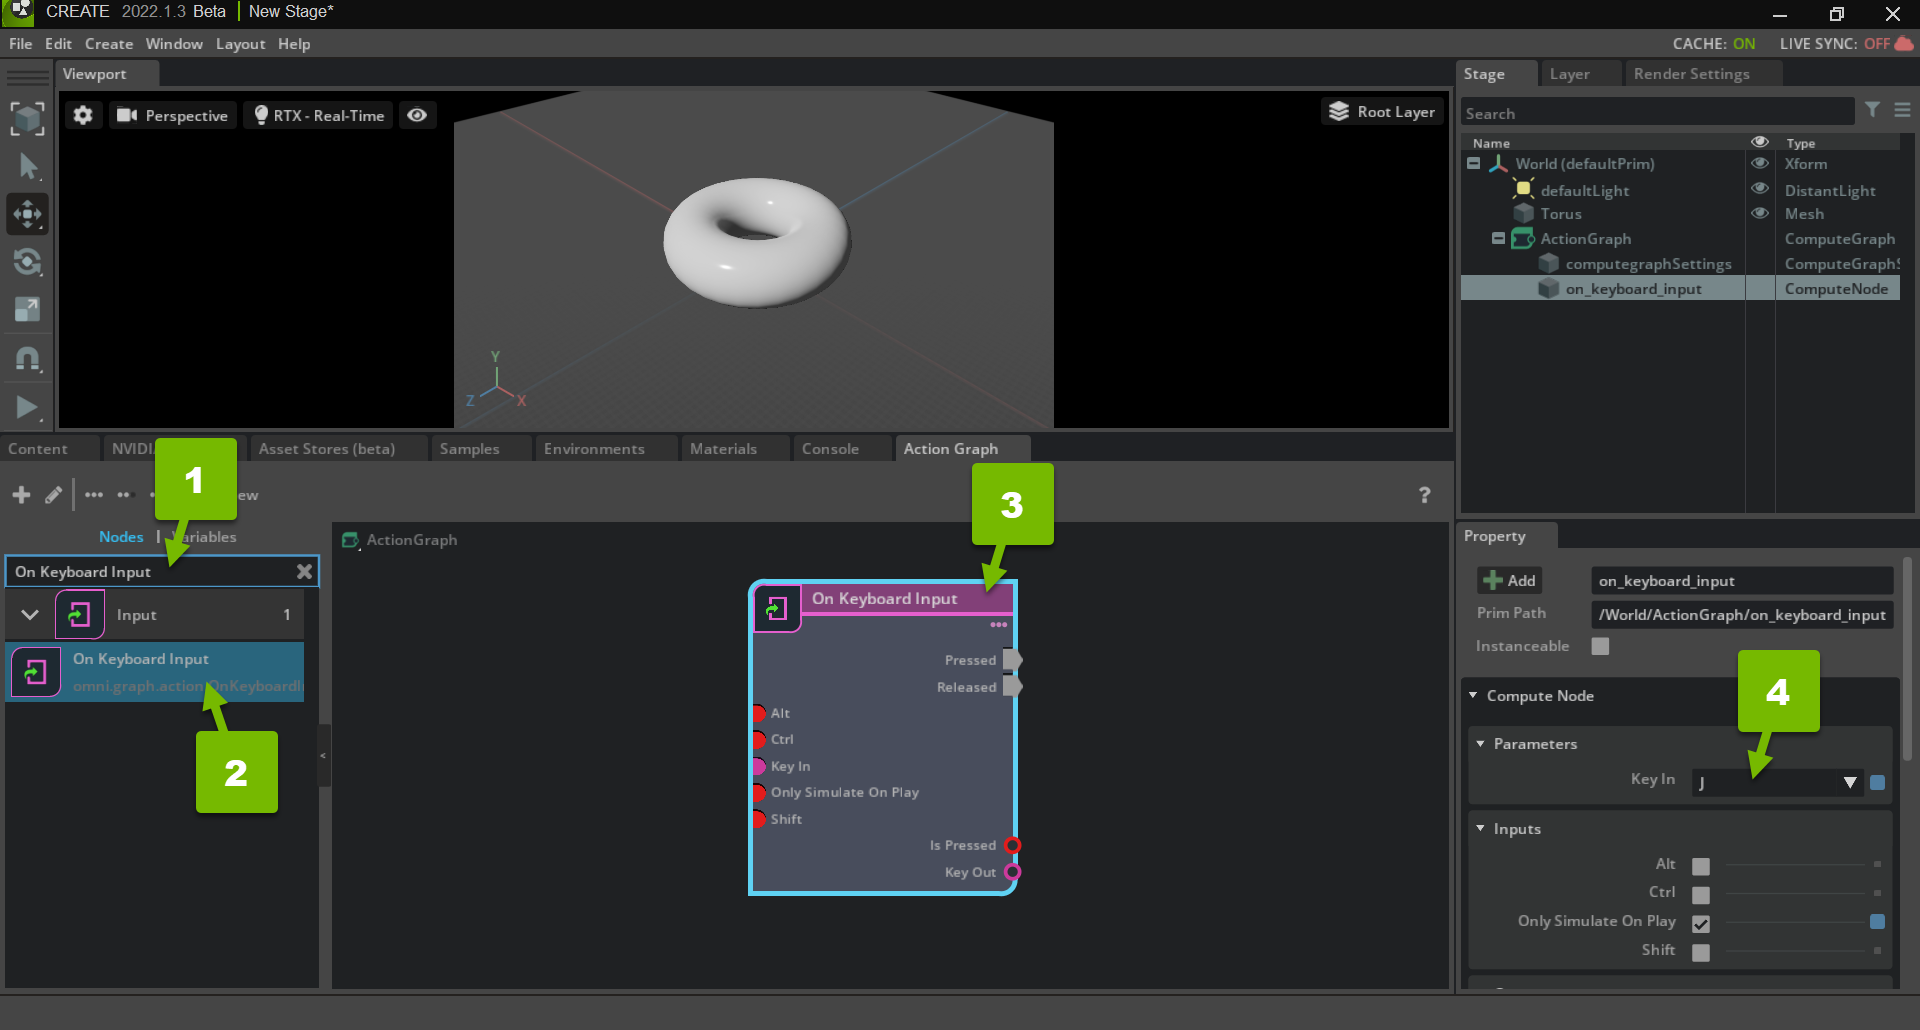
On Keyboard Input is an event-source node. When the user presses the J key, the outputs:pressed attribute is enabled. You use this attribute to trigger an action later in this tutorial.
Use a Write Prim Attribute Node
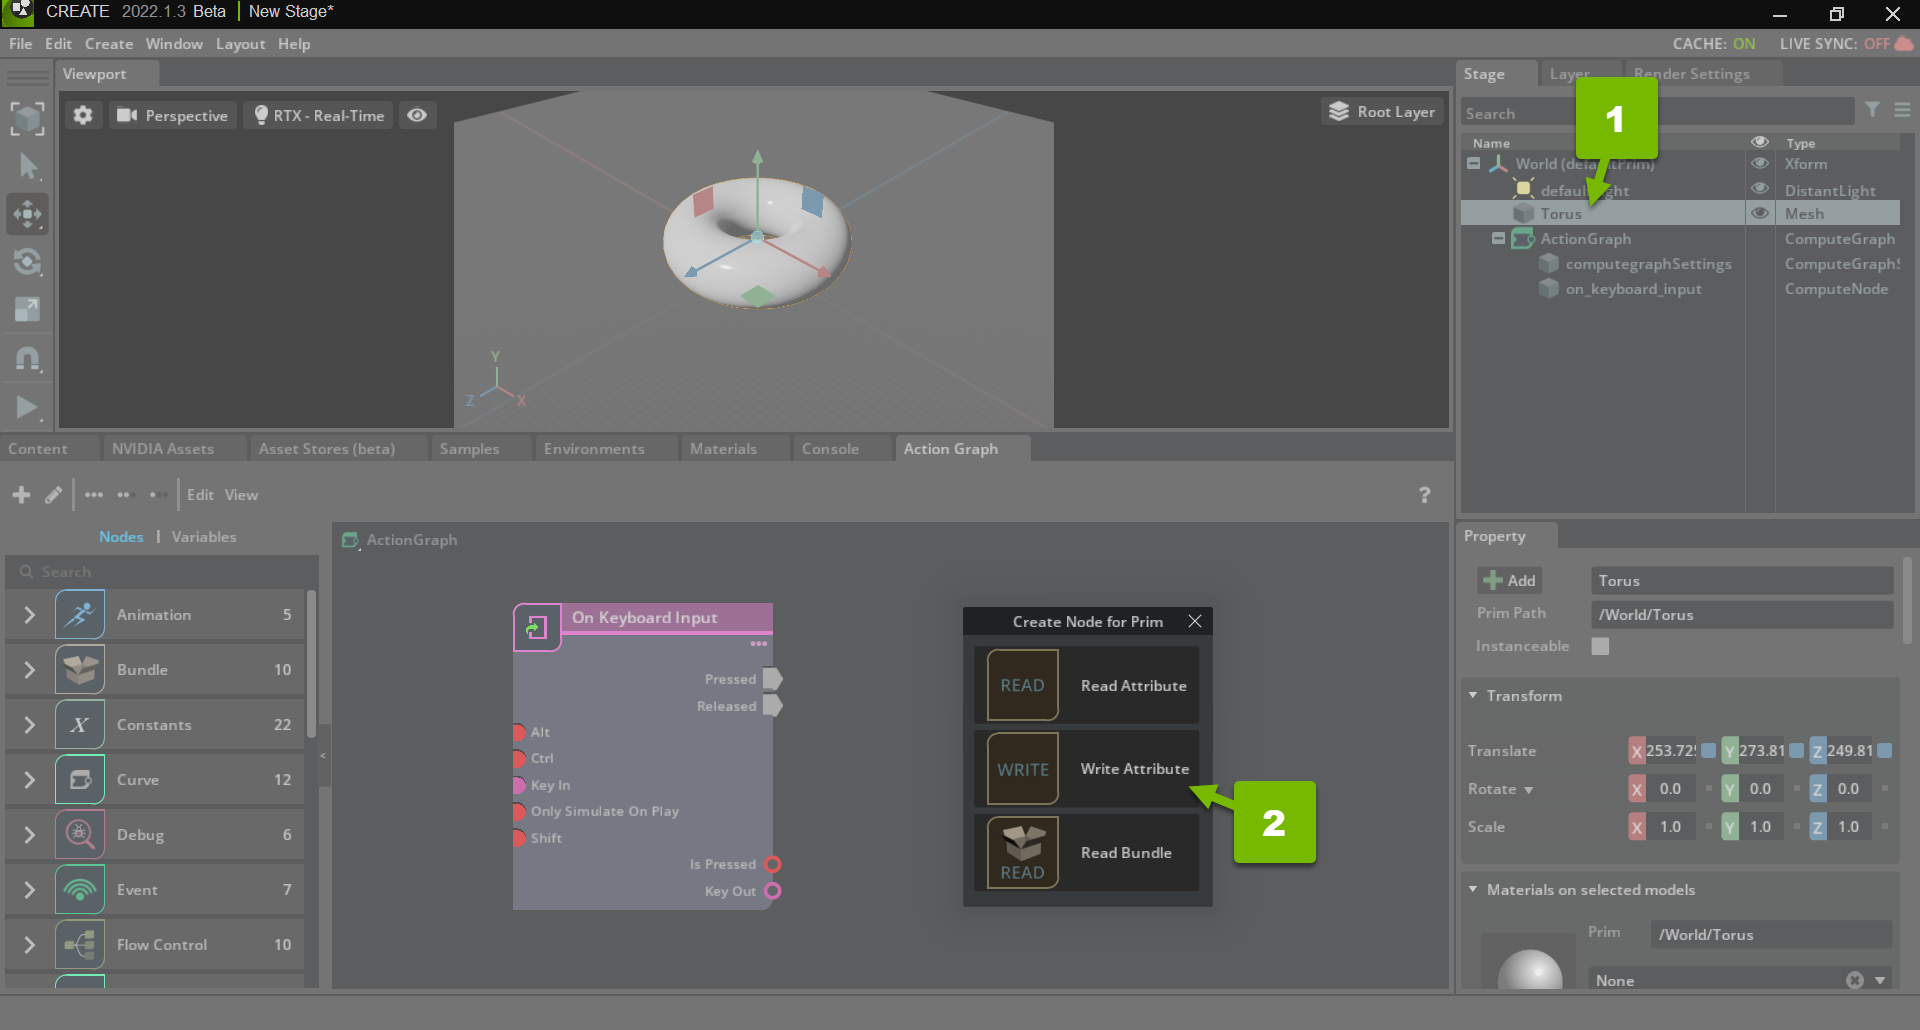
Drag the torus prim from the Stage to the Action Graph editor, and select Write Attribute:
Then, set its Attribute Name to xformOp:translate:
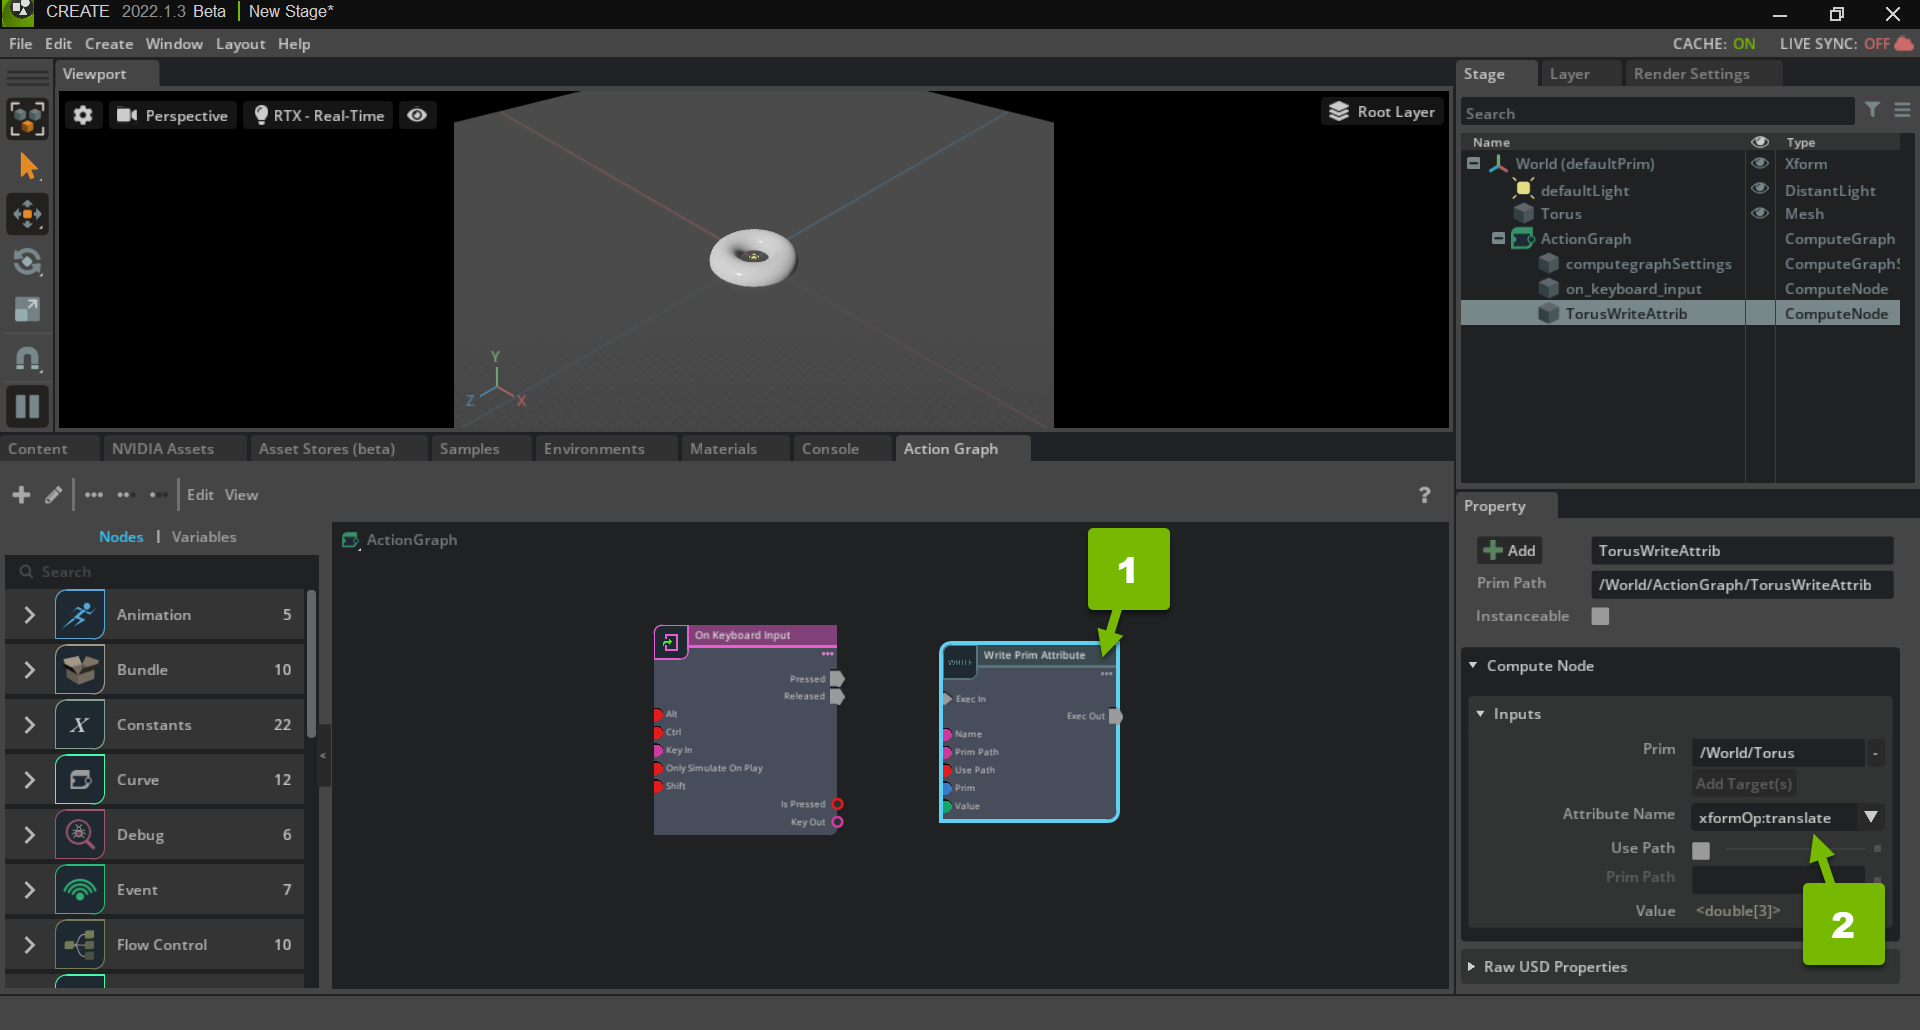
This means you want to translate, or move, the torus.
Use a Constant Point3d Node
Search for the Constant Point3d node, drag it into the editor:
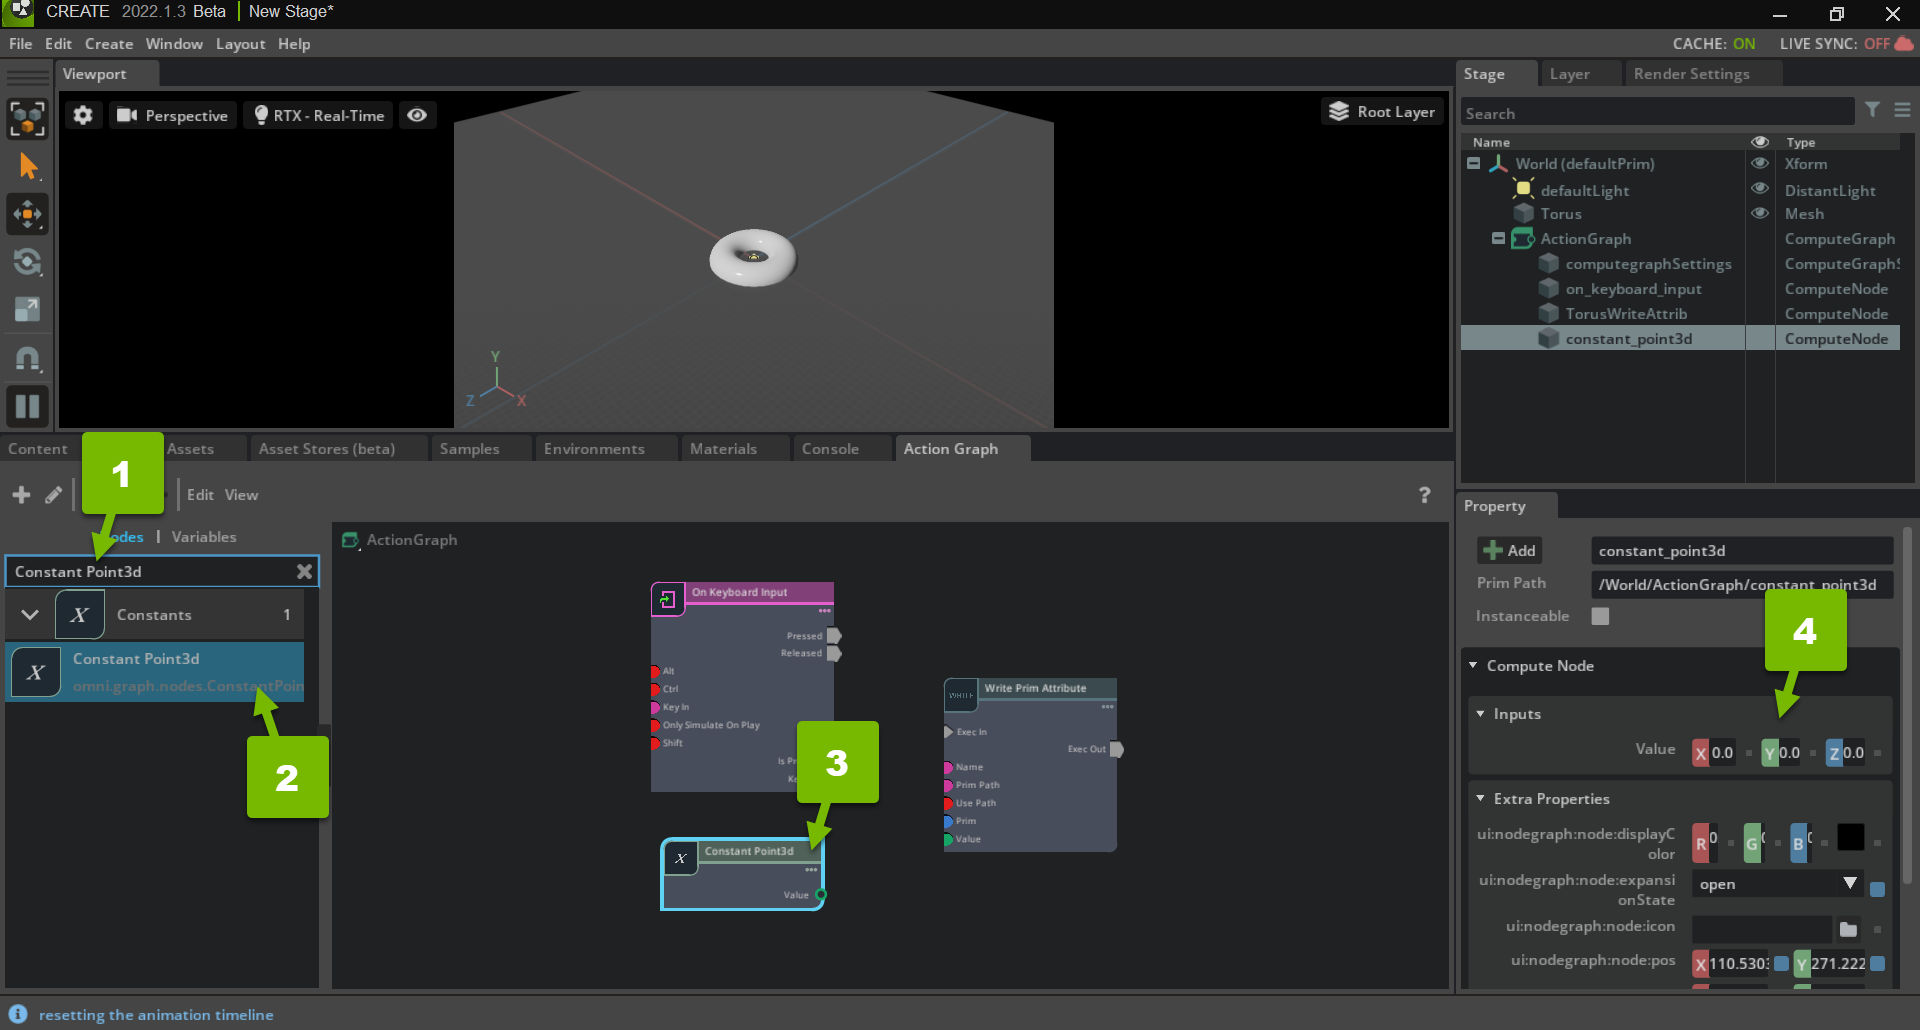
Notice that the X, Y, and Z input values are all set to 0.0 in the Property panel. This points your constant point at the origin of the scene.
Wire up the Nodes
Now, it’s time to wire up your nodes and direct the flow of execution.
Move the Torus to the Origin
Click and drag the Constant Point3d node’s Value pin to the Write Prim Attribute node’s Value pin:
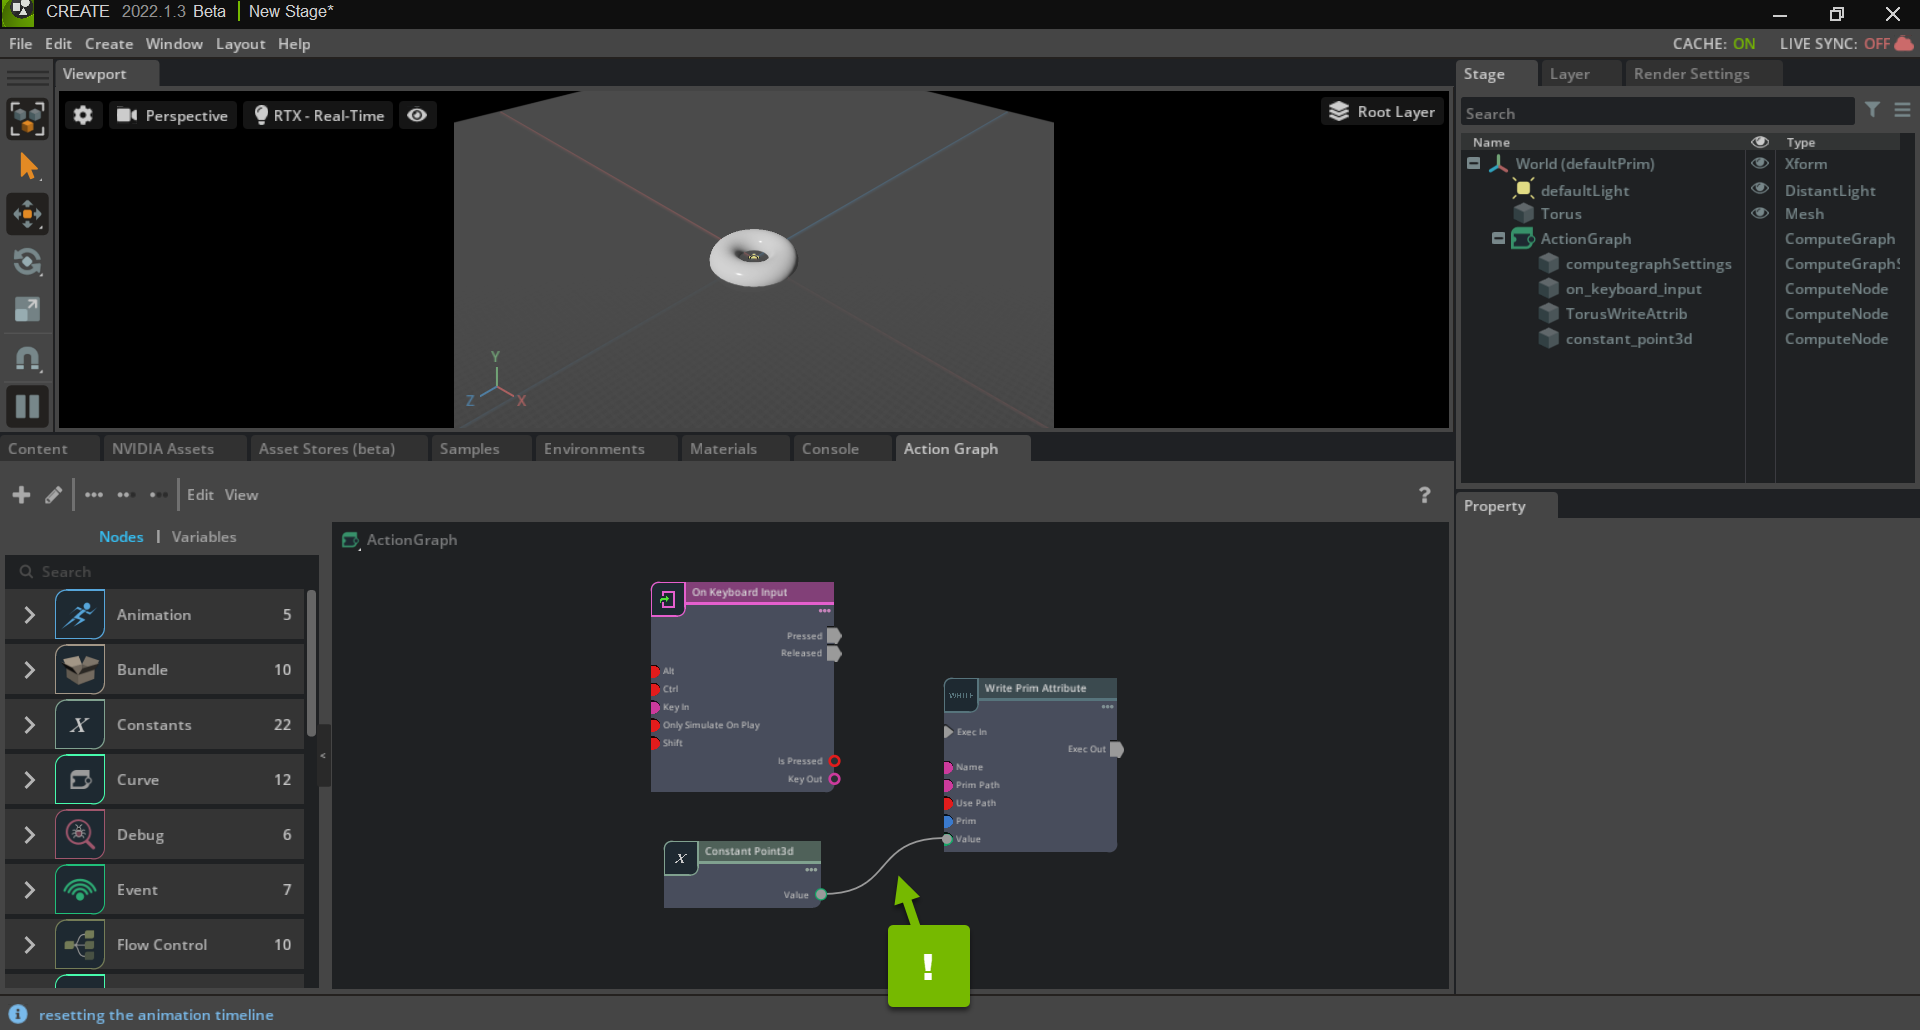
This takes the constant value, a 3-tuple representing the origin of the scene, and writes it to the torus’s xformOp:translate attribute. In other words, it moves the torus to the origin.
Move the Torus on Key Press
Next, click and drag the On Keyboard Input node’s Pressed pin to the Write Prim Attribute node’s Exec In pin:
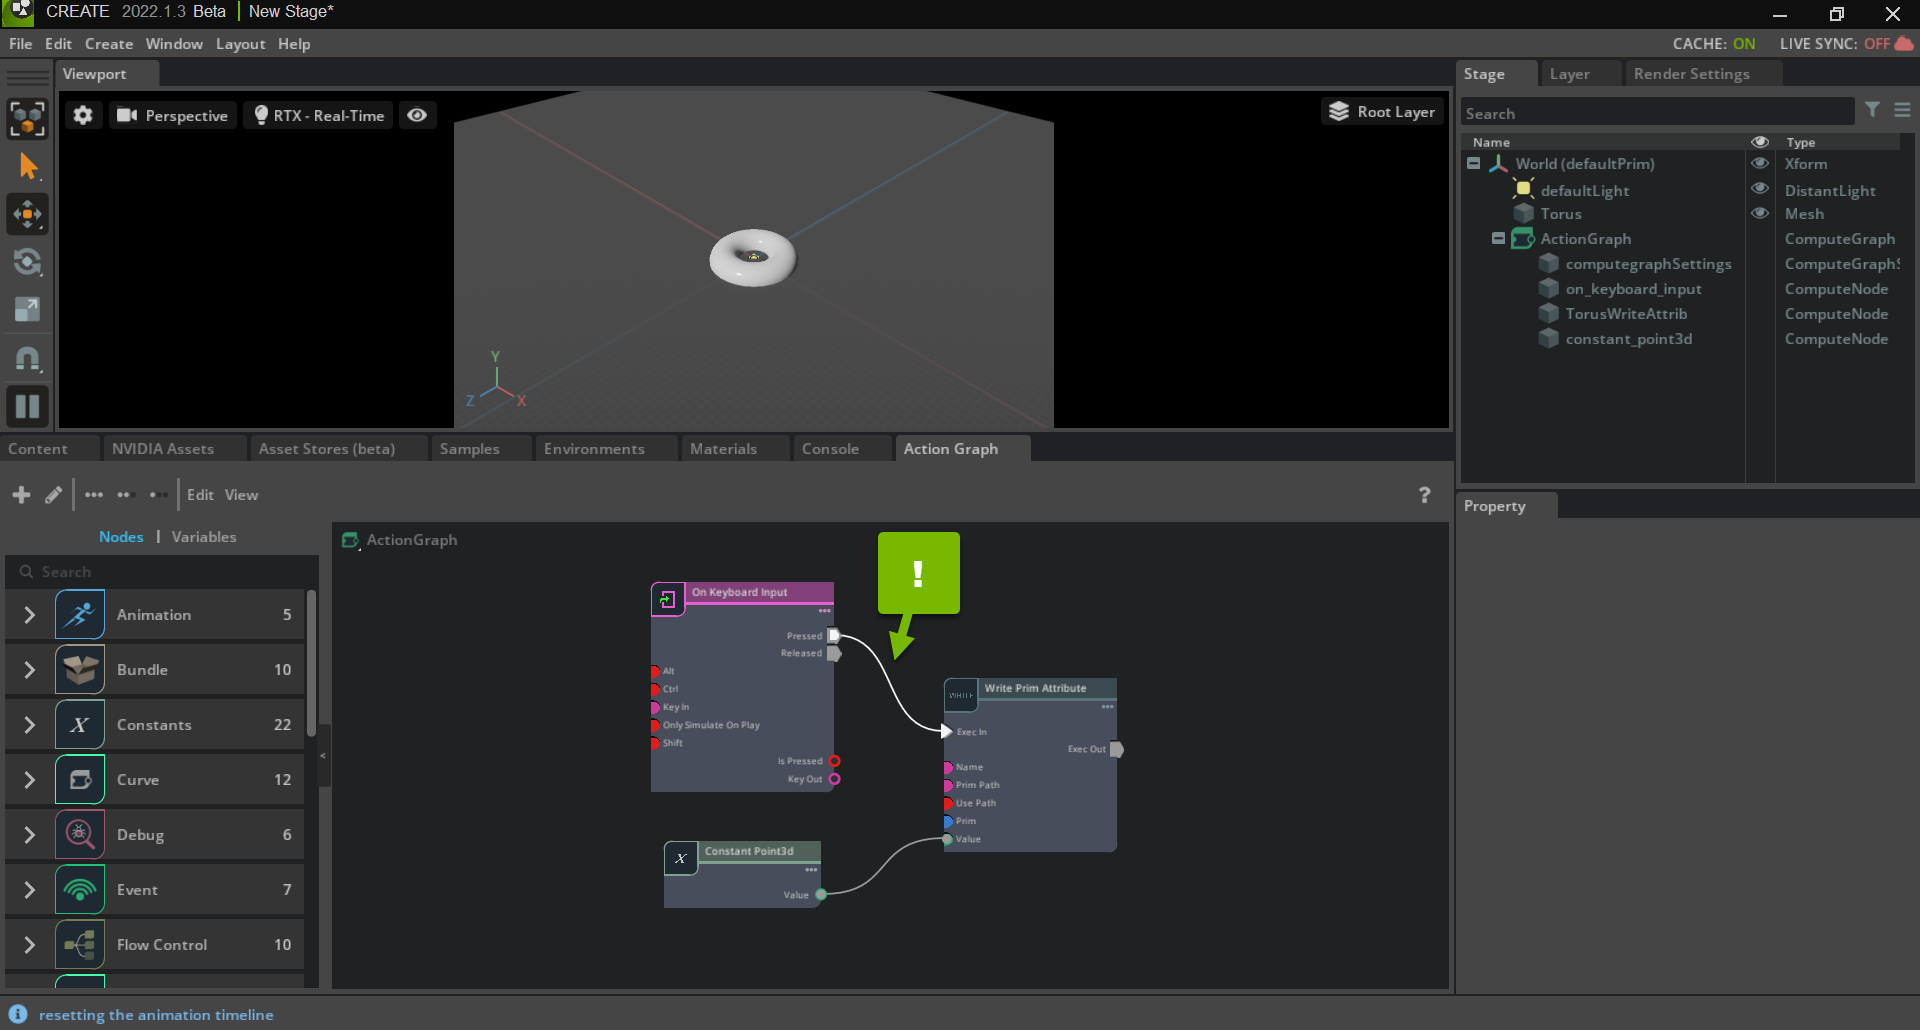
This moves the torus to the origin when the user presses the J key.
Technical Detail
The execution evaluator works by following node connections downstream and computing the nodes that it encounters until there are no more connections to follow.
In this case, the evaluator executes the network downstream from outputs:pressed attribute, whose next node is the Write Prim Attribute node. Before that can be computed, though, the evaluator evaluates its upstream data-dependency: the Constant Point3d node.
Finally, the Write Prim Attribute node is computed, which sets Torus.xformOp:translate to (0, 0, 0), the origin.
Review Your Work
Click Play in your scene’s toolbar, move the torus away from the origin, and press J:
The torus snaps back to the origin.
Alternate Actions with a Flip Flop Node
Next, make this network a little more interesting by cycling the location of the Torus on key press.
Use a Flip Flop Node
Search for the Flip Flop node, drag it into the editor:
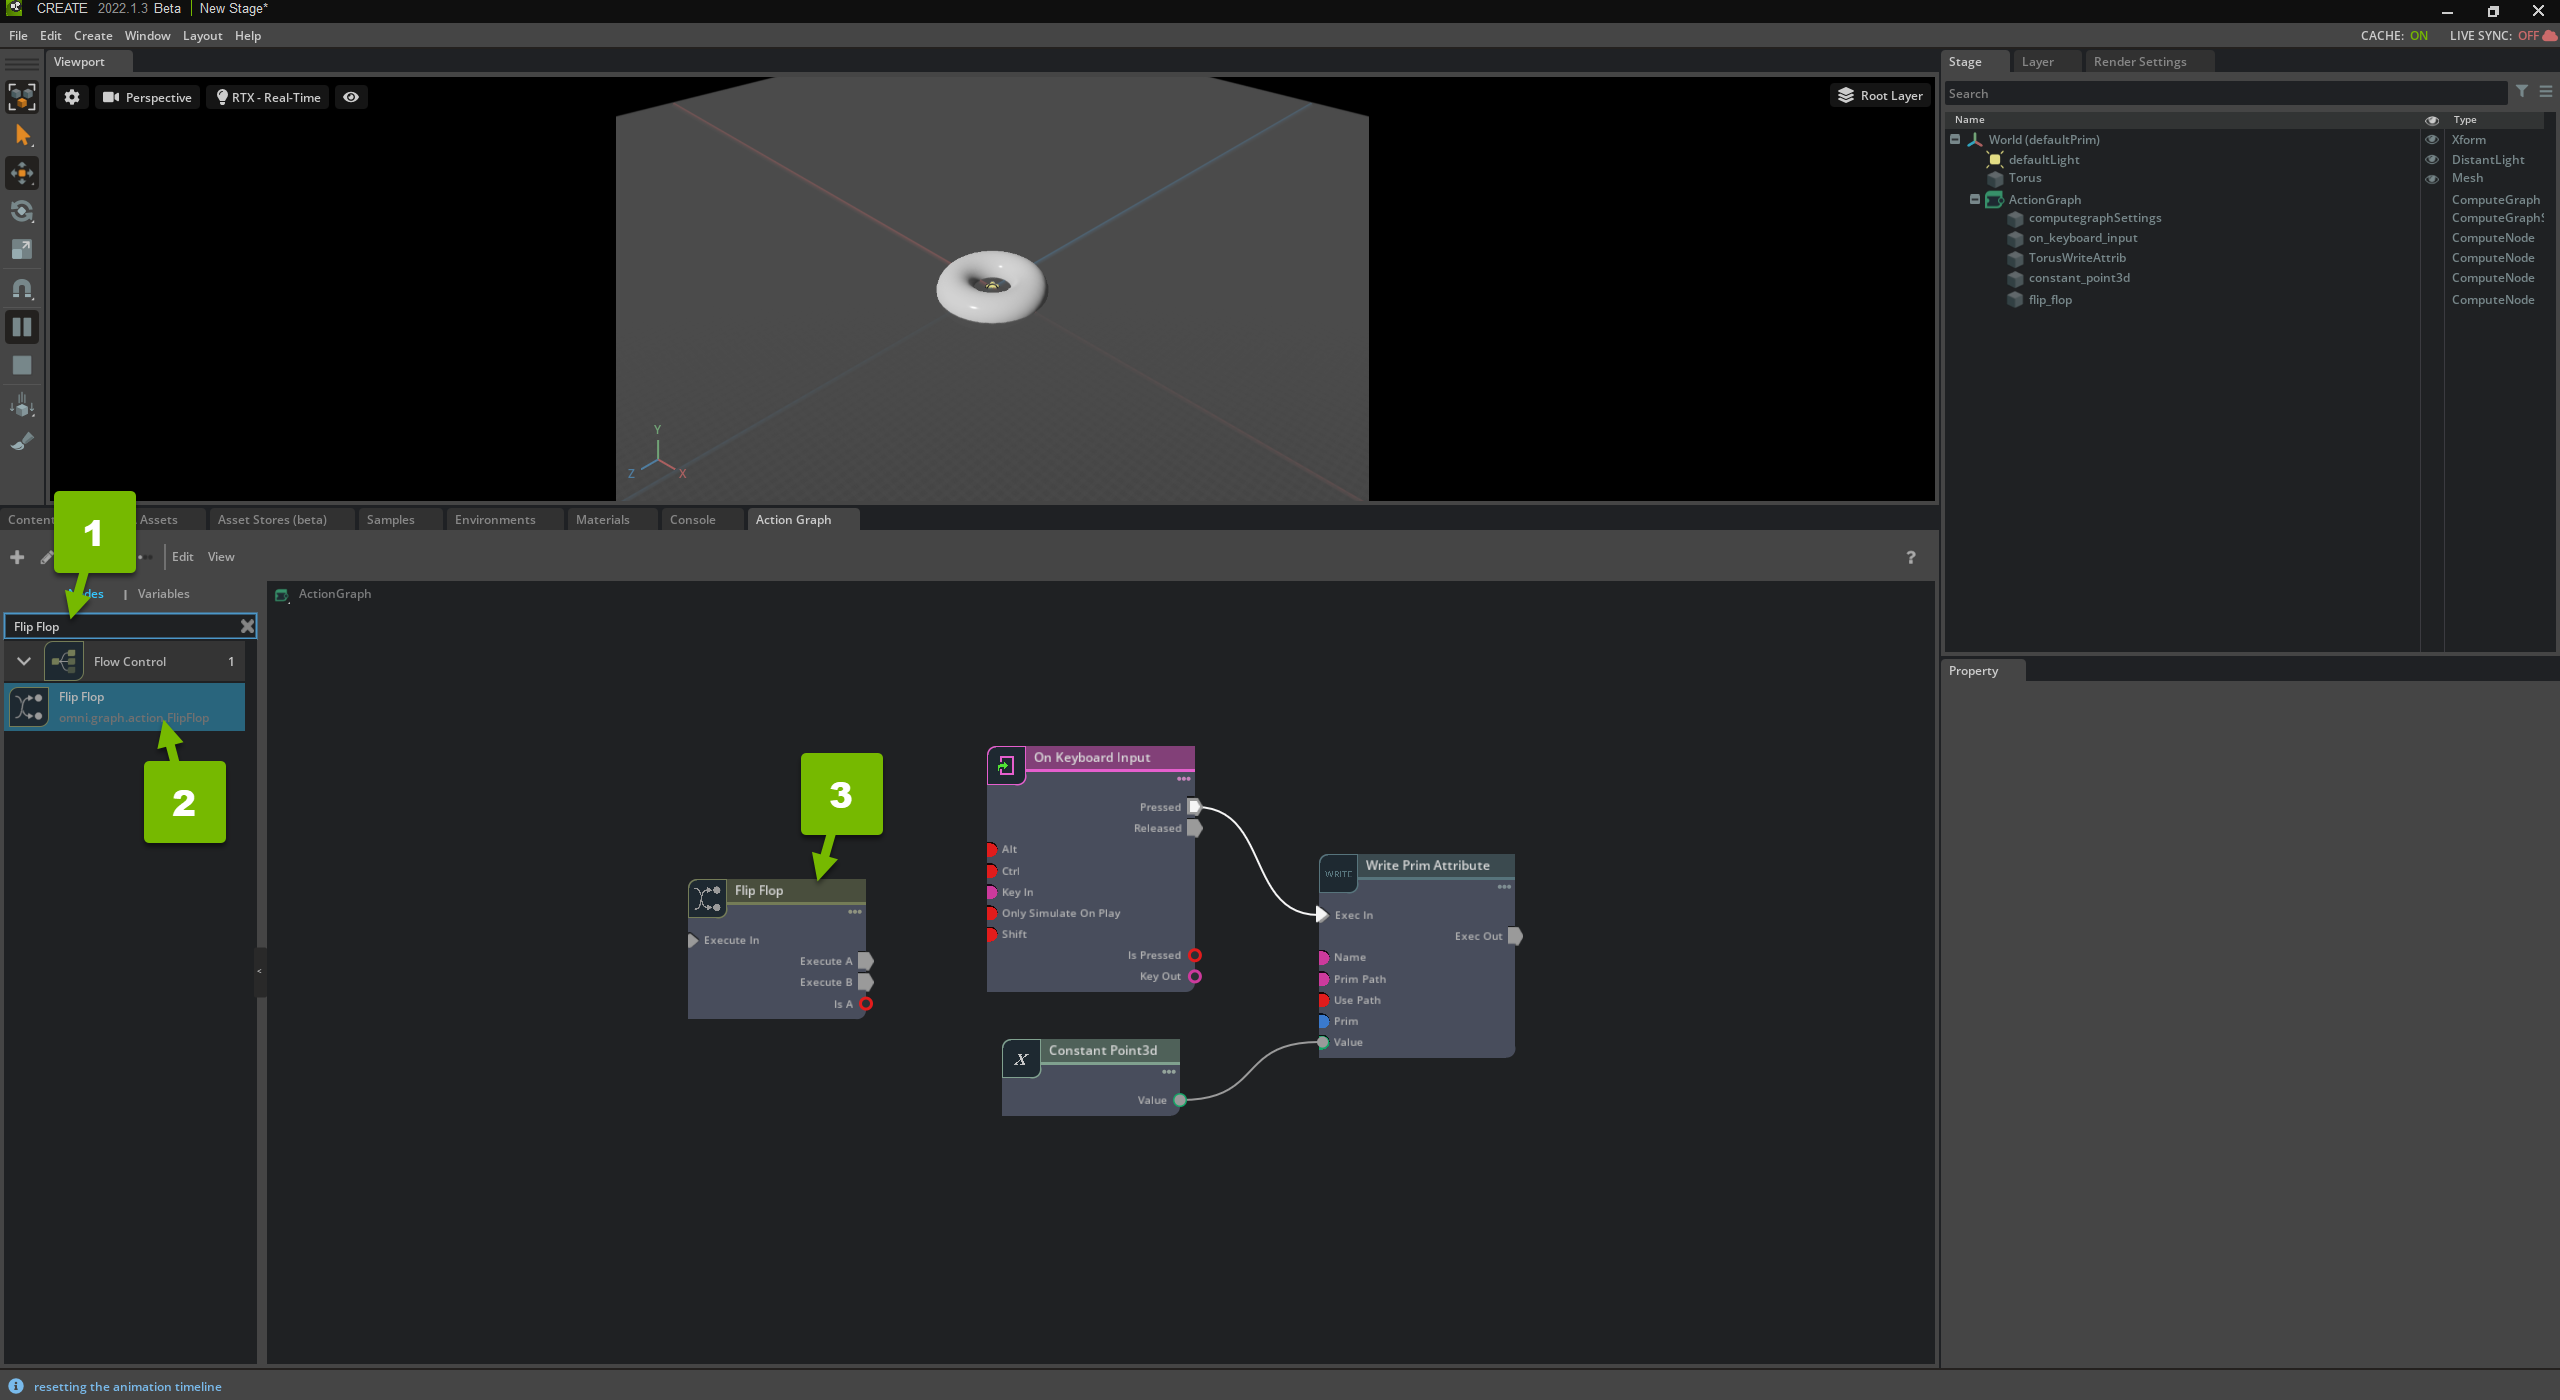
The Flip Flop node alternates activating one of two downstream networks every time it’s computed. You use this to cycle through two behaviors.
Right-click and disconnect the existing node connections to prepare to use your Flip Flop node.
Duplicate Your Constant and Write Prim Nodes
Use Ctrl-D to duplicate your Constant Point3d and Write Prim Attribute nodes:
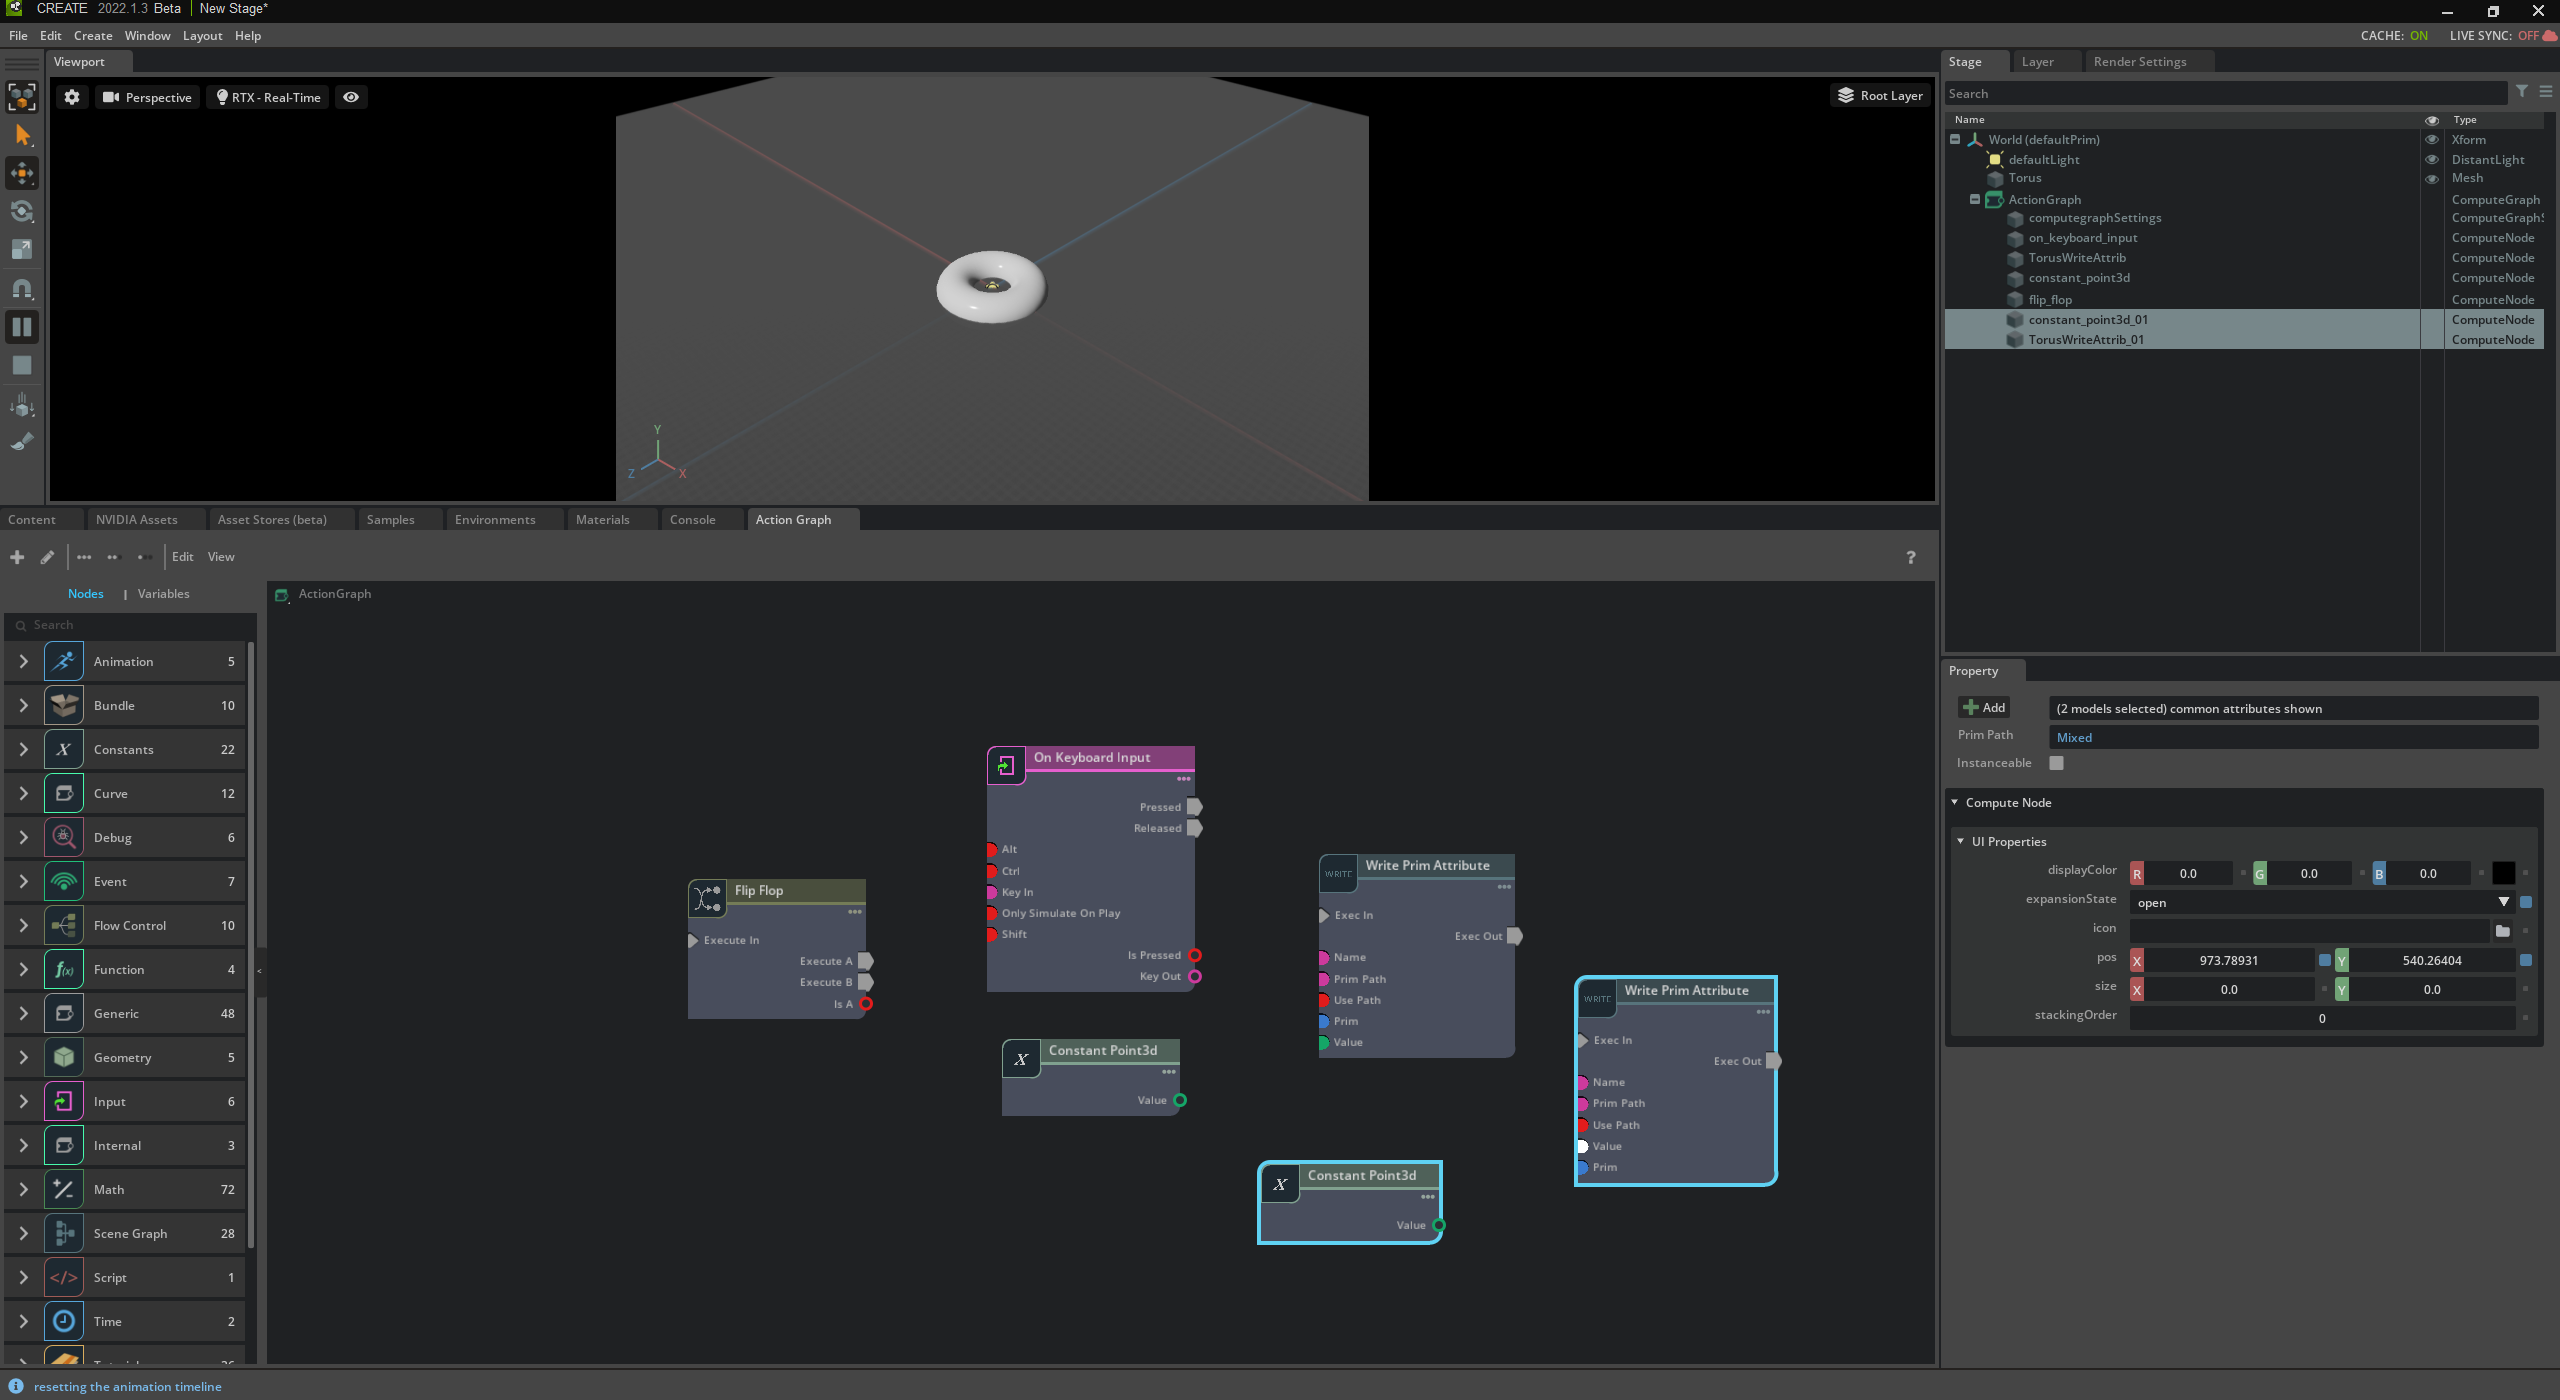
Rearrange the nodes so that you can easily see them.
Tip
You can marquee-select or Ctrl-select both nodes to duplicate them simultaneously.
Change the Inputs Values for the New Constant Point3d Node
Set the Y input value to 250.0 for your new Constant Point3d node:
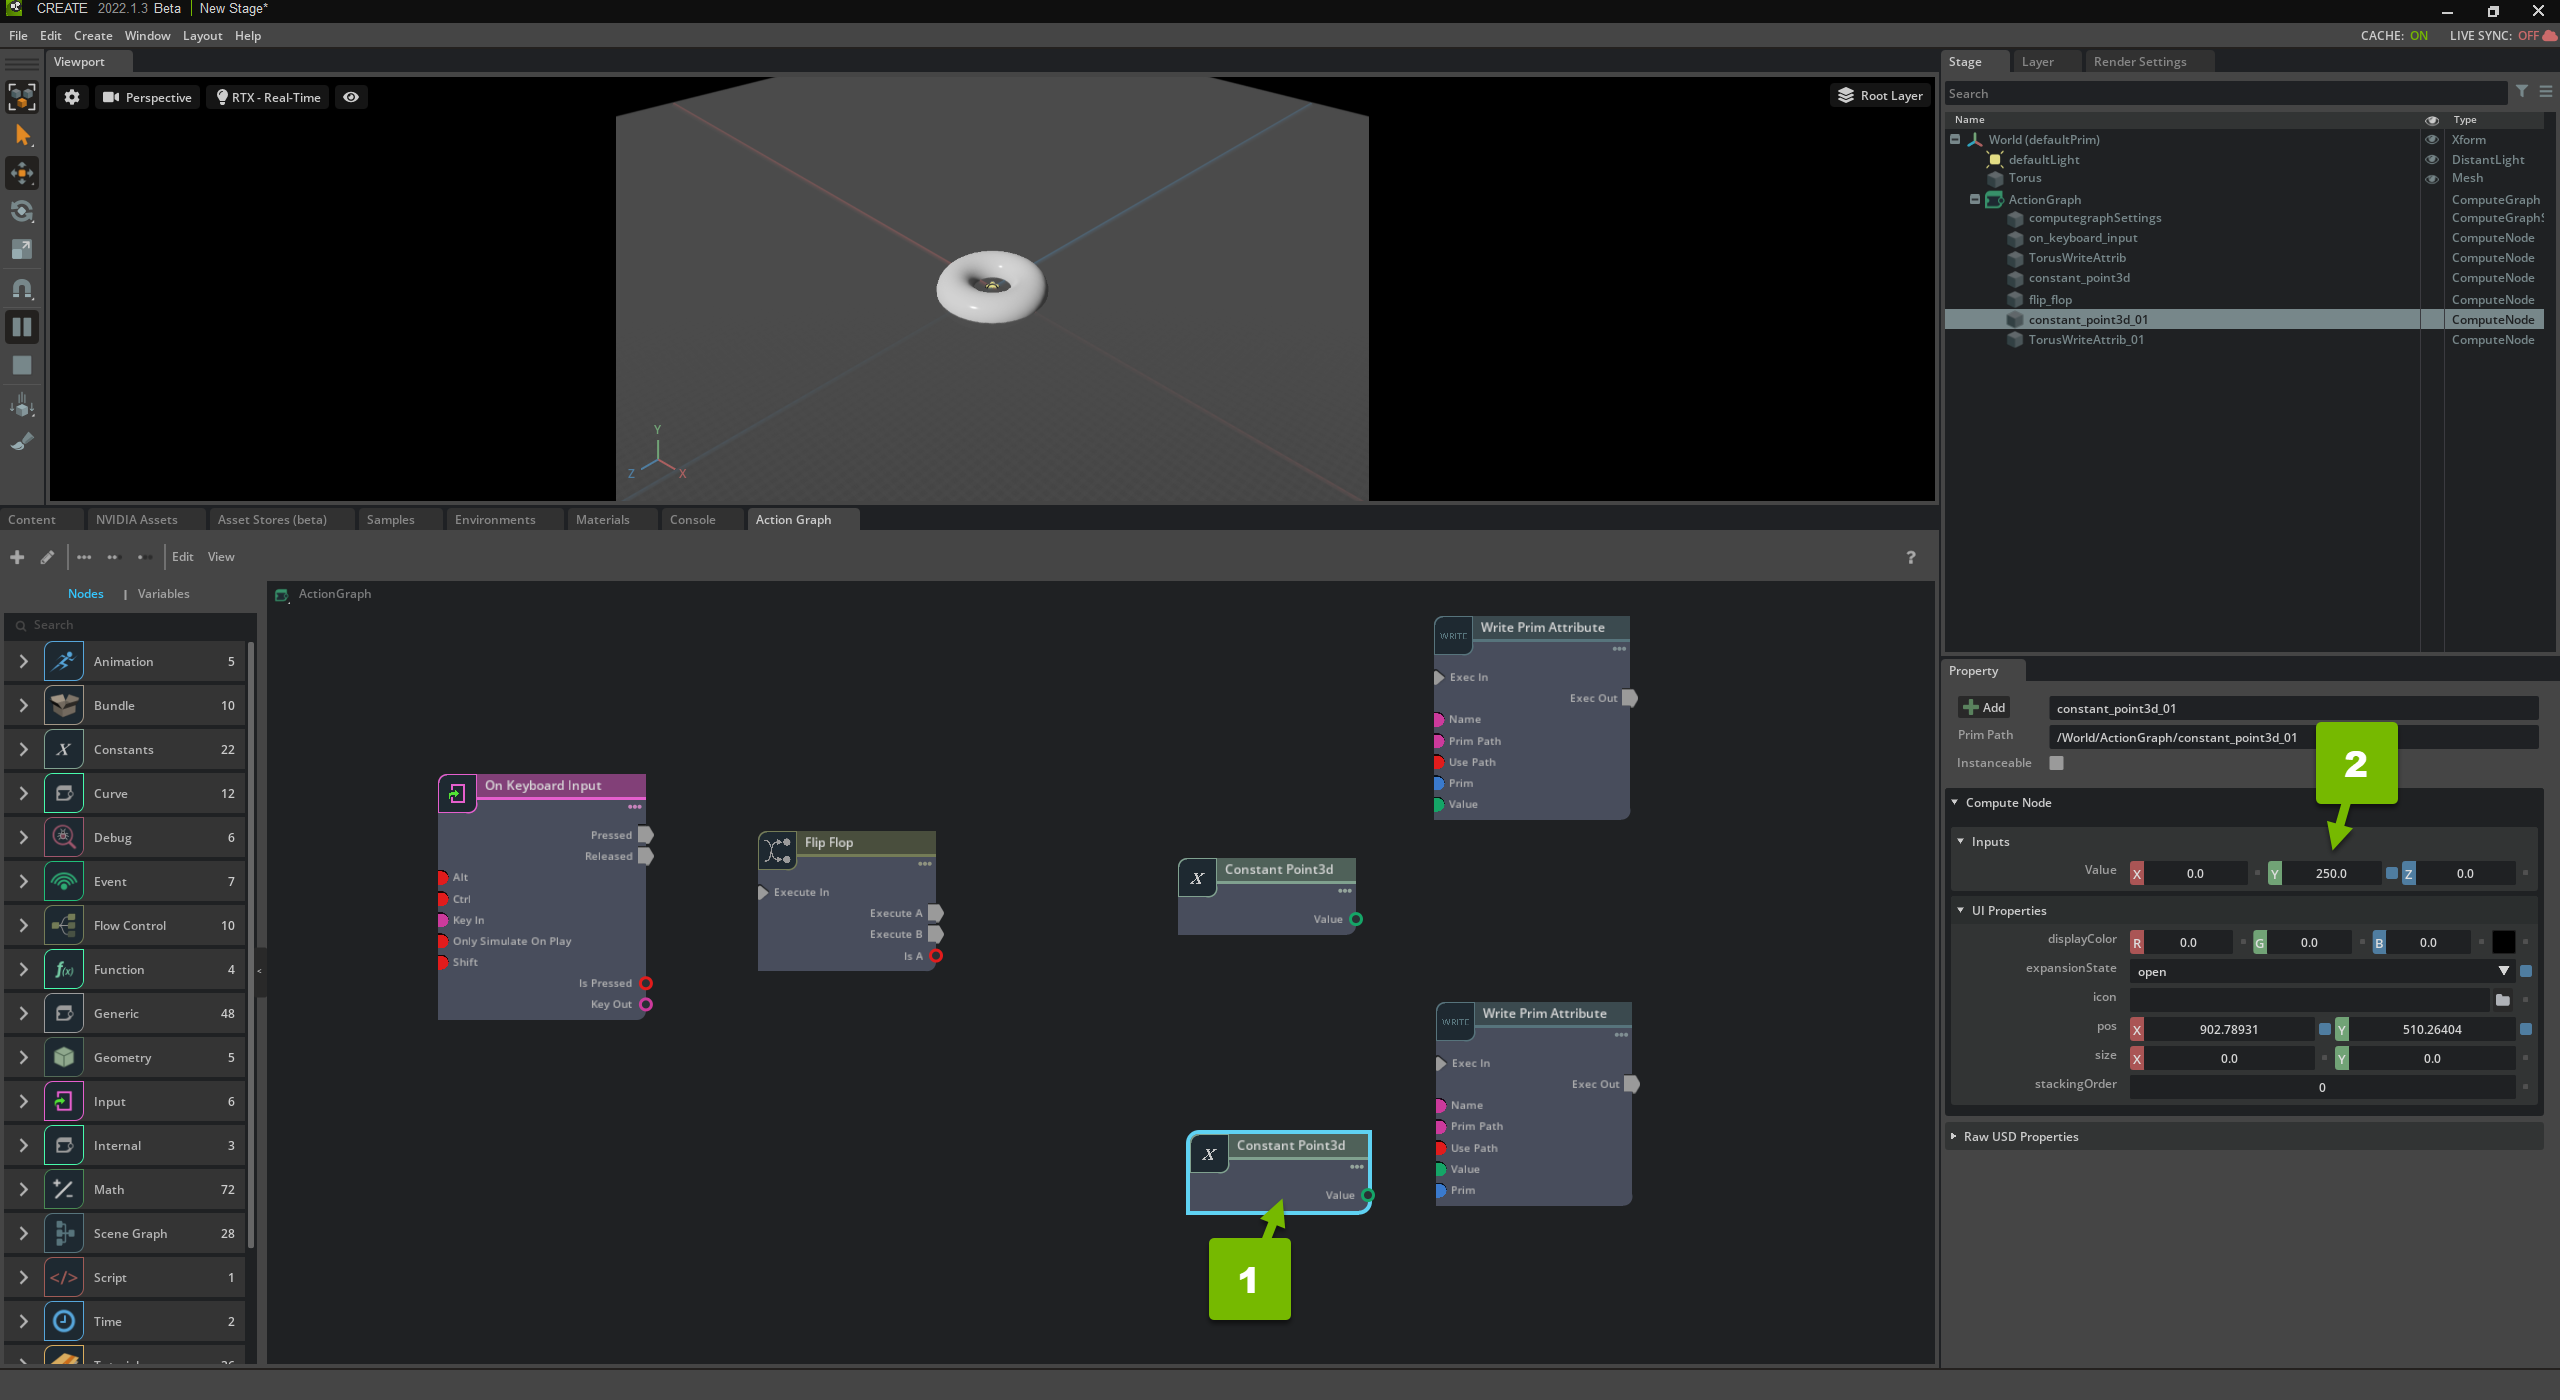
This stores the coordinates for a point that is 250 units away from the origin on the positive Y axis.
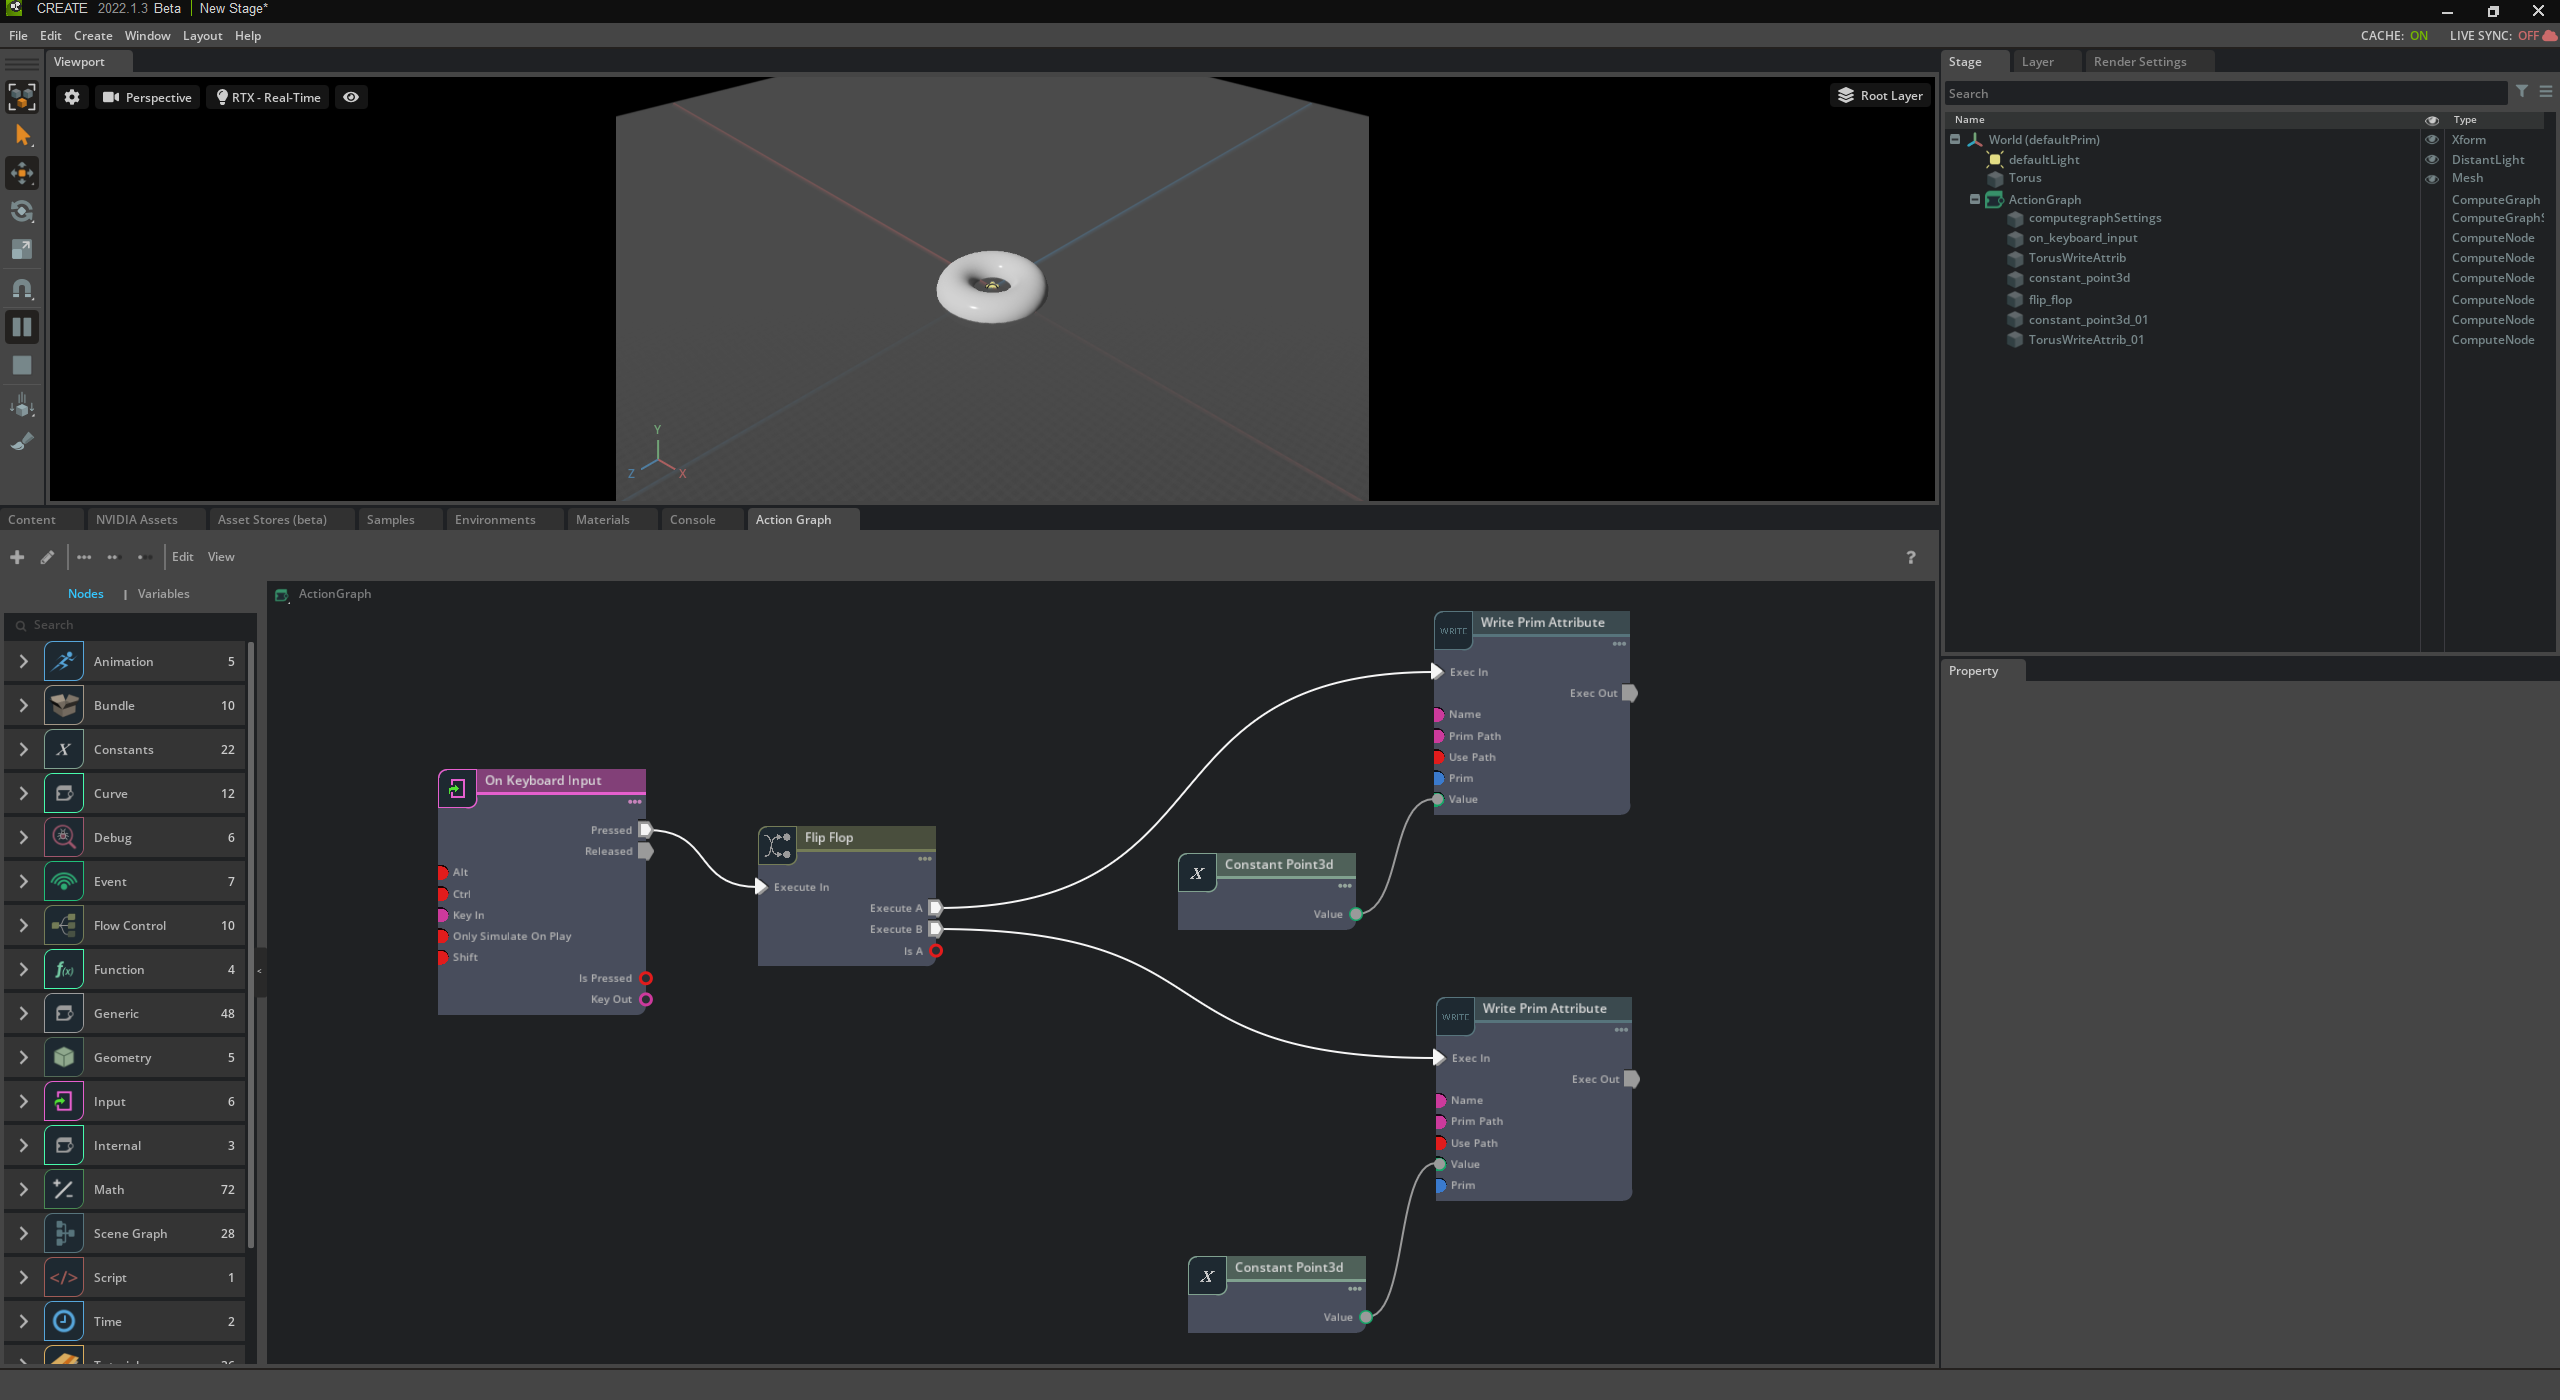
Wire up the Flip Flop Node
Wire up the Flip Flop node to evaluate one Write Prim Attribute node for Execute A and the other node for Execute B:
Test Your Flip Flop Node
Click Play in your scene’s toolbar. Every time you press J, the torus will alternate between the origin and 250 units in the positive direction on the y-axis:
Common Problems and Caveats
If you run into problems or have questions, read through this section to, hopefully, find an explanation:
Common Problem/Question |
Explanation |
|---|---|
You can’t connect to a node input due to incompatible types. |
Remove all connections from the target node and reconnect. When extended types are resolved, the node has to be disconnected to reset the types. |
It’s set up correctly, but isn’t working. |
Check the Console panel for error or warning messages, try saving and reloading the scene, and ensure you’ve loaded the Action Graph extensions bundle. |